I've been less than pleased with my extruder for some time.
Actually, back up. Let's discuss terminology just a little first to make sure we're all on the same page. When I say extruder I'm talking specifically about the part of a 3D printer that feeds filament. This is different than the hot end which is the part which melts the filament and contains the nozzle which actually extrudes it. Though on many printers it's common to call the combination of both an extruder since on a direct drive setup (like I currently have) they're joined together and in some designs hard to tell apart. I upgraded my hot end over a year ago and switched extruders at the time but felt like my extruder change was a step back in some ways.
But perhaps I'm getting ahead of myself even with this diversion. For those reading this who haven't followed my extruder/hotend experiences since building my printer 2 years ago (almost exactly, it was on Dec 26th and 27th of 2015 that I built it) I'll give a quick review.
I have a FolgerTech 2020 i3. It's called an i3 design because it borrows a lot of design specifications from the Prusa i3 - but assembles them rather differently. The Prusa i3 uses a flat plate frame (usually of acrylic or metal though wood is not uncommon either) while this printer uses aluminum extrusions. The real i3 has it's steppers mounted on the base with lead screws rising above - while this one has them at the top and extending down. However the X gantry is almost identical to an original Prusa i3 with the same size and length of smooth rods spaced the same distance apart.
The original extruder/hotend on this printer was a clone of the Makerbot MK7/8 design (the 7 and 8 are apparently VERy similar with only some minor differences in the drive gear and nozzle.) which worked...but wasn't ideal and had a few fairly major flaws.
The first issue I had was that the fan that came with it didn't work. Folger sent me a replacement for free, and I used a spare fan I pulled off an old motherboard while waiting for it (once I realized it wasn't working.) You can see in this photo of my very first print that the fan wasn't moving:

The other flaws are more subtle...Here it is as I was installing it for the first time:


The first thing that jumped out at me was that the way the fan bolted onto the heatsink was janky as all get out. You can see in that last photo how the fan would tilt forward as you tightened the screws since there was nothing between the fan and heat sink. This also meant the heat sink didn't make great contact with the heat break which isn't great since it kind of defeats the whole point of the heat sink.
See, the idea here is that you want to localize the heat as much as possible. Keep it all down in the nozzle and don't let it creep back up the filament. That's one of the nice things about the e3d v6 hot ends - the have a really nice heat break and heat sink that do a fantastic job of preventing heat creep and creating a very sharp heat break creating a more consistent melt.
This one...not so much. The big block of aluminum between the fan and the stepper motor which the hot end's throat screws into probably acts as more of a heat sink than the heat sink. One more than one occasion I had heat creep up the filament and soften it causing it to tangle around the drive gear.
I did improve the heat sink when I added my inductive sensor for auto leveling. I designed the sensor mount (the first thing I shared on thingiverse incidentally) so it would mount in that gap between the fan and heat sink allowing the fan to better tension the heat sink against the heat break:

The other problem I has was with the extruder body itself being injection molded ABS. It's ok...but over a fairly short period of time (a few months) I had problems with the idler that puts tension between the filament and drive gear loosing strength because the plastic where the screw it pivoted on started to wallow out. There was a brass sleeve there...but the plastic around the sleeve started to deform. Which would have been ok except for my biggest complaint about this extruder.
The tension isn't adjustable. If it was I could have compensated for the worn pivot.
Now...this extruder isn't junk by any means. I printed most of my first step of MPCNC parts with it no complaints. But as I started to do more printing with PETG and higher temps - the flaws became more and more noticable. So I got a $15 all aluminum MK7/8 clone off ebay and swapped to it:

For $15 delivered you don't get much. No instructions and no fancy box. Just a few anodized aluminum bits and some hardware. But it was fairly easy to figure out:
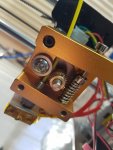
When I installed it I used some fiber gasket material between the stepper and the aluminum body to try and help insulate them so heat from the stepper wouldn't soak into the extruder body. I used the same hot end that came with my printer and eventually ended up going back to the original drive gear as well as I found it gripped filament better than the one that came with this extruder.
I was quite honestly blown away by the difference this extruder made. It was possibly the single biggest improvement in print quality anything I've done has given me. The surface of my prints became markedly smoother and layer lines were far less obvious even though I was using the same hot end and nozzle I was before. The extra tension apparently made for more consistent filament feeding is all I can figure.
In fact - I believe I actually got better print quality with that extruder and hot end than with my current setup.
So Jason, why did you change and why haven't you changed back?
Well, I started doing more PETG and really wanted to start printing Nylon. PETG requires higher temps than PLA or ABS and I found the higher I went on temp the better my PETG prints got...until I went too hot one day and melted the PTFE liner in my hot end. That made for a rather spectacular clog that was a real pain to clean. And meant my printer was down for a count for a few days while I wanted on new PTFE or a new throat.) It actually happened twice (since the thermistor in my original hot end was damaged Folger send me a whole new hot end instead of just a thermistor and I melted the tube in that one as well.)
Since Nylon would require even hotter temps I decided I needed to get an all metal hot end. There are several options available and it seemed the two best were either the hexagon hot end that lulzbot uses or the e3d v6 that Prusa and a number of other manufacturers use. The v6 is a more modular design and is more popular so there's more of a community around it so I decided to go with it.
But...it mounts very differently than the original hot end. Instead of a threaded throat it has ridge that mounts into a groove in the extruder.
With the original plastic extruder from Folger I could have printed a new inductive sensor mount that included a mount for the V6...but then I'd be back to the extruder I wasn't happy with. The new metal extruder had a big aluminum chunk down there so I couldn't replace it with a V6 mount. I could cobble something together but it would make the whole stack taller and there just wasn't a clean way to mount a v6 to it other than going to a bowden setup which I wanted to avoid.
So I started looking into new extruders. I actually printed a few gregs wades derived geared extruders since I was already thinking about going geared for more torque (My extruder stepper runs really hot, but if i turn the current down I get missed steps.) but mounting them along with a cooling fan and my inductive sensor started to get ugly. And I was never happy with any of the DIY hobbed bolts I tried making as a drive gear. So I never actually used any of them.
Instead I went with this extruder:
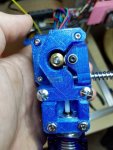
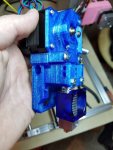
I found the design on thingiverse here: https://www.thingiverse.com/thing:825133 And overall felt it did much of what I was looking for.
It had adjustable tension, it moved the stepper up and back over the top of the X rails so more of the weight was over the rails instead of hanging off of them, it's compact, it mounts an e3d v6 very nicely, it has a well constrained filament path allowing for flexible filaments to work well, and I was able to print it out without having to buy any new parts.
But I wasn't 100% happy with it right from the start. The idler arm isn't really capable of putting a lot of tension on the filament even with a heavy spring and tightening it way down. And releasing the idler was a serious pain. I made a minor change to the idler that solved the problem of it being hard to release:
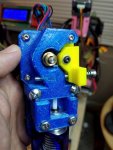
But it didn't help with the less than stellar tension.
I also made a couple of sensor and fan mounts which I've been mostly happy with (the sensor mount is great...but needs supports to print. The fan mount is acceptable but did allow the fan shroud to touch the nozzle melting it one time.)
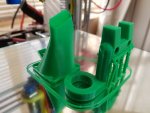
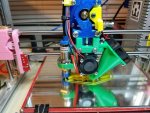
And while I haven't been quite as happy with the print quality and consistency as I was with the metal extruder - it's been "good enough" since March of 2016 that I've yet to replace it. I've printed a few things to replace it with...but once I started mounting my inductive sensor and cooling fan to them...they wound up in my failed ideas pile.
I haven't gone back to the aluminum because frankly I don't want to give up my all metal hot end. I haven't had great luck with Nylon (which mostly seems to be a tension issue as tightening up the tension makes it print better for a bit...but then the tension is so high that something must be deforming because it slowly gets worse and starts to fail again.) but ABS and PETG print wonderfully now...surface finish isn't quite as nice as it was with the old extruder but it's still good enough for what I do most of the time.
Which brings me to today.
About the time I was finishing my current extruder e3d announced their then new Titan extruder to go with the v6 hot end: https://e3d-online.com/titan-extruder
It's a very compact geared extruder made from injection molded parts. It features one of e3d's "hobgoblin" hobbed shafts as a drive gear, and has a 3:1 gear reduction for increased torque - but it's done with a small acetal gear instead of a big 3D printed gear like the ones I'd tried printing. This makes for a far more compact extruder that should be much easier to mount. It's pretty sexy and I've yet to hear anyone who tried one speak ill of it.
It does have a few design aspects I'm not thrilled about. I don't like how it uses the stepper motor shaft as the pivot point for the tension idler arm. Or how short the lever point on that arm is. The acetal gear worries me a tiny bit about how well it will hold up long term running against a steel drive gear. But I wasn't sure how big of an issue these issues would be in the real world.
A month or so ago filastruder did a "Free day" promotion where they gave out a discount code good for $50 off...but it was only good for a limited number of uses. I set an alarm and had my shopping cart ready. $65 for the extruder is more than I could normally justify spending..but $15...I was on it! When the time came I went to checkout...and...was too early the code didn't work yet. Tried again immediately...and..it worked! Code accepted! Woo Hoo! I completed my checkout and then got a thanks message...that didn't include the discount?! Turned out I should have paid with a credit card stored in their system instead of paypal. Due to the delay induced by paypal all of the codes were used up between when mine was accepted and when paypal actually processed the payment. So the code was no longer valid and didn't get applied
Thankfully they were very apologetic and promptly canceled the order and refunded my payment. But that didn't get me an extruder.
Well...a few weeks ago filastruder did a 12 days of Christmas sale with a different item getting discounted each day. I crossed my fingers and sure enough the Titan showed up for 20% off one day. It was already on my Christmas list so I let me wife know and crossed a few more fingers. But I never saw any packages delivered to the house for her so I figured she wasn't able to make it happen
Turns out she's gotten sneakier and had it delivered to her office. Which is good because it comes in a rather fancy and obvious box which filastruder just slapped a shipping label on and didn't bother to obscure. (and due to that label I can't really show off the nice box either...sorry.) So if it had been shipped to our house her surprise would have been obliterated since I get home first most days
Instead my first glimpse of that box was as I tore the paper off it this morning after pulling it out from under the tree. The packaging is quite nice, but I neglected to take any photos of it. Everything is well packed and protected, they even include all the allen keys needed for assembly.
What they don't include is a mounting bracket since that depends heavily on your printer. I printed their "Prusa" bracket they list on thingiverse and used it to assemble the little beast on a spare stepper:
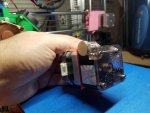
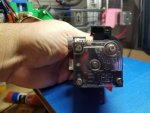
I'm pretty impressed so far. The tensioner works better that I anticipated it seems. While I haven't been able to try printing with it yet I did push some filament through it and even with the tensioner at it's loosest setting it seems to bite better than my current extruder does cranked all the way down...even though my current extruder appears to have a longer lever arm. Not sure how they pull that off...but it's reassuring for sure! The tension adjuster is also "Calibrated" with marks so you can adjust it repeatably, and it's very easy to adjust even at high tensions.
The whole thing is also very small and light which is nice!
However, the default mounting bracket won't really work on my machine. I could make it work...but it would be a hack, and I'd rather print something nicer before tearing my machine down to install this
So right now I'm debating between a few existing options:
https://www.thingiverse.com/thing:2065461 Impressive looking...and clean...but looks like it probably needs supports to print and I'm kind of wanting to switch to a blower fan for my layer fan. Also only designed for a 12mm inductive sensor and I'm using an 18mm sensor currently. (I have a 12mm on hand but it's less sensitive so I switched away from it.) So not really sold on this one.
https://www.thingiverse.com/thing:1310161 This is the one apparently semi-endorsed by e3d...and looks nice. But doesn't have a sensor mount or a fan mount. There is an optional fan that was added later...and it is a blower...but I don't have a blower fan on hand yet (have one on order now though!) No sensor mount is a bummer though...there are step files though so I could modify it.
https://www.thingiverse.com/thing:1552022 This is a modified version of the previous one, and includes both 12mm and 18mm sensor mounts (as well as bltouch) still needs a blower fan though....I'm leaning towards doing this one and just living without a fan until I get the one I ordered in a few days. Or...maybe I'll modify the fan duct to take a "normal" 40mm fan.
Or...maybe I'll just start from scratch on my own idea. Not sure I want to take the time for that.
And honestly, if my daughter hadn't woken me up at 5 this morning after going to bed at almost 2 after finishing playing Santa I'd probably have made a choice already. But I left my wife take a nap while I entertained our daughter...then had to cook dinner while she entertained...so...I never got a nap and am not quite feeling up to making a decision like this right now
So...next few days we'll see how it goes. What I decide as a mount and if the Titan lives up to my expectations for it. I already turned my nylon dehumidifer back on in hopes that I may finally be able to reliably print with that stuff
Actually, back up. Let's discuss terminology just a little first to make sure we're all on the same page. When I say extruder I'm talking specifically about the part of a 3D printer that feeds filament. This is different than the hot end which is the part which melts the filament and contains the nozzle which actually extrudes it. Though on many printers it's common to call the combination of both an extruder since on a direct drive setup (like I currently have) they're joined together and in some designs hard to tell apart. I upgraded my hot end over a year ago and switched extruders at the time but felt like my extruder change was a step back in some ways.
But perhaps I'm getting ahead of myself even with this diversion. For those reading this who haven't followed my extruder/hotend experiences since building my printer 2 years ago (almost exactly, it was on Dec 26th and 27th of 2015 that I built it) I'll give a quick review.
I have a FolgerTech 2020 i3. It's called an i3 design because it borrows a lot of design specifications from the Prusa i3 - but assembles them rather differently. The Prusa i3 uses a flat plate frame (usually of acrylic or metal though wood is not uncommon either) while this printer uses aluminum extrusions. The real i3 has it's steppers mounted on the base with lead screws rising above - while this one has them at the top and extending down. However the X gantry is almost identical to an original Prusa i3 with the same size and length of smooth rods spaced the same distance apart.
The original extruder/hotend on this printer was a clone of the Makerbot MK7/8 design (the 7 and 8 are apparently VERy similar with only some minor differences in the drive gear and nozzle.) which worked...but wasn't ideal and had a few fairly major flaws.
The first issue I had was that the fan that came with it didn't work. Folger sent me a replacement for free, and I used a spare fan I pulled off an old motherboard while waiting for it (once I realized it wasn't working.) You can see in this photo of my very first print that the fan wasn't moving:

The other flaws are more subtle...Here it is as I was installing it for the first time:


The first thing that jumped out at me was that the way the fan bolted onto the heatsink was janky as all get out. You can see in that last photo how the fan would tilt forward as you tightened the screws since there was nothing between the fan and heat sink. This also meant the heat sink didn't make great contact with the heat break which isn't great since it kind of defeats the whole point of the heat sink.
See, the idea here is that you want to localize the heat as much as possible. Keep it all down in the nozzle and don't let it creep back up the filament. That's one of the nice things about the e3d v6 hot ends - the have a really nice heat break and heat sink that do a fantastic job of preventing heat creep and creating a very sharp heat break creating a more consistent melt.
This one...not so much. The big block of aluminum between the fan and the stepper motor which the hot end's throat screws into probably acts as more of a heat sink than the heat sink. One more than one occasion I had heat creep up the filament and soften it causing it to tangle around the drive gear.
I did improve the heat sink when I added my inductive sensor for auto leveling. I designed the sensor mount (the first thing I shared on thingiverse incidentally) so it would mount in that gap between the fan and heat sink allowing the fan to better tension the heat sink against the heat break:

The other problem I has was with the extruder body itself being injection molded ABS. It's ok...but over a fairly short period of time (a few months) I had problems with the idler that puts tension between the filament and drive gear loosing strength because the plastic where the screw it pivoted on started to wallow out. There was a brass sleeve there...but the plastic around the sleeve started to deform. Which would have been ok except for my biggest complaint about this extruder.
The tension isn't adjustable. If it was I could have compensated for the worn pivot.
Now...this extruder isn't junk by any means. I printed most of my first step of MPCNC parts with it no complaints. But as I started to do more printing with PETG and higher temps - the flaws became more and more noticable. So I got a $15 all aluminum MK7/8 clone off ebay and swapped to it:

For $15 delivered you don't get much. No instructions and no fancy box. Just a few anodized aluminum bits and some hardware. But it was fairly easy to figure out:

When I installed it I used some fiber gasket material between the stepper and the aluminum body to try and help insulate them so heat from the stepper wouldn't soak into the extruder body. I used the same hot end that came with my printer and eventually ended up going back to the original drive gear as well as I found it gripped filament better than the one that came with this extruder.
I was quite honestly blown away by the difference this extruder made. It was possibly the single biggest improvement in print quality anything I've done has given me. The surface of my prints became markedly smoother and layer lines were far less obvious even though I was using the same hot end and nozzle I was before. The extra tension apparently made for more consistent filament feeding is all I can figure.
In fact - I believe I actually got better print quality with that extruder and hot end than with my current setup.
So Jason, why did you change and why haven't you changed back?
Well, I started doing more PETG and really wanted to start printing Nylon. PETG requires higher temps than PLA or ABS and I found the higher I went on temp the better my PETG prints got...until I went too hot one day and melted the PTFE liner in my hot end. That made for a rather spectacular clog that was a real pain to clean. And meant my printer was down for a count for a few days while I wanted on new PTFE or a new throat.) It actually happened twice (since the thermistor in my original hot end was damaged Folger send me a whole new hot end instead of just a thermistor and I melted the tube in that one as well.)
Since Nylon would require even hotter temps I decided I needed to get an all metal hot end. There are several options available and it seemed the two best were either the hexagon hot end that lulzbot uses or the e3d v6 that Prusa and a number of other manufacturers use. The v6 is a more modular design and is more popular so there's more of a community around it so I decided to go with it.
But...it mounts very differently than the original hot end. Instead of a threaded throat it has ridge that mounts into a groove in the extruder.
With the original plastic extruder from Folger I could have printed a new inductive sensor mount that included a mount for the V6...but then I'd be back to the extruder I wasn't happy with. The new metal extruder had a big aluminum chunk down there so I couldn't replace it with a V6 mount. I could cobble something together but it would make the whole stack taller and there just wasn't a clean way to mount a v6 to it other than going to a bowden setup which I wanted to avoid.
So I started looking into new extruders. I actually printed a few gregs wades derived geared extruders since I was already thinking about going geared for more torque (My extruder stepper runs really hot, but if i turn the current down I get missed steps.) but mounting them along with a cooling fan and my inductive sensor started to get ugly. And I was never happy with any of the DIY hobbed bolts I tried making as a drive gear. So I never actually used any of them.
Instead I went with this extruder:


I found the design on thingiverse here: https://www.thingiverse.com/thing:825133 And overall felt it did much of what I was looking for.
It had adjustable tension, it moved the stepper up and back over the top of the X rails so more of the weight was over the rails instead of hanging off of them, it's compact, it mounts an e3d v6 very nicely, it has a well constrained filament path allowing for flexible filaments to work well, and I was able to print it out without having to buy any new parts.
But I wasn't 100% happy with it right from the start. The idler arm isn't really capable of putting a lot of tension on the filament even with a heavy spring and tightening it way down. And releasing the idler was a serious pain. I made a minor change to the idler that solved the problem of it being hard to release:

But it didn't help with the less than stellar tension.
I also made a couple of sensor and fan mounts which I've been mostly happy with (the sensor mount is great...but needs supports to print. The fan mount is acceptable but did allow the fan shroud to touch the nozzle melting it one time.)


And while I haven't been quite as happy with the print quality and consistency as I was with the metal extruder - it's been "good enough" since March of 2016 that I've yet to replace it. I've printed a few things to replace it with...but once I started mounting my inductive sensor and cooling fan to them...they wound up in my failed ideas pile.
I haven't gone back to the aluminum because frankly I don't want to give up my all metal hot end. I haven't had great luck with Nylon (which mostly seems to be a tension issue as tightening up the tension makes it print better for a bit...but then the tension is so high that something must be deforming because it slowly gets worse and starts to fail again.) but ABS and PETG print wonderfully now...surface finish isn't quite as nice as it was with the old extruder but it's still good enough for what I do most of the time.
Which brings me to today.
About the time I was finishing my current extruder e3d announced their then new Titan extruder to go with the v6 hot end: https://e3d-online.com/titan-extruder
It's a very compact geared extruder made from injection molded parts. It features one of e3d's "hobgoblin" hobbed shafts as a drive gear, and has a 3:1 gear reduction for increased torque - but it's done with a small acetal gear instead of a big 3D printed gear like the ones I'd tried printing. This makes for a far more compact extruder that should be much easier to mount. It's pretty sexy and I've yet to hear anyone who tried one speak ill of it.
It does have a few design aspects I'm not thrilled about. I don't like how it uses the stepper motor shaft as the pivot point for the tension idler arm. Or how short the lever point on that arm is. The acetal gear worries me a tiny bit about how well it will hold up long term running against a steel drive gear. But I wasn't sure how big of an issue these issues would be in the real world.
A month or so ago filastruder did a "Free day" promotion where they gave out a discount code good for $50 off...but it was only good for a limited number of uses. I set an alarm and had my shopping cart ready. $65 for the extruder is more than I could normally justify spending..but $15...I was on it! When the time came I went to checkout...and...was too early the code didn't work yet. Tried again immediately...and..it worked! Code accepted! Woo Hoo! I completed my checkout and then got a thanks message...that didn't include the discount?! Turned out I should have paid with a credit card stored in their system instead of paypal. Due to the delay induced by paypal all of the codes were used up between when mine was accepted and when paypal actually processed the payment. So the code was no longer valid and didn't get applied
Thankfully they were very apologetic and promptly canceled the order and refunded my payment. But that didn't get me an extruder.
Well...a few weeks ago filastruder did a 12 days of Christmas sale with a different item getting discounted each day. I crossed my fingers and sure enough the Titan showed up for 20% off one day. It was already on my Christmas list so I let me wife know and crossed a few more fingers. But I never saw any packages delivered to the house for her so I figured she wasn't able to make it happen
Turns out she's gotten sneakier and had it delivered to her office. Which is good because it comes in a rather fancy and obvious box which filastruder just slapped a shipping label on and didn't bother to obscure. (and due to that label I can't really show off the nice box either...sorry.) So if it had been shipped to our house her surprise would have been obliterated since I get home first most days
Instead my first glimpse of that box was as I tore the paper off it this morning after pulling it out from under the tree. The packaging is quite nice, but I neglected to take any photos of it. Everything is well packed and protected, they even include all the allen keys needed for assembly.
What they don't include is a mounting bracket since that depends heavily on your printer. I printed their "Prusa" bracket they list on thingiverse and used it to assemble the little beast on a spare stepper:


I'm pretty impressed so far. The tensioner works better that I anticipated it seems. While I haven't been able to try printing with it yet I did push some filament through it and even with the tensioner at it's loosest setting it seems to bite better than my current extruder does cranked all the way down...even though my current extruder appears to have a longer lever arm. Not sure how they pull that off...but it's reassuring for sure! The tension adjuster is also "Calibrated" with marks so you can adjust it repeatably, and it's very easy to adjust even at high tensions.
The whole thing is also very small and light which is nice!
However, the default mounting bracket won't really work on my machine. I could make it work...but it would be a hack, and I'd rather print something nicer before tearing my machine down to install this
So right now I'm debating between a few existing options:
https://www.thingiverse.com/thing:2065461 Impressive looking...and clean...but looks like it probably needs supports to print and I'm kind of wanting to switch to a blower fan for my layer fan. Also only designed for a 12mm inductive sensor and I'm using an 18mm sensor currently. (I have a 12mm on hand but it's less sensitive so I switched away from it.) So not really sold on this one.
https://www.thingiverse.com/thing:1310161 This is the one apparently semi-endorsed by e3d...and looks nice. But doesn't have a sensor mount or a fan mount. There is an optional fan that was added later...and it is a blower...but I don't have a blower fan on hand yet (have one on order now though!) No sensor mount is a bummer though...there are step files though so I could modify it.
https://www.thingiverse.com/thing:1552022 This is a modified version of the previous one, and includes both 12mm and 18mm sensor mounts (as well as bltouch) still needs a blower fan though....I'm leaning towards doing this one and just living without a fan until I get the one I ordered in a few days. Or...maybe I'll modify the fan duct to take a "normal" 40mm fan.
Or...maybe I'll just start from scratch on my own idea. Not sure I want to take the time for that.
And honestly, if my daughter hadn't woken me up at 5 this morning after going to bed at almost 2 after finishing playing Santa I'd probably have made a choice already. But I left my wife take a nap while I entertained our daughter...then had to cook dinner while she entertained...so...I never got a nap and am not quite feeling up to making a decision like this right now
So...next few days we'll see how it goes. What I decide as a mount and if the Titan lives up to my expectations for it. I already turned my nylon dehumidifer back on in hopes that I may finally be able to reliably print with that stuff
Last edited:


