DatRoboticsGuy
Junior Member
Recently, the antenna on my new Turnigy 9X8CV2 receiver broke after its very first flight! The flight went well, I didn't crash, and yet, my antenna was ruined. After failing to get a hold of anyone from customer service, I decided to go ahead and try and fix it myself. I had never repaired an antenna before, and figured it would be as straight forward as soldering two wires back together, which I was later to find out was not true. So here is my recount of how I managed to repair the antenna, and perhaps it will help others out there who will have this problem in the future
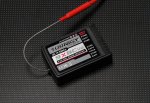
Here is a picture of what the 9X8CV2 receiver looks like before it was repaired; I didn't take any pictures before I repaired it so here is a picture of it off the internet:
Taking the back cover off was as simple as unscrewing two screws and popping it off

Next, I pulled the board out of the case (I de-soldered what remained of the antenna before this picture)

Now onto actually repairing and reconnecting the antenna. Here is the antenna
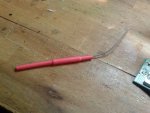
What I didn't know about antenna up until this fix is that antennas are not just one wire. They are what is referred to as coaxial wires, meaning inside the wire there are actually two different wires insulated from one another, in this case, a signal and a ground. Upon stripping back the initial insulation, I was met by an outer layer of silver mesh wire. This was the ground. Upon peeling that back, there was clear insulation protecting the signal wire. This wire was very, very small and fragile, and so I didn't want to risk stripping it with conventional wire strippers. Instead, I took an x-acto blade and lightly, ever so lightly, rolled the wire back and forth underneath the blade, almost like one would roll play-do underneath a finger. The insulation came off without a hitch, and this is what it looked like after. I also separated the ground and signal lines here.
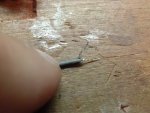
Next comes actually soldering the wires into place. The pad further back is for the signal, and the larger one closer to the front is for the ground. I had to be very careful not to let any of the wires touch, as both connections are very close to each other and both wires are no longer insulated against each other.
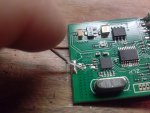

And now, to insulate them against each other and to add some support to these already taxed wires!

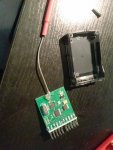
The final result next to the case, not necessarily the prettiest thing in the whole world, but it works!
As I began to assemble everything back together, I realized why the antenna broke in the first place.....

The angle that that the antenna is going through is absurd!! Once I screw the top plate back on, the antenna is going to be crushed back into two back-to-back ninety degree angles! This is unacceptable. If anybody has this receiver, I feel this next step is a must whether or not your antenna wire has broken, because if it hasn't, it's only a matter of time before it does.
So to remedy this problem I simply cut out a groove in the case with a hacksaw that allowed the antenna to sit flat.
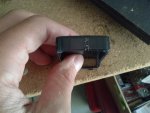

And with the board and newly attached antenna inside the case

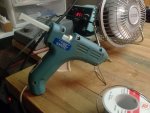
Now to make add some structural support, and make sure the antenna doesn't flop around (More hot glue!)

Now, with case all back together, you can see the difference of where the antenna was, and where it is now.
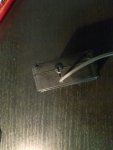
AAAAAANNNNND finally, I hot glued the antenna to the side of the receiver so that it wouldn't be eaten up in my quadcopter's blades.
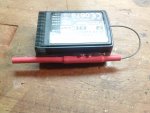
Good as new!
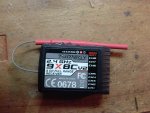
As this was my very first forum post here, let me know what you guys think, and maybe what I can do better next time. Thanks for checking this post out! Hopefully you learned a little something along the way too!
Here is a picture of what the 9X8CV2 receiver looks like before it was repaired; I didn't take any pictures before I repaired it so here is a picture of it off the internet:

Taking the back cover off was as simple as unscrewing two screws and popping it off

Next, I pulled the board out of the case (I de-soldered what remained of the antenna before this picture)

Now onto actually repairing and reconnecting the antenna. Here is the antenna

What I didn't know about antenna up until this fix is that antennas are not just one wire. They are what is referred to as coaxial wires, meaning inside the wire there are actually two different wires insulated from one another, in this case, a signal and a ground. Upon stripping back the initial insulation, I was met by an outer layer of silver mesh wire. This was the ground. Upon peeling that back, there was clear insulation protecting the signal wire. This wire was very, very small and fragile, and so I didn't want to risk stripping it with conventional wire strippers. Instead, I took an x-acto blade and lightly, ever so lightly, rolled the wire back and forth underneath the blade, almost like one would roll play-do underneath a finger. The insulation came off without a hitch, and this is what it looked like after. I also separated the ground and signal lines here.

Next comes actually soldering the wires into place. The pad further back is for the signal, and the larger one closer to the front is for the ground. I had to be very careful not to let any of the wires touch, as both connections are very close to each other and both wires are no longer insulated against each other.


And now, to insulate them against each other and to add some support to these already taxed wires!


The final result next to the case, not necessarily the prettiest thing in the whole world, but it works!

As I began to assemble everything back together, I realized why the antenna broke in the first place.....

The angle that that the antenna is going through is absurd!! Once I screw the top plate back on, the antenna is going to be crushed back into two back-to-back ninety degree angles! This is unacceptable. If anybody has this receiver, I feel this next step is a must whether or not your antenna wire has broken, because if it hasn't, it's only a matter of time before it does.
So to remedy this problem I simply cut out a groove in the case with a hacksaw that allowed the antenna to sit flat.


And with the board and newly attached antenna inside the case

Now to make add some structural support, and make sure the antenna doesn't flop around (More hot glue!)

Now, with case all back together, you can see the difference of where the antenna was, and where it is now.

AAAAAANNNNND finally, I hot glued the antenna to the side of the receiver so that it wouldn't be eaten up in my quadcopter's blades.

Good as new!

As this was my very first forum post here, let me know what you guys think, and maybe what I can do better next time. Thanks for checking this post out! Hopefully you learned a little something along the way too!
