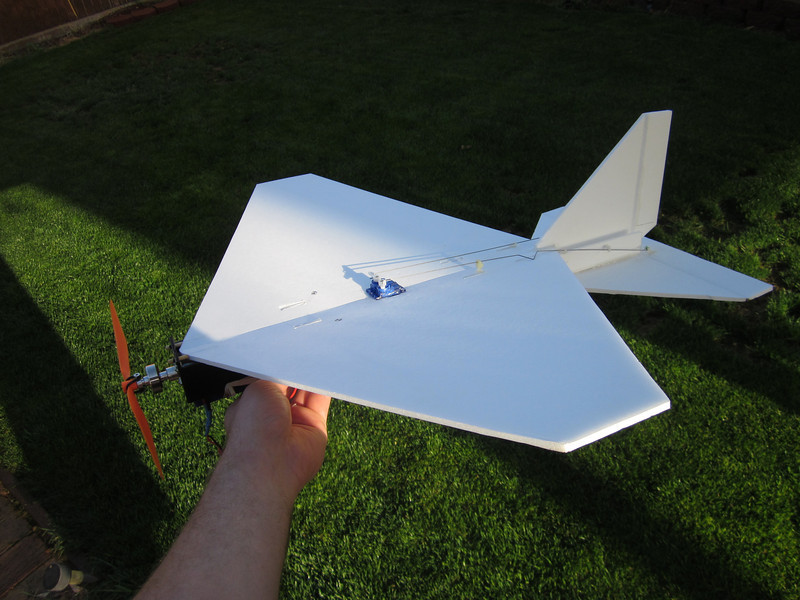
FT Flyer - Scratch Build

Newtown

Junior Member
LOVE the Swappables. Went the Speed Build route and bought the pre-cut foam.

BUT, am having trouble maintaining the dihedral angle on the wings of the FT Flyer. I probably failed to put enough hot glue on the bottom of the joint when I built it and the angle flexes a little. Any ideas or suggestions? I vaguely remember seeing maybe a carbon rod connecting the middle of each wing on the top, maybe in a prototype? Or maybe I could glue a couple of small pieces of wire or toothpick in the bottom at the joint? Or maybe just tape on the top running sideways between the two wings would hold the angle well enough? Or maybe a couple of very small pieces of foam glued across the joint on the top? Anybody have any experience stiffening up the angle?
 
Last edited:

Bolvon72

Senior Member
Mentor
LOVE the Swappables. Went the Speed Build route and bought the pre-cut foam.

BUT, am having trouble maintaining the dihedral angle on the wings of the FT Flyer. I probably failed to put enough hot glue on the bottom of the joint when I built it and the angle flexes a little. Any ideas or suggestions? I vaguely remember seeing maybe a carbon rod connecting the middle of each wing on the top, maybe in a prototype? Or maybe I could glue a couple of small pieces of wire or toothpick in the bottom at the joint? Or maybe just tape on the top running sideways between the two wings would hold the angle well enough? Or maybe a couple of very small pieces of foam glued across the joint on the top? Anybody have any experience stiffening up the angle?

IF you have a high temp glue gun you can run the tip across the seam enough to melt the glue then try to reset with a bit more glue. Try to keep it as still as possible while hardening to keep it from flexing later. Another choice is to bend it a bit past the point where you want it and run 2 or 3 strips of packing tape horizontally against the fold on the top.
 

jhitesma

Some guy in the desert
Mentor
Built one of these for my wife last week. I had put off trying one because I was bored with the rudder/elevator setup on the nutball and have been trying to learn ailerons - but my nutball is wearing out and my wife has been wanting to try flying something, so I figured this would be fun to try.

IMG_8003-L.jpg

(more photos)

Wow, glad I finally did! I'm going to have to make one for myself too now! What a blast from just one sheet of $1 foam! Flew great first try and has impressed me since. Finally got to let her fly it today and she had a huge smile on her face too (it was her first time flying any RC plane.) Her first launch she pushed on the elevator instead of pulled and landed up in the ground 10ft from her feet..but no damage, prop saver even saved the prop. Second launch the wind died down to nothing suddenly and she had a great 3 minutes of still air. Unfortunately the wind then came back with a vengeance, and from the exact opposite direction. So she suddenly found herself downwind instead of upwind and with a 15mph wind instead of a 5mph wind. Add in a touch of orientation loss due to the distance and wind tossing her around, well I got to go on a nice retrieval hike to prove I love her.

Plane survived fine, and I flew it back upwind to where we had started ;) She put a small gouge in one wing but nothing a little bit of tape won't take care of.

Only problem is this may turn out to the most expensive piece of foam board I ever bought - she wants her own TX now...On the upside...she doesn't mind that our back room is rather quickly being taken over by a foam fleet.

Now I just need to work on getting my 2 year old to be able to hold a video camera still for more than 2 seconds...
 

yapoyo

Junior Member
i have no idea what I'm doing, can someone help me with the electronics? Does the lazertoyz kit really have everything I need besides a radio? Does it include a lipo charger and linkage stoppers?
 

tramsgar

Senior Member
I had a happy accident with my second FT Flyer which I built for my son. I was painting it outside under a balcony roof where it sat to dry, when suddenly a quick shower blew in under the roof and just got the main wing wet on the top side. I wiped it off as fast and thorough as I could, but the paper shrunk anyway. But it shrunk evenly and it looked quite good, so I finished painting it, built it and with this rain-dihedral it turned out to fly like a dream!

IMAG1409.jpg IMAG1412.jpg
 

brettp2004

New member
My son helped build his first plane the other day and it was the FT Flyer. I took him out yesterday to let him fly a little. He did pretty good he just needs to learn to be gentle on the sticks. I should let him use my TX so I can turn D/R and Expo way up. He is only three but he can keep it in the air! He does great on simulators and I can't wait until the day him and I can fly together.
 

headstash

Junior Member
I built my first scratch build - an FT Flyer and I'm really excited for my electronics to come in so I can take it to the field and see how she flies. One thing I'm a bit concerned about is that my swappable fuselage out of Elmer's foam board, not the lighter Dollar tree foam. I've sinced found a Dollar Tree and the Dollar tree foam is definitely lighter so I'm concerned that my CG is going to be off and that the added weight will also make the Flyer too heavy for the 1380kv Park300 motor. Do you think it will be ok or should I construct a new fuselage out of the dollar tree stuff and scrap the one made from the elmers foam board?
 

Craftydan

Hostage Taker of Quads
Staff member
Moderator
Mentor
I built my first scratch build - an FT Flyer and I'm really excited for my electronics to come in so I can take it to the field and see how she flies. One thing I'm a bit concerned about is that my swappable fuselage out of Elmer's foam board, not the lighter Dollar tree foam. I've sinced found a Dollar Tree and the Dollar tree foam is definitely lighter so I'm concerned that my CG is going to be off and that the added weight will also make the Flyer too heavy for the 1380kv Park300 motor. Do you think it will be ok or should I construct a new fuselage out of the dollar tree stuff and scrap the one made from the elmers foam board?

Don't sweat it. Elmers is not *that* much heavier than DT foam board, and a lot of people have reported success with it. As for CG, even the small batteries are a significant fraction of the total overall weight -- you should have good flexability in moving the CG by moving it forward or back. It might fly heavier (more sluggish), but you'll be fine.

If you want to build another flyer, that's up to you -- positive side, it's cheap -- but with any luck you won't need to!
 

rcspaceflight

creator of virtual planes
One thing I'm a bit concerned about is that my swappable fuselage out of Elmer's foam board, not the lighter Dollar tree foam.

http://www.flitetest.com/articles/comparing-foam-board

If it's just the power pod, I wouldn't worry about it. If anything it might be a good thing for it's added strength. Even if it was the entire plane it should still fly fine. You'll need more speed/power, but it'll fly.

Yes, I just shamelessly plugged an article I wrote. You wanna fight about it?
 

headstash

Junior Member
Thanks! That was helpfull. Ultimately, I guess the proof will be in the performance. If it turns out to be too heavy, I'll just build another as CraftyDan suggested.
 

Craftydan

Hostage Taker of Quads
Staff member
Moderator
Mentor
Thanks! That was helpfull. Ultimately, I guess the proof will be in the performance. If it turns out to be too heavy, I'll just build another as CraftyDan suggested.

Careful -- if you get bit by this bug, another just won't do . . . I mean Jason just got hooked on his flyer, and have you SEEN the SIZE of the OV-1 Bronco he's building?!?

You've been warned ;)
 

Newtown

Junior Member
IF you have a high temp glue gun you can run the tip across the seam enough to melt the glue then try to reset with a bit more glue. Try to keep it as still as possible while hardening to keep it from flexing later. Another choice is to bend it a bit past the point where you want it and run 2 or 3 strips of packing tape horizontally against the fold on the top.

Sorry for the delay in getting back but it worked GREAT! Got a high temp glue gun and slowly redid the joint adding glue.
 

CIRRUS

Junior Member
Hello,
I have just downloaded and put together the tiled plans to find that only half of the main wing is part of the plans!
How do I cut out the wing? Different plans?
Thanks.
 

rcspaceflight

creator of virtual planes
Hello,
I have just downloaded and put together the tiled plans to find that only half of the main wing is part of the plans!
How do I cut out the wing? Different plans?
Thanks.

I think the tiled versions only have half of the wing to save on paper. You should be able to flip the template of half of the wing over to mirror it when tracing out the other side. Both halves are identical, power pod notches and all, except they are a mirrored version of each other. So drawing out one half with the ink up, then the other with the ink down, will give you both halves of the wings.

There has been a brief debate on the best way to cut out the wings. Some say to cut the wings as one piece and then score cut the center for the dihedral fold. I say that it's best to cut the two wing halves separately and to use the factory edges of the foam board as the center part of the wing. So you have a nice, straight line for the center. But that's up to you.