Glassed Viggen

nhk750

Aviation Enthusiast
My Stepdaughter went to WSU. Here is a picture of our short final to runway 6 at Pullman when we visited her a few years ago. We took her to dinner and then flew home at night to Renton, WA. It was fun to fly, but I cant afford it anymore, so RC gives me my fix these days...

IMG_1412.JPG
 

HilldaFlyer

Well-known member
That's a great shot...
gasf1XbNKc9EpNVBFa1gy2GY5mSJzoCV2x-XdaLDVkgVglrYjSl7Ys21Ic3GBew9ktvxdDDrOH86_63yGwQTpfF7qH06udFTNfd8rdheiqlBjX7HYtVqeOsiQzsEhWd_87DmLOt_


I used to spend many hours sitting up on top of the little hill (arrow). Pullman airport is not very busy, but I always enjoyed watching the puddle jumpers come in and go out. Things have changed a bit since I've been there. You almost needed a 4x4 to get to the hill because in the Spring or after a rain, the clay road got really slick and a small incline would stop your progress. There was a small incline to the hill.
 

HilldaFlyer

Well-known member
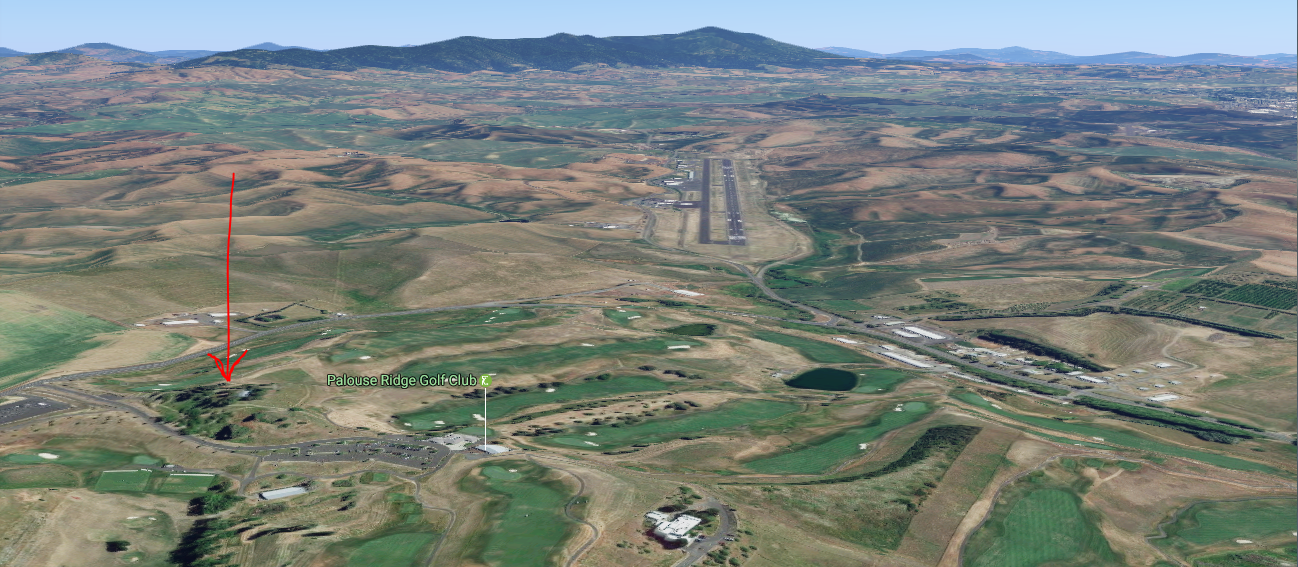
Wasn't into it back then (regret), but from what I've seen, the West is far better suited for RC flying... why? Because is far more open than here in the Northeast where there isn't any open land... open meaning unencumbered by trees. The Palouse is wide open wheat fields. I grew up in Montana and could have slope soared about 2 blocks from my home. I need to wind the clock back while keeping my memory.
 

Michael9865

Elite member
We got lots of trees here too, Eastern WA is more open. Trees break planes...

Wow, what an understatement. "Trees break planes" I had a Corsair get within swatting distance of trees and all I brought home was from the fire wall to just before the cockpit.:black_eyed: The trees kept the rest as tribute. We could not even locate the cowling or the wing. Trees are evil to model airplanes. ;)
 

Lord270

New member
Here in the South around central MS the only place we can fly is at actual airports or old airports not used anymore because of trees, powerlines, and cell towers or houses. I've already had 2 planes be taken by pine trees and 1 by a 50 foot pin oak.
 

HilldaFlyer

Well-known member
Maybe someone should start a thread - "What kind of tree ate your plane?"
I've had two incidents with trees, both funny, one on video and the other was before I was recording the flights.
Around here you have to join a club to fly because there just isn't any open "tree-less" areas.
 

HilldaFlyer

Well-known member
Viggen - Glassed

Back to model - building

To start the build, the first thing you should do is tape the backside of all the score cuts. This will help stabilize the fiberglass from breaking and if it does brake, will hold the pieces together until glue is applied and the fold made.

bW-mywXg4nZZp882kquxySvX9-aYer_9upaIVAFNMu4Z57V6knwj7d2kehVJLxUdH4Y4dW4LZzNapOx9SwJVUJ_gY3Ej-0k757w3DbLCoE7kUw1XBHXmA1UroDwf7gvZ7z5y-nYG

Here is the tape put on the inner fuselage core.

45i_KSkA4LLCzvTSU8XwknZsi-_80g1saPFRG2WTYWs-mfrFJvJeSMRo1AirOtyun_aVO6b67qEyndPqz8iBmV-vkZC3NAY--XkcnIAxun58r0ApkovrbBZULa7cbgvwbkyx1BIt

Flip the piece over, cut along the score cuts with a knife and dig out the foam from the troughs.

OKcWXG-o3w1yI3ydK7z9wC7hBj-we4-DFPQoQ8a-5lA_P8fg2P1Hbh9kdiq2RTYnl1apYb_yZxJiZKYNa0LjnsHTQeIiqOiC4GMsNpDYIsDfjBPnitj-S2CunD6nP-ZZMcAbp7zV

Put Gorilla glue onto the fold seam and fold into place. Tape in place and ensure the panels are square. I put a light weigh on the top of this to hold it on the table while the glue is curing.

kSimF9uHA72bKzbcv3fM971NHNfKNz-89daawh1eIlpDPdBNJtCKw-Gp2vlollJtwkNaGhi2YHG4ZF5M_kRsqPuLCN8g09fottrNLMkqFQK9-xMwdvxBd2BaSedx4z9V6qk5C7BA

Tape the backside of the fuselage panel along the score lines. Turn over, cut along the score cut lines and follow the instructions to depress the foam along the score cuts with a skewer.

Gently bend the fuselage into shape.
j5MWT98JLXsSWuvxToncyShTFTxljTKGeIO3uoGwdlhhd_YY1HHj3hUHNlX896Qc7jvX1sxdWfO24eNhzchs8Ak8zMz5R7vJk53AnLeZZO9mJg9Lva8y-K_bYmIacGkJXVhpKdsK

Glue the inner fuselage core onto the fuselage panel. Use weights to hold it in place while the glue cures.

The next step requires assembling the EDF in the fuselage and the EDF is on backorder… so we’ll be waiting for a bit.
 

HilldaFlyer

Well-known member
Back on it… The EDF arrived. I think this the aluminum Dr. Mad Thrust is lots heavier than the plastic Grayson Hobby EDF.

thSfayKG4Q7x7jsZky8HqiOtnSDLxFxoMY8oSYADxRC8ctM7eDZ3NeBq52sjNlkq2DKTttpVla2guoA7XXgmMYjgkk8iU73zgxC1BInVMKFJfrhxozQXOBqGPp0cZEBBiZ9lxkyI

Put tape on the fuselage pieces that join.

CKdCuUnFNIxF1YffOKyy94GK7ne8RMgcnVA1uoqwKjdXECNIsKw6No0hVF0bI2TLdGQG1Ty_KJsyX-mV4yWeJTEE716Q8ynVxuAVh0JljZMW02goKKyIVOPxm5Y07KNVyU4FIUwy

I used Gorilla Glue on the joints. The wing is not glued in place but is used to hold the correct shape to the fuselage while the glue cures. Fold the front fuselage onto the internal piece and tape the joint. The left side in the photo is held in place with a clip and weights.

GXOsV4t-WS7c9WqoX5TzvMTpC9KZOE55rhzDU-DrK72tdcTXtaJyJtv_HglEHLRb_uSBKAycyqs-uXpvIMIiY2S3KN_jNQlvV7c8wicJ3-AsiRlB7Iq0ZkBzIeTj6ShjmBHw_7gm

Remove the tape and it is starting to look like a real plane.

aoYYQzVSD-968C19YzoUw6wPB2irWZhPDeyzY1WMe7tnx1oSzmeX2ouIJ_0YeYBmqai7aHUOTazgTPPcTlwN_gNtCIQ7AAr_EE_VqZjlYhp7eUjKDxcZWRCPv7crIEtu5yJZ2gN8

Glue all the other pieces together using tape to hold their shape while the Gorilla glue cures. You can see that I put a bit too much glue in the seams, but it is all hidden. I did remove most of it.

iDAhAsVaXp2R7fs1uwM670UJsyogqByfEvED1ikaZG7AslRHKbL-OQ534ZBKO6AF1zVAC-MC5Q6YlM-y-gmLdLSaLtAZnCJg7BiP5Xc9o9uM-2X0Ph7pfA69oTawvNVQcam7Z7l_

The inside of the nose.


0sBuQNY4Ihxur7XWqiPv5m6CVcXVdHmdw2cqx_4hnrMjheE9CYq6iKLU9JkersmLuqXPns1Bj9lDPa9DuChPk7zxkIr4mVpmCI7doFQmlabMB2pVR8Zw6RbDLCbhxIce3GYJLIkO

Remove the top fuselage piece. To mount the nose I added a “V” shaped extension that slides into the fuselage and it will be attached to the nose.

-9kbsF2qdZFXc7Cbq2ON5Fb3AZPvORP-R5GfJ-ToZvFDOGziwq6ZuheDleyKHKc2w-nWLU3Iu5LGkcNCFA9jiQdFJs6f5KmEusVGHiBxNXWfWfZR6Y1bFISw5tYvwEno6MyyyFAQ

CG Testing. Before I glued in the electronics, I taped them in the location specified by the plans. This would have been one really tail heavy plan. To get the plane balanced on the CG, I had to move the Dr. Mad Thrust way up front near the end of the fuselage.


SVLeRbqVH7L1ryxAU0uO4e1Wpbs1WKz9MsMZwktq6xR0sP_dRbAxahKG2gqM38_6cfAVhvEAbj4O2ijrK0yznopPkM3jc2xhqxstnV5Z2mihyrGWI00kPV1ONBcd5hzTHu3rtL9K

I wanted to have smooth airflow into the EDF, so I hacked the fuselage apart and made a “V” shape. Note that the EDF is placed almost at the location of the forward servo marks. I placed the elevon servos in the rear servo location. To mount the servos, the foam on the inside was removed leaving the fiberglass skin on the outside. Mounting the servos like this leaves the entire servo are exposed for the linkage.


k1XeViusIGV8zn7Tybb9slYmEVOdqfoJV0UDQXsNnf3ep8RcHJ6hC4H-tHf6To_zgBbnkcfofV6baADqnBOLoq1TYsFRPEq5lduFB6wFQTdQla84EBSqgmDeqBdG_O-QeWP8_S4p

Since I moved the EDF forward, the EDF mounting pieces were not as wide as the fuselage, so I made new ones to fit. To make the EDF easier to place, I cut the EDF mounts in half.

XaXigGMxd52TrcyczG9o1ITInnk40bkg_jYbep4V7YI33lrD3RcBqOcCPThPPW6BWkEpc5nZHa6yPBtqqHuEHK00NuIaddAe1cYu8SOGQWP7DcF0gnvJVsFf1lEPgHvmRj5hQ6j4

Here is a photo of the top mounts in place cradling the EDF. After the ESC is placed and everything is ready, I’ll install the motor by gluing the bottom EDF brackets into place.