Guillow's Lancer Kit 604 Rubber Power to RC conversion

TooJung2Die

Master member
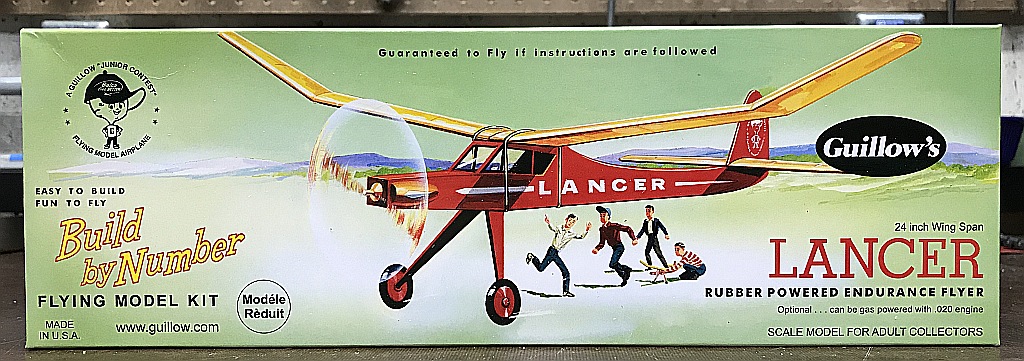
I've been wanting to do this one for years. Our RC club has access to the indoor hockey arena at Hershey Park during the winter. We get one day a week to fly indoors during the winter. This should be a good indoor/outdoor flier after its converted to RC.

I built this rubber power kit as a boy and it actually flew despite my clumsy build. When you're that young you want to fly it more than build it. The new kit arrived a couple of days ago. I expected a laser cut kit but only the 'C' balsa sheet is laser cut. 'A' and 'B' are die-crushed. Why? :(
IMG_1094 crop.jpg


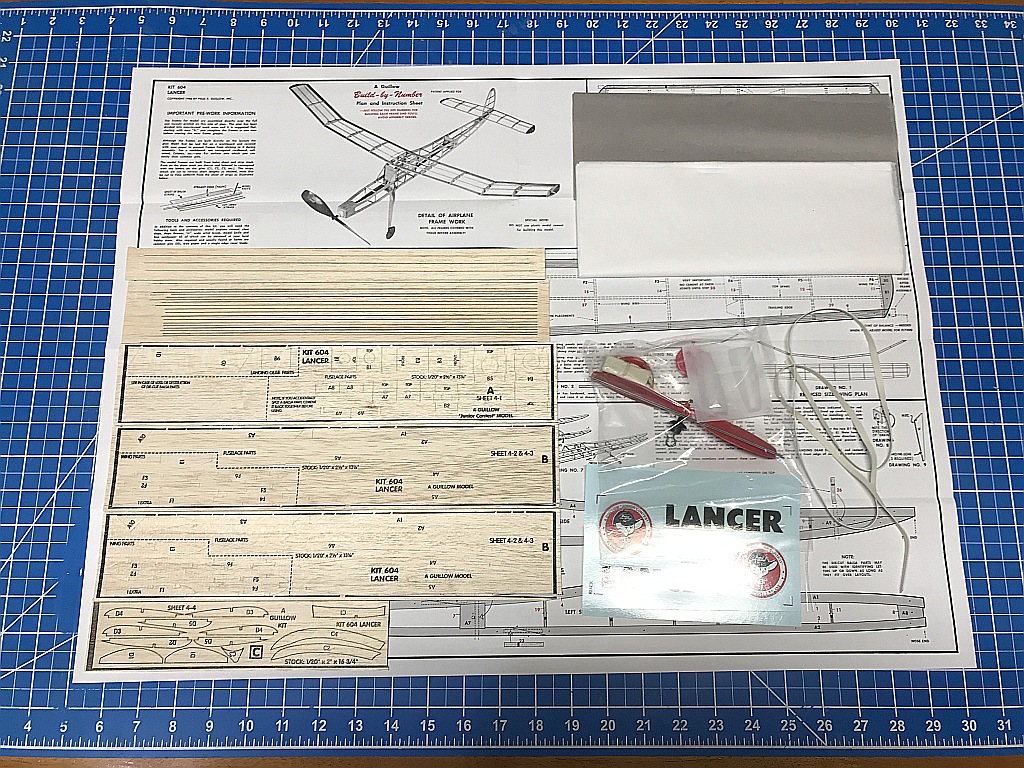
Here are the contents of the kit. This is so simple compared to what I have built recently.
IMG_1095.JPG


The electronics are coming from the WLToys F949 Cessna 182. The Cessna has a 19" wingspan and weighs 2 ounces ready to fly. It was bought bind-n-fly without a transmitter because WLToys binds with my Flysky FS-i6 transmitter. Turns out the Cessna is such a blast to fly I can't bring myself to sacrifice it yet. I ordered another Rx brick and motor gearbox separate. The build will have to commence without the electronics. I will be taking my time and enjoying the build. RC conversions require lots of thinking ahead.

IMG_1078.JPG


Jon
 
Last edited:

rockyboy

Skill Collector
Mentor
I love watching (and building) RC conversions! So many ways to solve the problems, and it's so satisfying to get something flying that wasn't designed and tested by someone else first!

I used one of those WL Toys bricks in an indoor build too and I like how it performs - but it requires that I rebind the receiver every single time it gets plugged in. That part is a little annoying!
 

Vimana89

Legendary member
Cool old rubber band glider! I like the dihedrals. Should make a good RC. I think RET would be best, don't know how ailerons would do with that much dihedral angle.
 

TooJung2Die

Master member
I used one of those WL Toys bricks in an indoor build too and I like how it performs - but it requires that I rebind the receiver every single time it gets plugged in. That part is a little annoying!
The brick works great in the F949. Binding is no hassle. Plug in receiver battery. Hold down bind button and turn on transmitter. Turn transmitter off/on. It's ready to fly.
I assume you're going with a 3 channel throttle/elevator/rudder control and not adding ailerons?
Yessir. Think of it as a free flight airplane with a rudder so it doesn't fly away. Power climb and glide down. Repeat. :)
I think RET would be best, don't know how ailerons would do with that much dihedral angle.
I agree, RET is the way to go. The angles of the polyhedral will be reduced by at least 50% for RC. It will not need that much angle to stabilize it since it will have a rudder. Too much polyhedral angle works against the rudder.

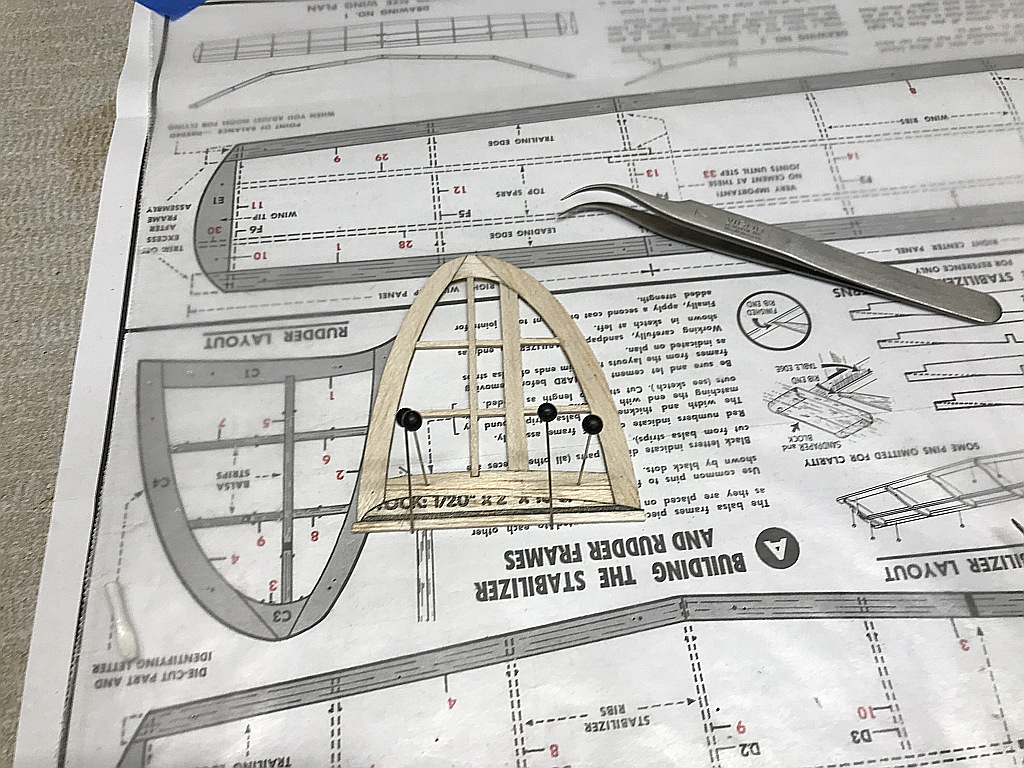
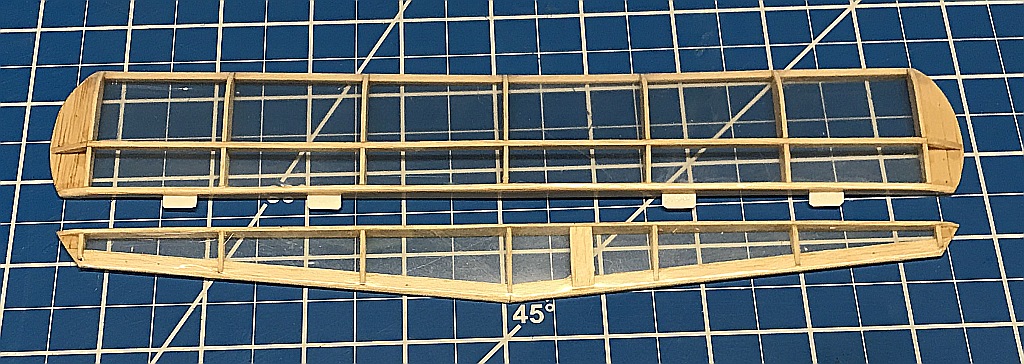
The horizontal and vertical stabilizers are assembled. I built the horizontal stab flat, no airfoil. It was recommended to eliminate trim issues when flying RC. The hinge lines for both control surfaces are added. I moved things around a bit from the plan. Just about everything will deviate from the plan to some degree.

IMG_1096.JPG


Glued some scrap balsa to the bottom of the vertical stab to make it straight.

IMG_1097.JPG


The tail feathers are sanded and taped together so you can see how they will look when glued to the fuselage. The horizontal stab gets moved back an inch so the elevator extends past the rear tip of the fuselage. The tail of the fuselage may get shortened a bit. The vertical stab will be in about the normal position. A little sanding and these parts are ready to cover.

IMG_1098.JPG


Jon
 
Last edited:

TooJung2Die

Master member
Great weekend. Got to do some flying and building. Also got to hike the rows of a hot humid cornfield looking for my crashed Tiny Trainer. :mad: Found it. :)

Wing is laid out and the ribs sanded. I'd rather hand cut printed balsa than have to deal with die-crushed parts.

IMG_1100.JPG


I'm building the wing out of order the plans suggest. Ribs glued and the polyhedral set. 50% of the plan angle. With a high wing, low CG and a rudder, this should be plenty stable in the air.

IMG_1102.JPG


Top spars glued in. The plans have the spars overlap at the polyhedral joints. I'm doing it another way.

IMG_1103.JPG


The spars are butted together and a piece of balsa glued alongside. I think this is stronger and cleaner looking. Gussets added to the center joint for strength. The plans called for a single center rib but since there are two in the kit why not? Wing is sanded and ready to cover.

IMG_1104.JPG


Control surfaces are separated and the tail feathers are ready to cover.

IMG_1106.JPG


This fun little airplane kit is going together pretty quickly. I think I'm going to try the 1.5 mil document laminating film covering on these parts before I start the fuselage. I don't have the electronics yet and I need that to figure out how the fuselage will be built.

Jon
 
Last edited:

TooJung2Die

Master member
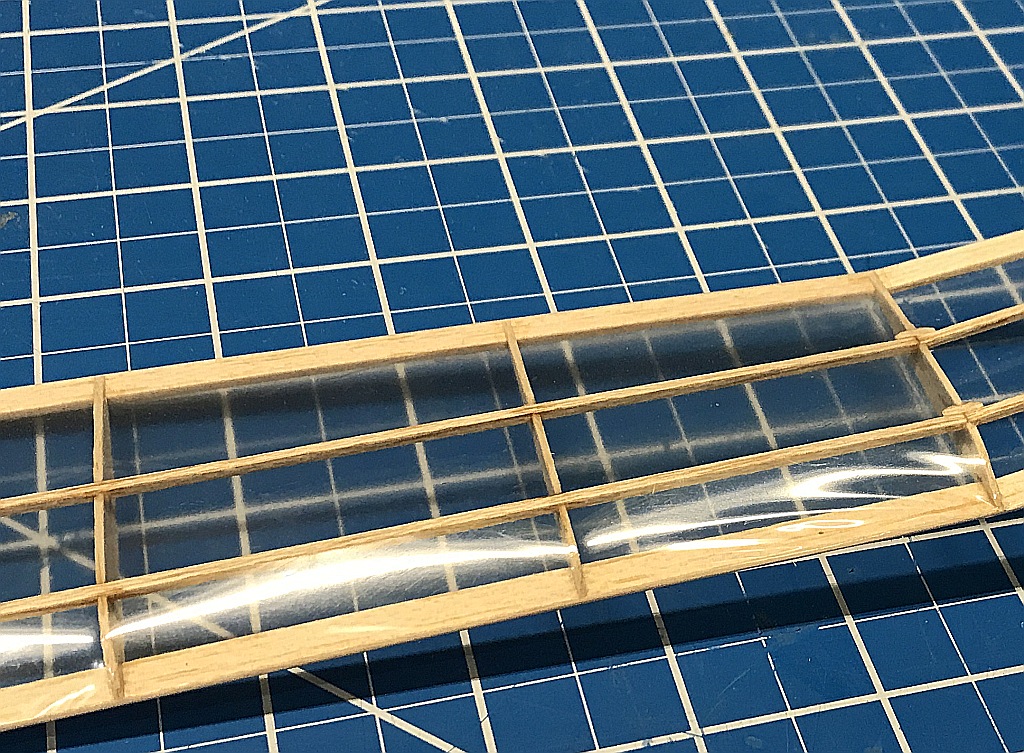
I started covering with the document laminating film. This is one side of the horizontal stabilizer, film tacked and ready to heat shrink. You can see how it changes from hazy to crystal clear when heated.

IMG_1107.JPG


Tail surfaces and bottom of the wing covered. If it looks like there's no covering in places that's because the camera can't see it unless there's light reflecting off it.

IMG_1108.JPG


First attempt at covering a top section of the wing. Film smoothed and tacked down around all the edges. Hit it with the heat gun but there's not enough shrinkage to pull it tight between the ribs on the leading edge. There's no support for the covering between the ribs. It's loose and wrinkled worse than the camera shows.

IMG_1109.JPG


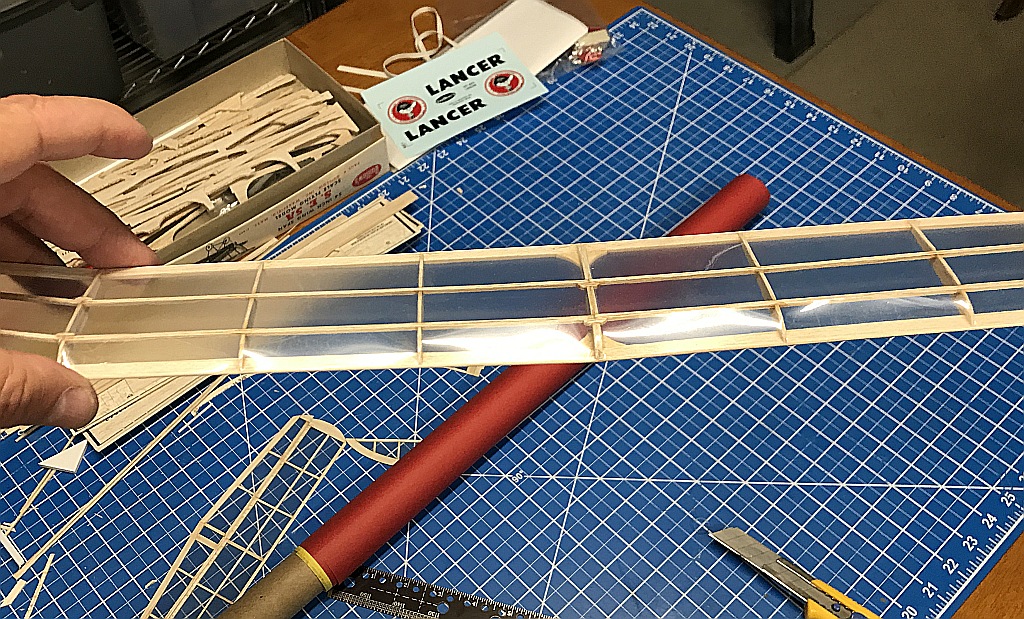
I peeled off the wrinkled film using the heat gun. On the next attempt I left lots of overhanging film. Put a work glove on my left hand and the heat gun in my right. While pulling the film carefully apply heat focused in the spot you're pulling until the film becomes stretchable. It takes a bit more heat than shrinking to stretch the film. Too much heat and you blow a hole in the film. It takes practice. I have lots of this film so I can redo it as many times as it takes to get it right. Working back and forth across the leading edge it came out smooth and tight.

IMG_1112.JPG


The wing tips are covered with a single piece of film, heated and stretched over the compound curves. The wing is done. This is good film for light balsa airplanes. The shrinkage is good but not strong enough to cause fragile balsa frames like this one to warp

IMG_1113.JPG


I'm glad I didn't attempt to cover this with the tissue that come in the kit. You would have to have crazy skill and patience to get tissue to shrink smooth on this wing.

Nothing left to do but begin the fuselage. I have a very large roll of this covering film. If you want to try some shoot me a message and I'll send you a few yards to try.

Jon
 
Last edited:

OliverW

Legendary member
I started covering with the document laminating film. This is one side of the horizontal stabilizer, film tacked and ready to heat shrink. You can see how it changes from hazy to crystal clear when heated.

View attachment 136880

Tail surfaces and bottom of the wing covered. If it looks like there's no covering in places that's because the camera can't see it unless there's light reflecting off it.

View attachment 136881

First attempt at covering a top section of the wing. Film smoothed and tacked down around all the edges. Hit it with the heat gun but there's not enough shrinkage to pull it tight between the ribs on the leading edge. There's no support for the covering between the ribs. It's loose and wrinkled worse than the camera shows.

View attachment 136883

I peeled off the wrinkled film using the heat gun. On the next attempt I left lots of overhanging film. Put a work glove on my left hand and the heat gun in my right. While pulling the film carefully apply heat in the spot you're pulling until the film becomes stretchable. It takes a bit more heat than shrinking to stretch the film. Too much heat and you blow a hole in the film. I have lots of this film so I can redo it as many times as it takes to get it right. It takes practice. Working back and forth across the leading edge it came out smooth and tight.

View attachment 136884

The wing tips are covered with a single piece of film, heated and stretched over the compound curves. The wing is done. This is good film for light balsa airplanes. The shrinkage is good but not strong enough to cause fragile balsa frames like this one to warp

View attachment 136885

I'm glad I didn't attempt to cover this with the tissue that come in the kit. You would have to have crazy skill and patience to get tissue to shrink smooth on this wing.

Nothing left to do but begin the fuselage. I have a very large roll of this covering film. If you want to try some shoot me a message and I'll send you a few yards to try.

Jon
I haven't got any updates til now!! And wow!!!
 

TooJung2Die

Master member
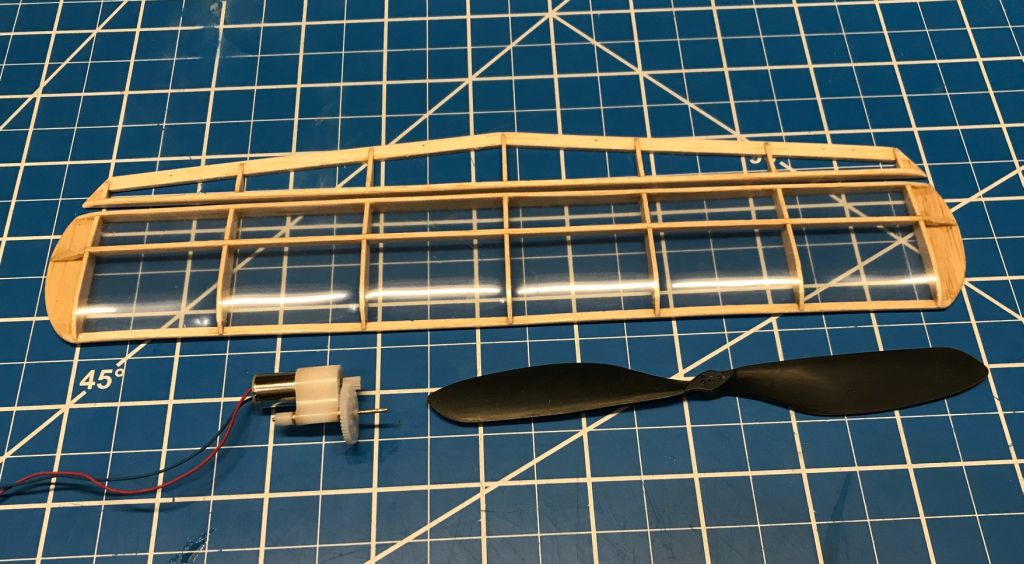
I'm having second thoughts about the flat horizontal stabilizer so I built another using the ribs. It was a bit tricky putting a hinge line in there which is one reason I built a flat horizontal stab in the first place. I'm getting the feel for this covering film. The top and tips are covered with one piece of film, no wrinkles.

The laser cut ribs were perfectly cut unlike the die-crushed ribs for the wing.

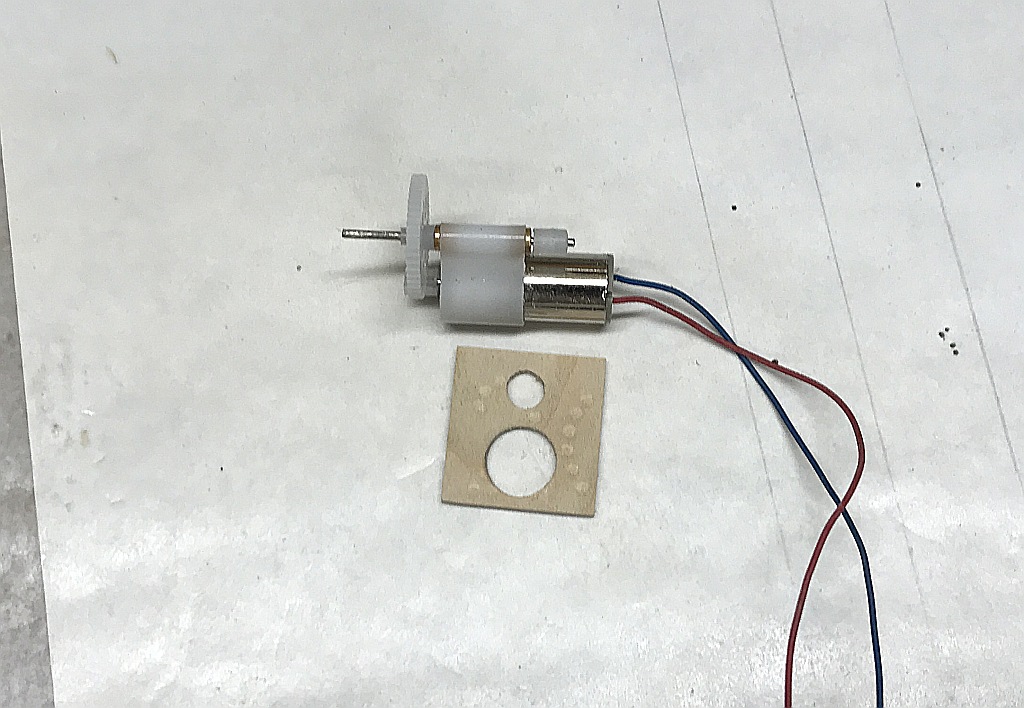
The motor arrived. It's a 820 motor and gear box. I think 8x20 are the dimensions of the motor in mm. The gearbox was unassembled. YouTube to the rescue. The motor and gearbox came with a 5.5" prop of unknown pitch. It is supposed to produce about 2 oz of thrust. The airplane should weigh no more than 3 oz ready to fly (maybe less, we will see). The motor and prop assembly weighs 8 grams.

IMG_1116.JPG


IMG_1114.JPG


Jon
 
Last edited:

TooJung2Die

Master member
I use Tyvek mailing envelope for hinges. It's extremely strong and very flexible. It wicks up CA glue like magic.

IMG_1118 elevator hinge.jpg


IMG_1119 elevator hinge.jpg


The rudder is so thin I don't think I can cut the slots for the Tyvek so I'm trying a tape hinge. One piece of tape on either side and stuck together in the hinge line. Seems to be staying stuck. Looks invisible.

IMG_1118 rudder hinge.jpg


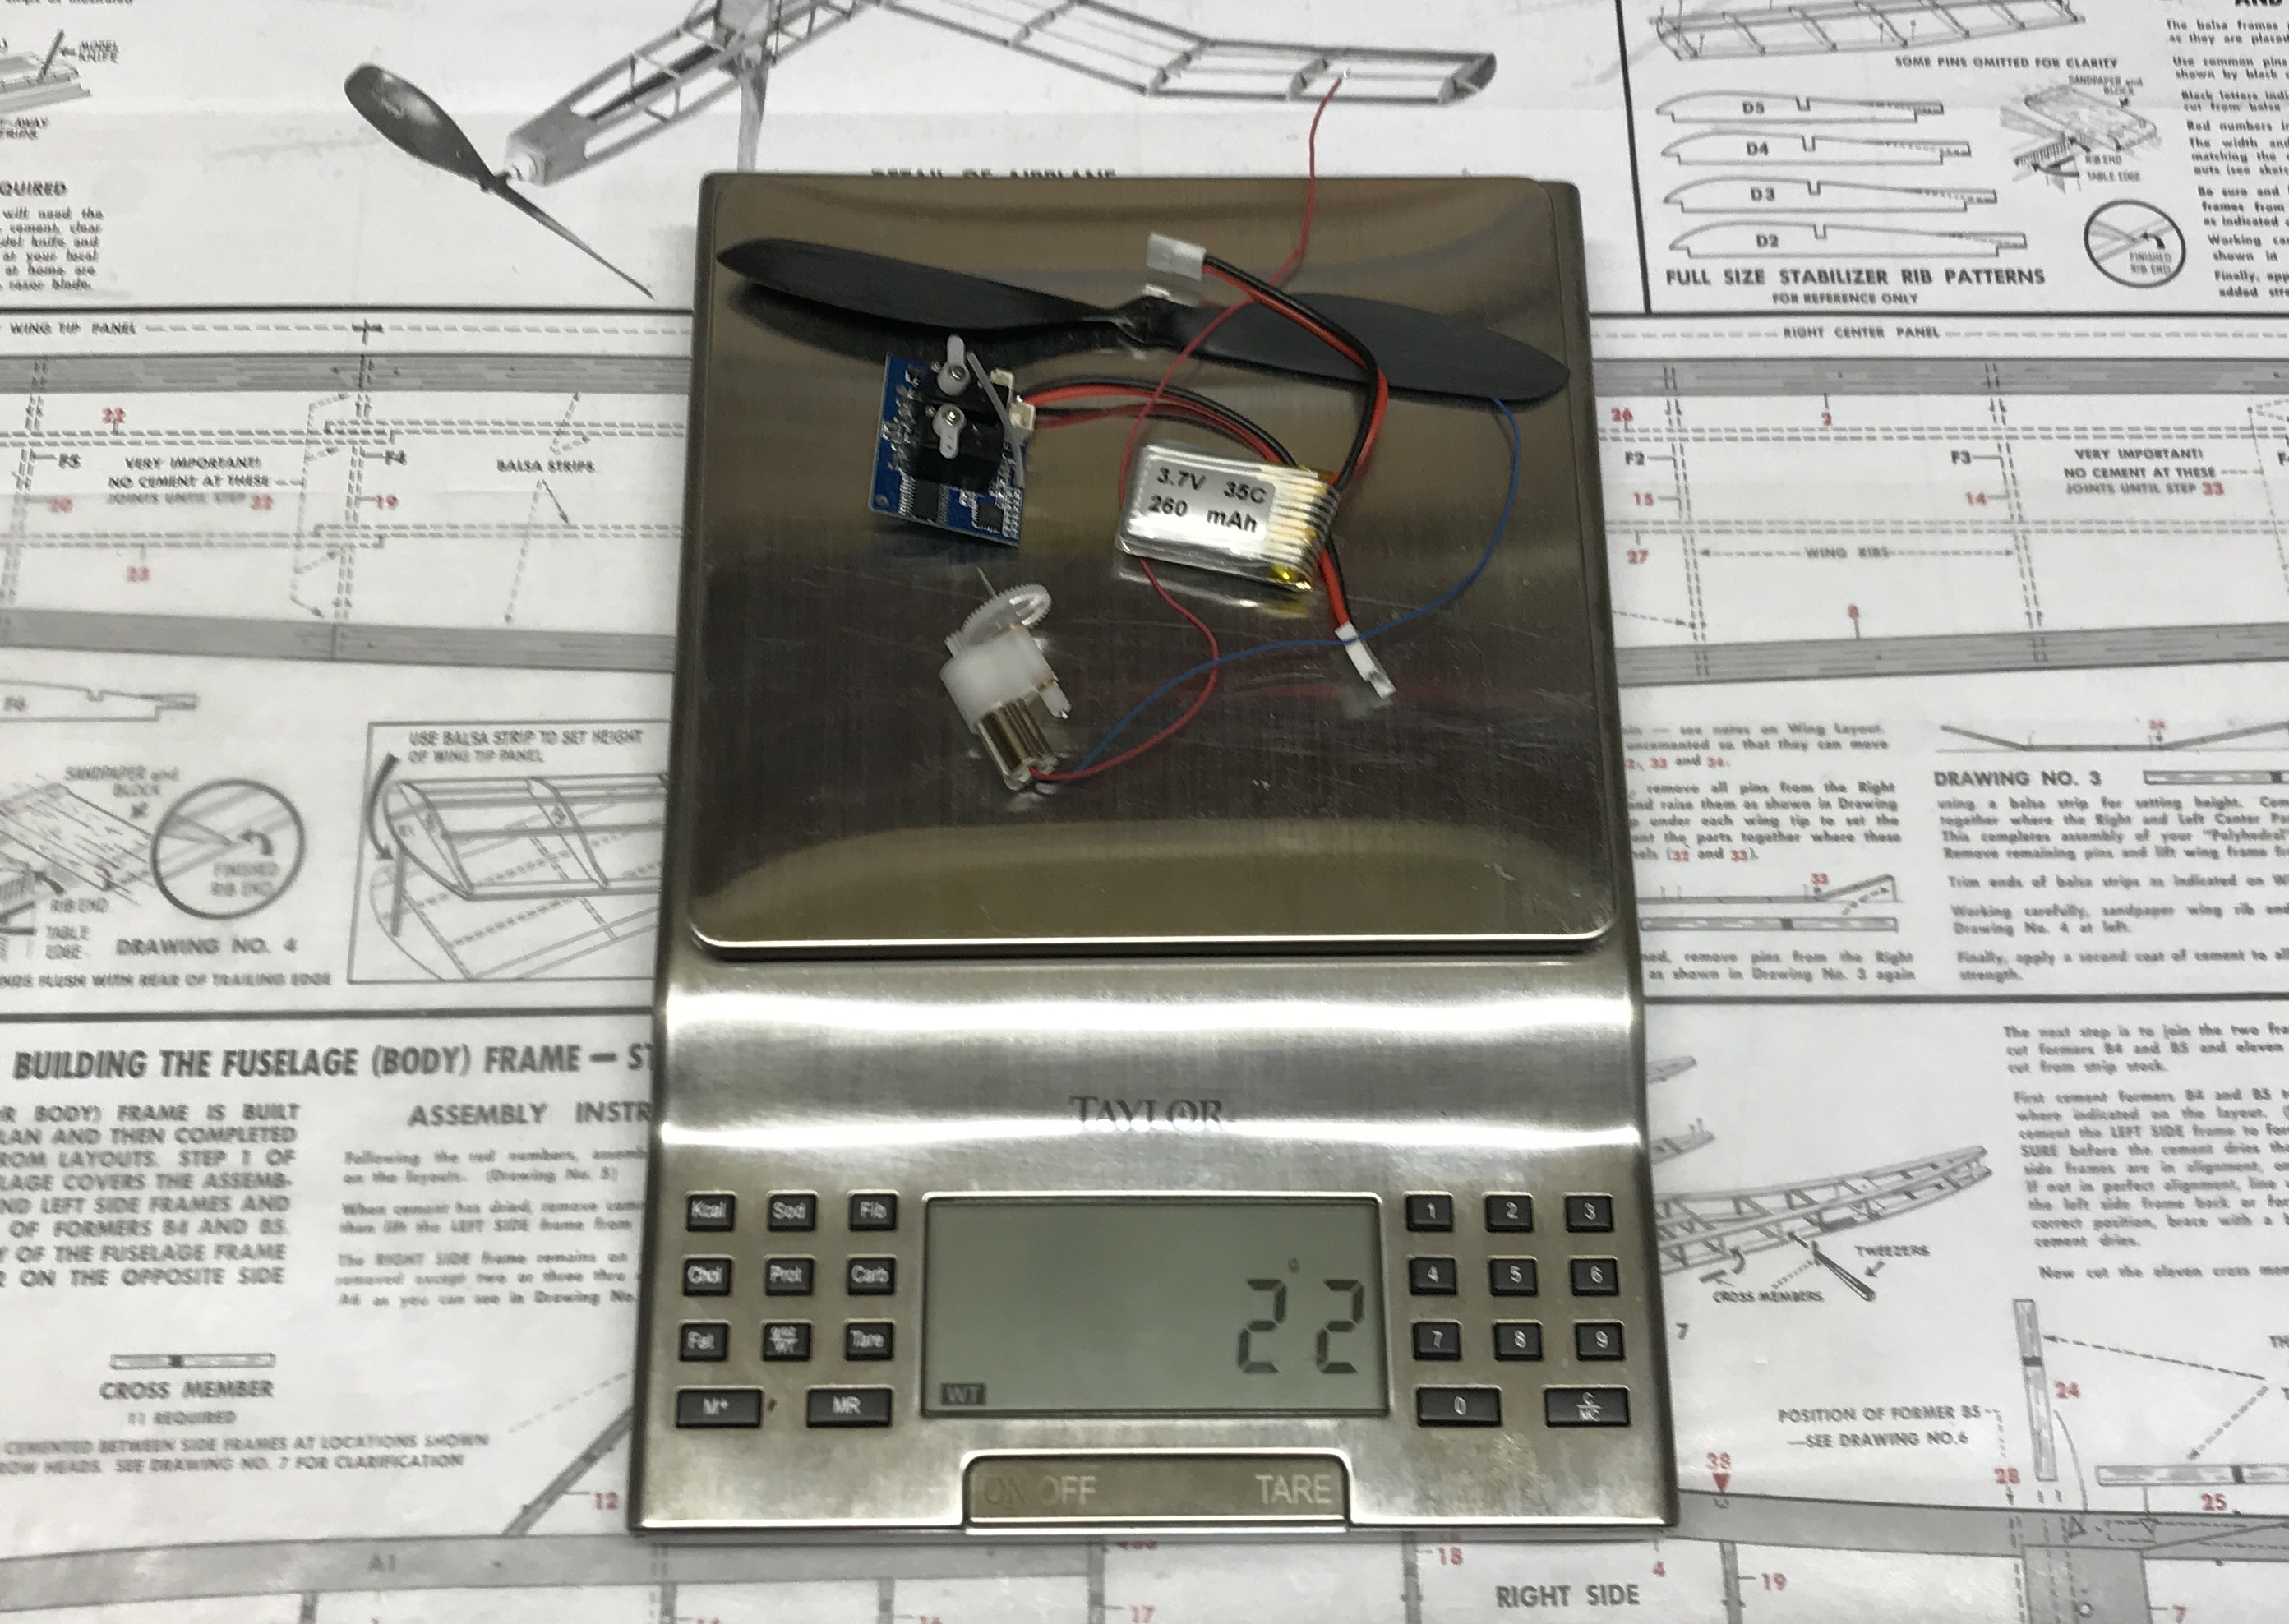
All the electronics are here. Total weight: 22 grams.

IMG_1123.JPG


Total weight of the wing and tail feathers: 12 grams

IMG_1124.JPG


So far we have 1.2 ounces of airplane. The goal is under 3 oz. The fuselage will have to be lightened up a bit. The fuselage design has a lot of reinforcement added to withstand a wound up rubber motor. I will be eliminating all that and as much wood as possible.

Jon
 

TooJung2Die

Master member
3 ounces of airplane.... That's crazy light! At least compared to what I'm used to. :)
I thought so too until I got the F949 Cessna. It's only 2 oz and it's uses the same electronics! I'm hoping to achieve around that weight with a slightly bigger airplane because it's all balsa. We all know balsa is king. (y)

Here are the stock fuselage side pieces.

IMG_1125.JPG


Here are the fuselage sides after I shaved the side pieces and eliminated a lot of unnecessary wood. All the grey sections showing on the plan are places where balsa has been eliminated.

IMG_1130.JPG


Keeping everything square and straight. The directions said to align the sides by eye. I don't trust my eyes. Using a jig.

IMG_1131.JPG


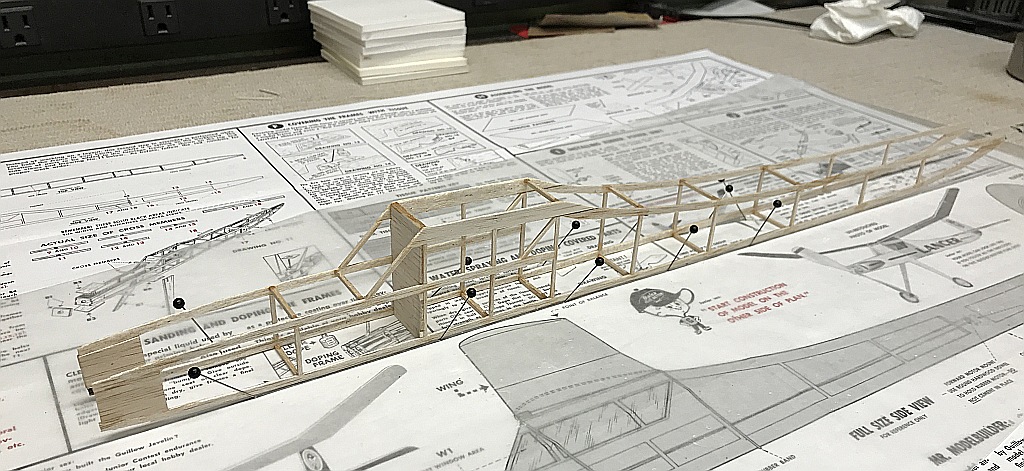
It's beginning to look like a fuselage. Very light and fragile at this point. The covering will create the strength and stiffness.

IMG_1132.JPG


Jon
 

TooJung2Die

Master member
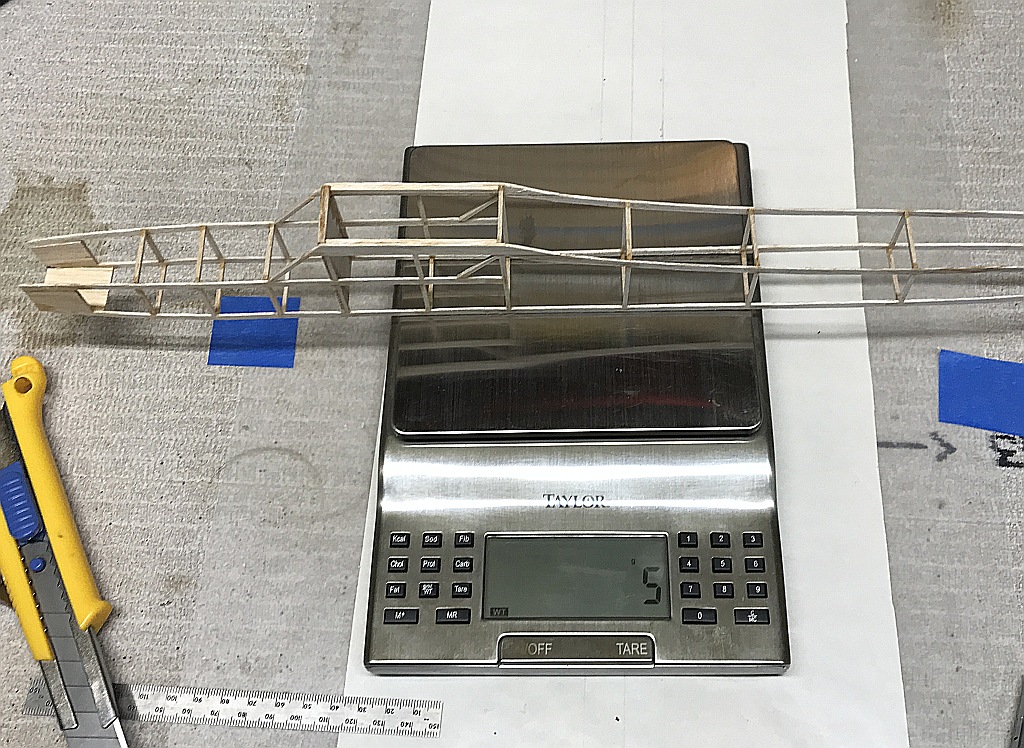
It's ready for the electronics to go in. The fuselage weighs 5 grams at this point. I'm getting encouraged about keeping under the 3 oz goal.

IMG_1138.JPG


Motor mount cut from 1/16" plywood. I drilled a hole slightly smaller than the motor and sanded the hole until the motor fit tight.

IMG_1134.JPG


Perfect fit without enlarging the nose.

IMG_1137.JPG


Jon
 
Last edited:

TooJung2Die

Master member
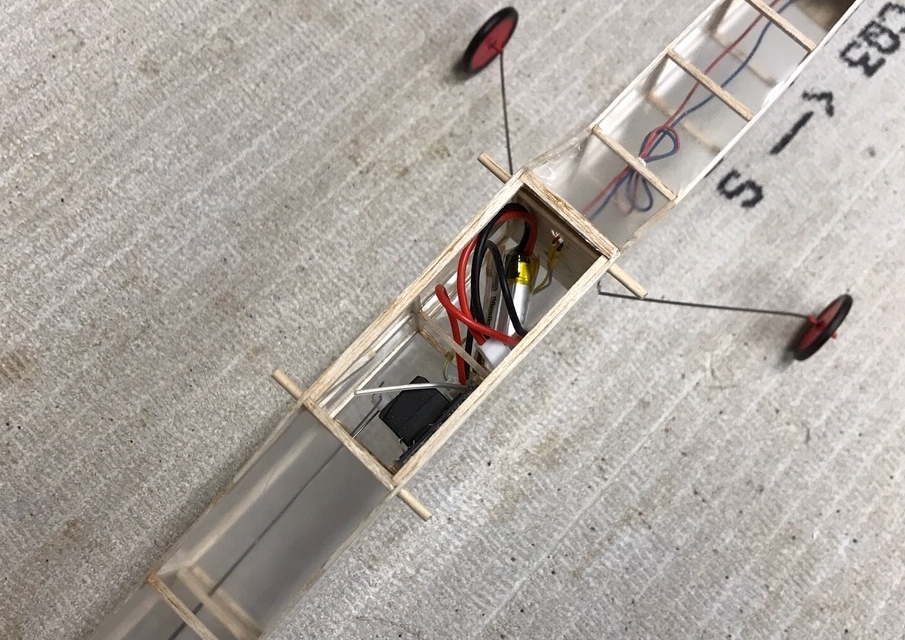
The motor, receiver brick and .020 wire push rods are installed. I test fit the electronics with the wing and tail temporarily mounted to get a ballpark idea of the best position. You want to balance on the CG point without extra ballast.

IMG_1141.JPG


I had to use hot glue sparingly to attach the receiver brick to balsa. Up until now the only glue I've used is thin CA.

I'm going to make some lightweight landing gear to protect the prop and gear shaft when landing. If I think the landing gear adds too much weight I'll skip it.

Some sanding and the fuselage is ready to cover. Total weight of fuselage, wings and everything including the battery is 44 grams, or 1.5 ounces.

Jon
 
Last edited:
TooJung2Die

Master member
Covering the fuselage. One side tacked down and edges sealed.

IMG_1143.JPG


Landing gear mounted. The .032" wire is sewn to 1/16" plywood and glued with CA. Titebond glue used to attach the plywood to the bulkhead.

IMG_1145.JPG


I remember the landing gear was very fragile. This is not the landing gear in the plans. I don't expect to be doing any ROG takeoff; I hope it will provide some protection for the prop on landing in short grass.

IMG_1146.JPG


Horizontal stabilizer is aligned and glued in place.

IMG_1149.JPG


It's almost there!

IMG_1150.JPG


Jon
 
Last edited:
TooJung2Die

Master member
Tail is finished. Control linkage hooked up. There are two holes on the control horns for low and high rates. The photo shows the high rate setup.

IMG_1157.JPG


Toothpicks are just right for the rubber band wing hold-down. With the battery in this spot the CG is just a touch forward. After the CG and trim get dialed in there will be a permanent battery holder.

IMG_1158.JPG


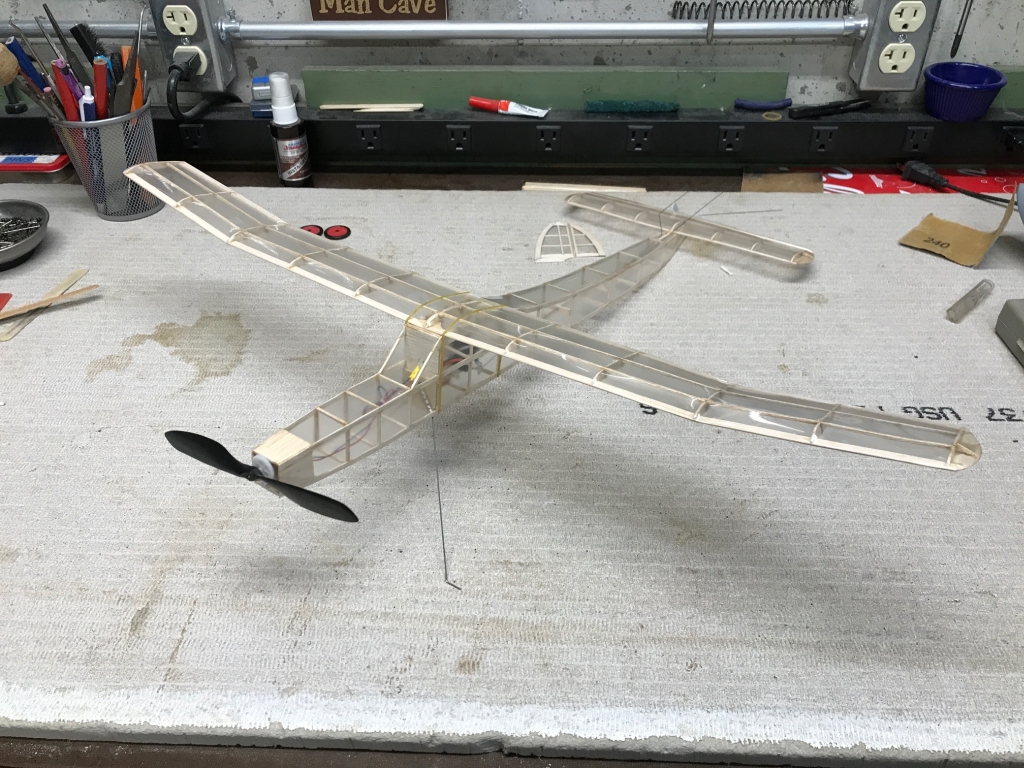
Ready for the maiden flight:

IMG_1160.JPG


IMG_1165.JPG


IMG_1163.JPG


Ready to fly AUW is 46 grams or 1.62 ounces. (y) I am very happy with that. Very surprised too. Full vertical climb may be possible if it can handle it. o_O

IMG_1155.JPG IMG_1154.JPG

There are Guillow's decals and some other decoration for after the maiden flight. I have high hopes it'll go well.

Jon
 
Last edited:
OliverW

Legendary member
Tail is finished. Control linkage hooked up. There are two positions on the control horns for low and high rates. The photo shows the high rate setup.

View attachment 137744

Toothpicks are just right for the rubber band wing hold-down. With the battery in this spot the CG is just a touch forward. After the CG and trim get dialed in there will be a permanent battery holder.

View attachment 137745

Ready for the maiden flight:

View attachment 137746

View attachment 137748

View attachment 137749

Ready to fly AUW is 46 grams or 1.62 ounces. I am very happy with that. Very surprised too. Full vertical climb may be possible if it can handle it. o_O

View attachment 137750 View attachment 137751

There are the Guillow's decals and some other decoration for after the maiden flight. I have high hopes it'll go well.

Jon
You are the world's fastest builder!! Dang I feel slow