MLGSwagPilot
New member
Hey everyone! My name is Tommaso, I live in Italy and this is my first post on the FT Forum: I wanted to share with you guys my experience in building and flying my second scratch built rc plane.
Around summer '20 I decided to start building a RC plane: at first, I wanted to make a 1m wingspan, low wing, sport-style plane made out of depron (as we don't have Foamboard here in Italy) so I started drawing some sketches, and after a couple of days I ended up with a pretty decent project of a plane (it looked liek a mix of a F4u Corsair and a P-40 Warhawk). Anyway, I started building it by tracing an upscaled version of the plans on my depron sheets, but soon enough I realized that the project was way too difficult for my building skills, so I decided to change plans and to build a high wing, trycicle landing gear, trainer-like airplane.
I had a lot of things to do in the summer, so the only part that I have managed to finish was the wing: it had a wingspan of 1m, a clark-y airfoil (i cut around 10 clark-y formers and I hot glued them on a sheet of depron foam, which i then folded over the formers) and it was reinforced by a spar made out of five depron strips as long as the wing, which i hot glued together so that the spar was formed by three strips stacked one over the other and two glued vertically on the sides (the spar was held together with Hot glue reinforced by foam safe CA - possibly not the best idea but still - and its desing was inspired by the ones shown on the YouTube channel "Experimental Airlines").
After that, summer ended and I had to go back to school, so I didn't have a lot of time to spend building RC planes and my wing just sat in my garage for a very long time. Then, during spring break '21, I had some free time and I decided to pick up my project and I started building the fuselage and the horizontal and vertical stabilizers.
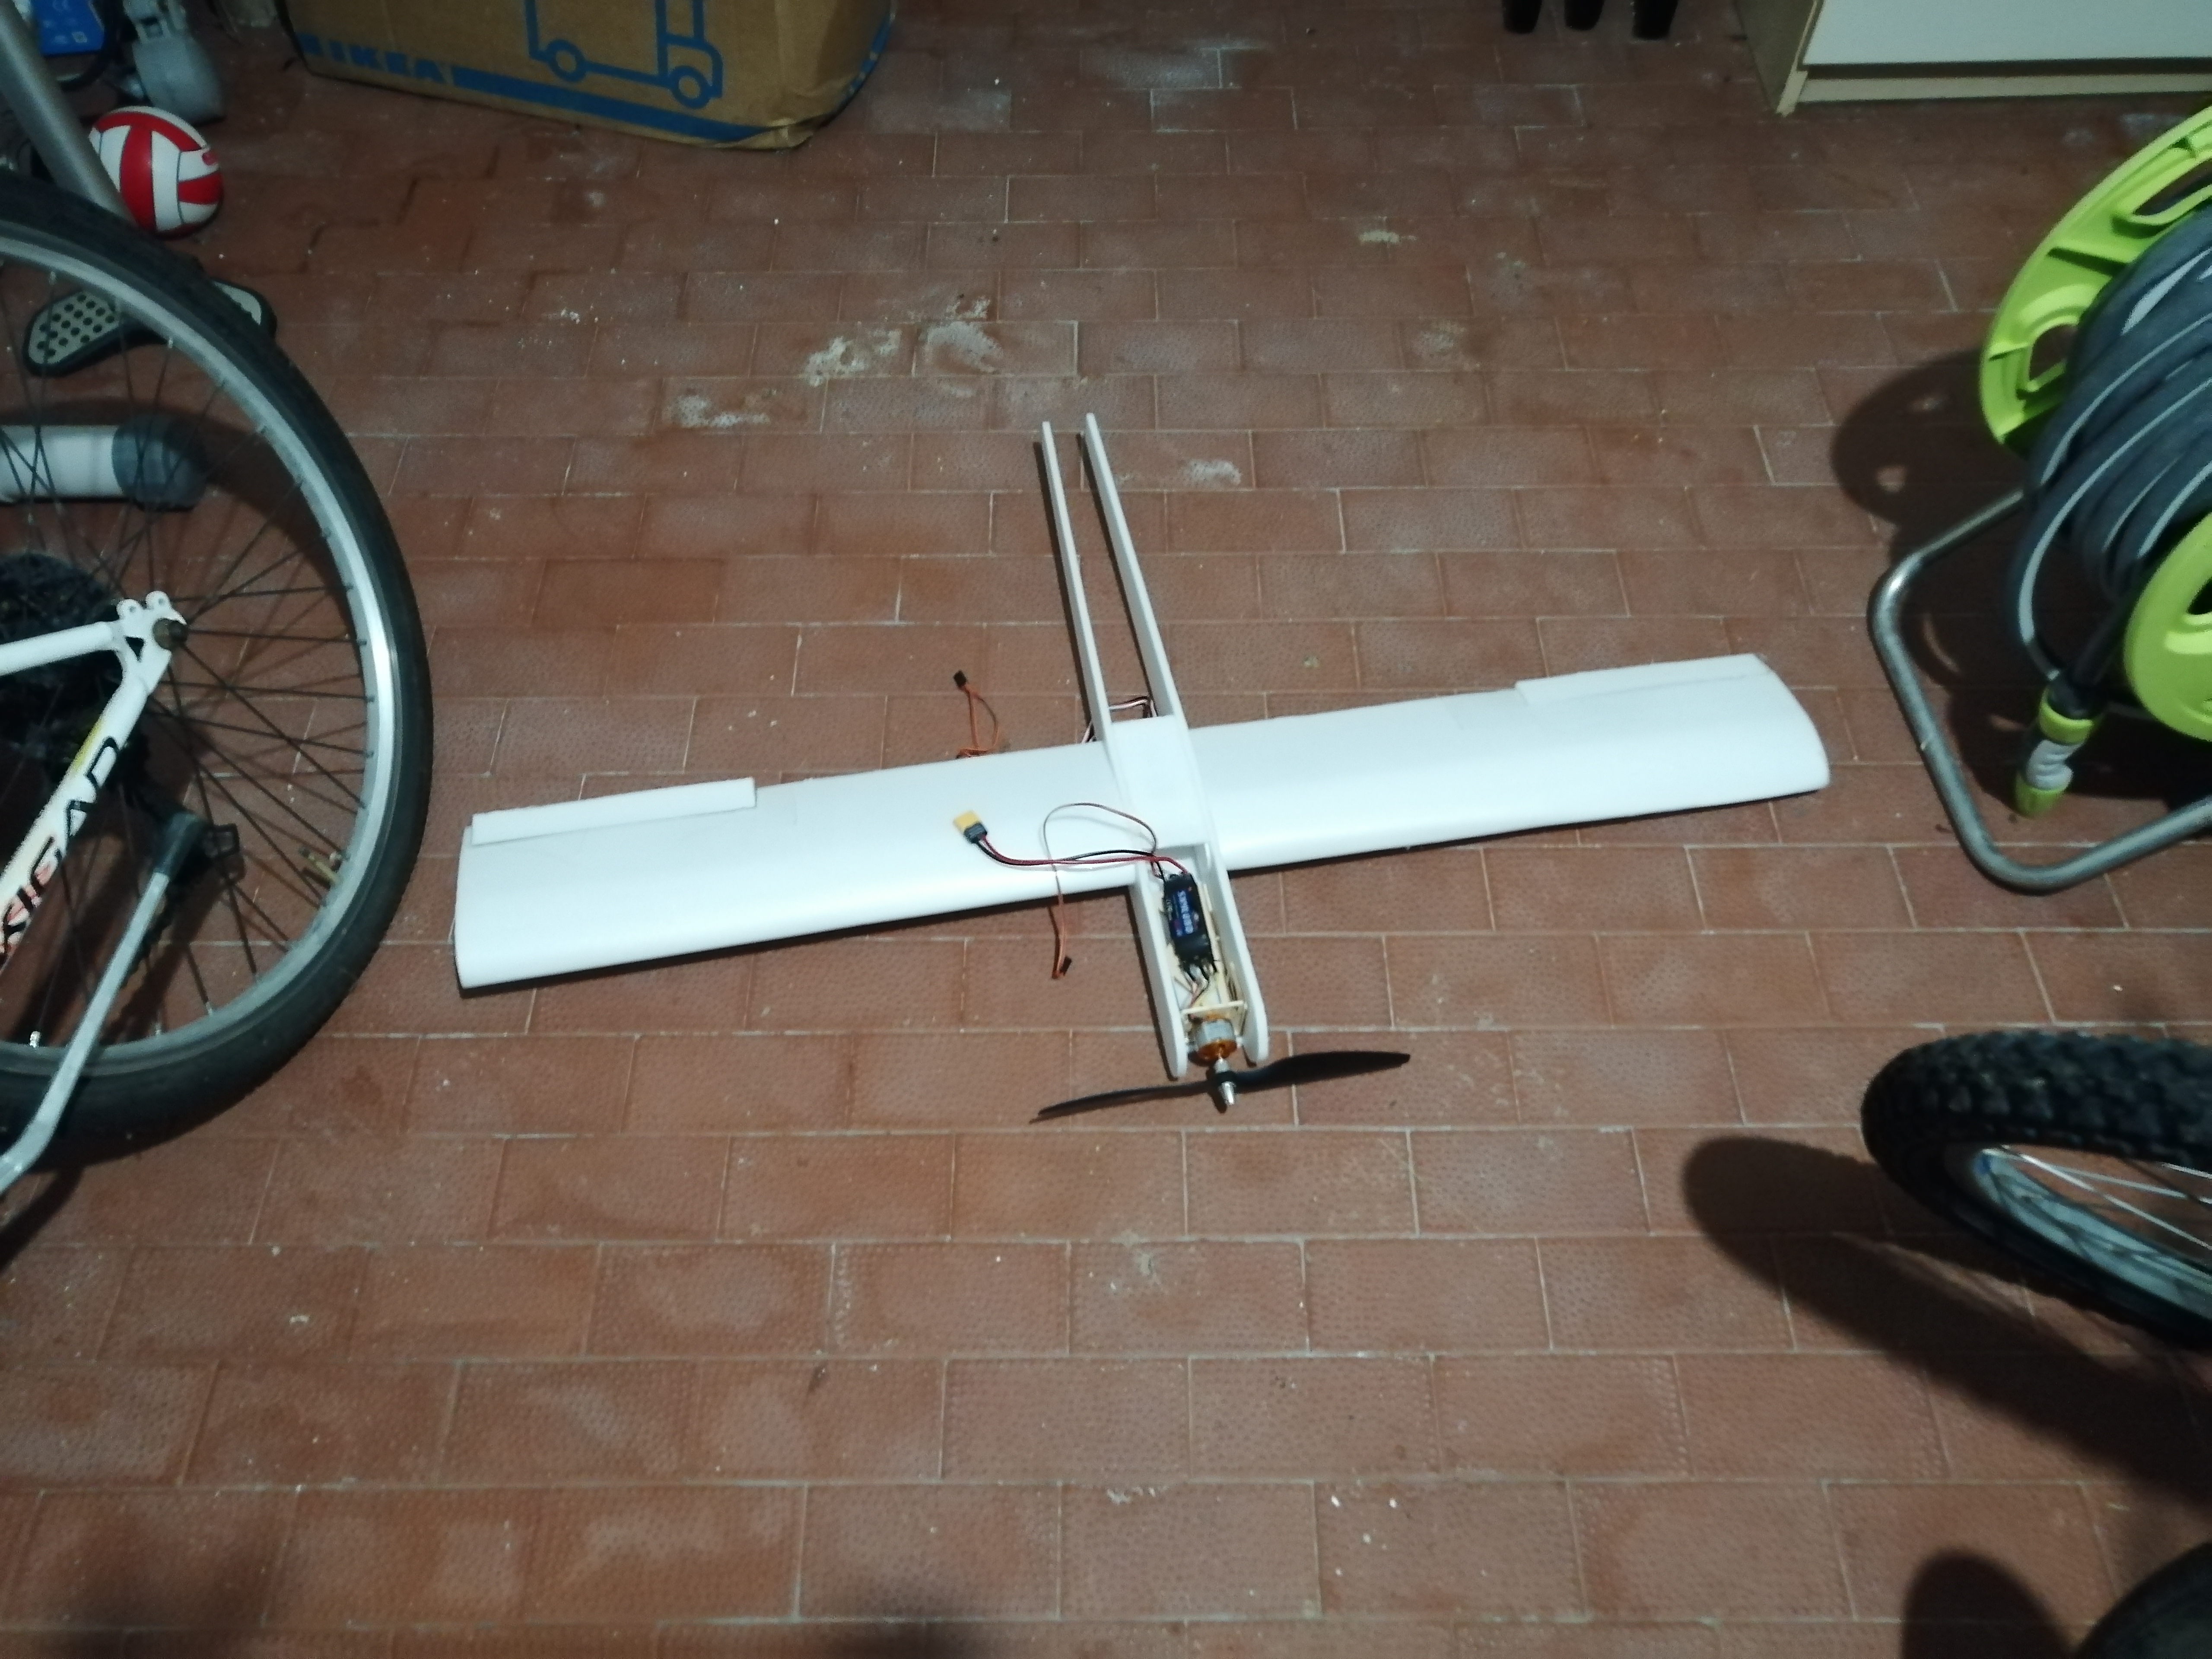
Here you can see the finished wing (as you can see the ailerons were cut into the wing's structure and they were not extra flat surfaces) a semi-finished fuselage with all the electronics inside. If I remember correctly, I had mounted a 1100kV motor and a 1045 prop, but I'll have to check because I can't quite remember. It was all powered by a 2200 3S LiPo, which was kinda hard to fit but in the end i found a way and it fit very well (the CG was perfect as well!!).
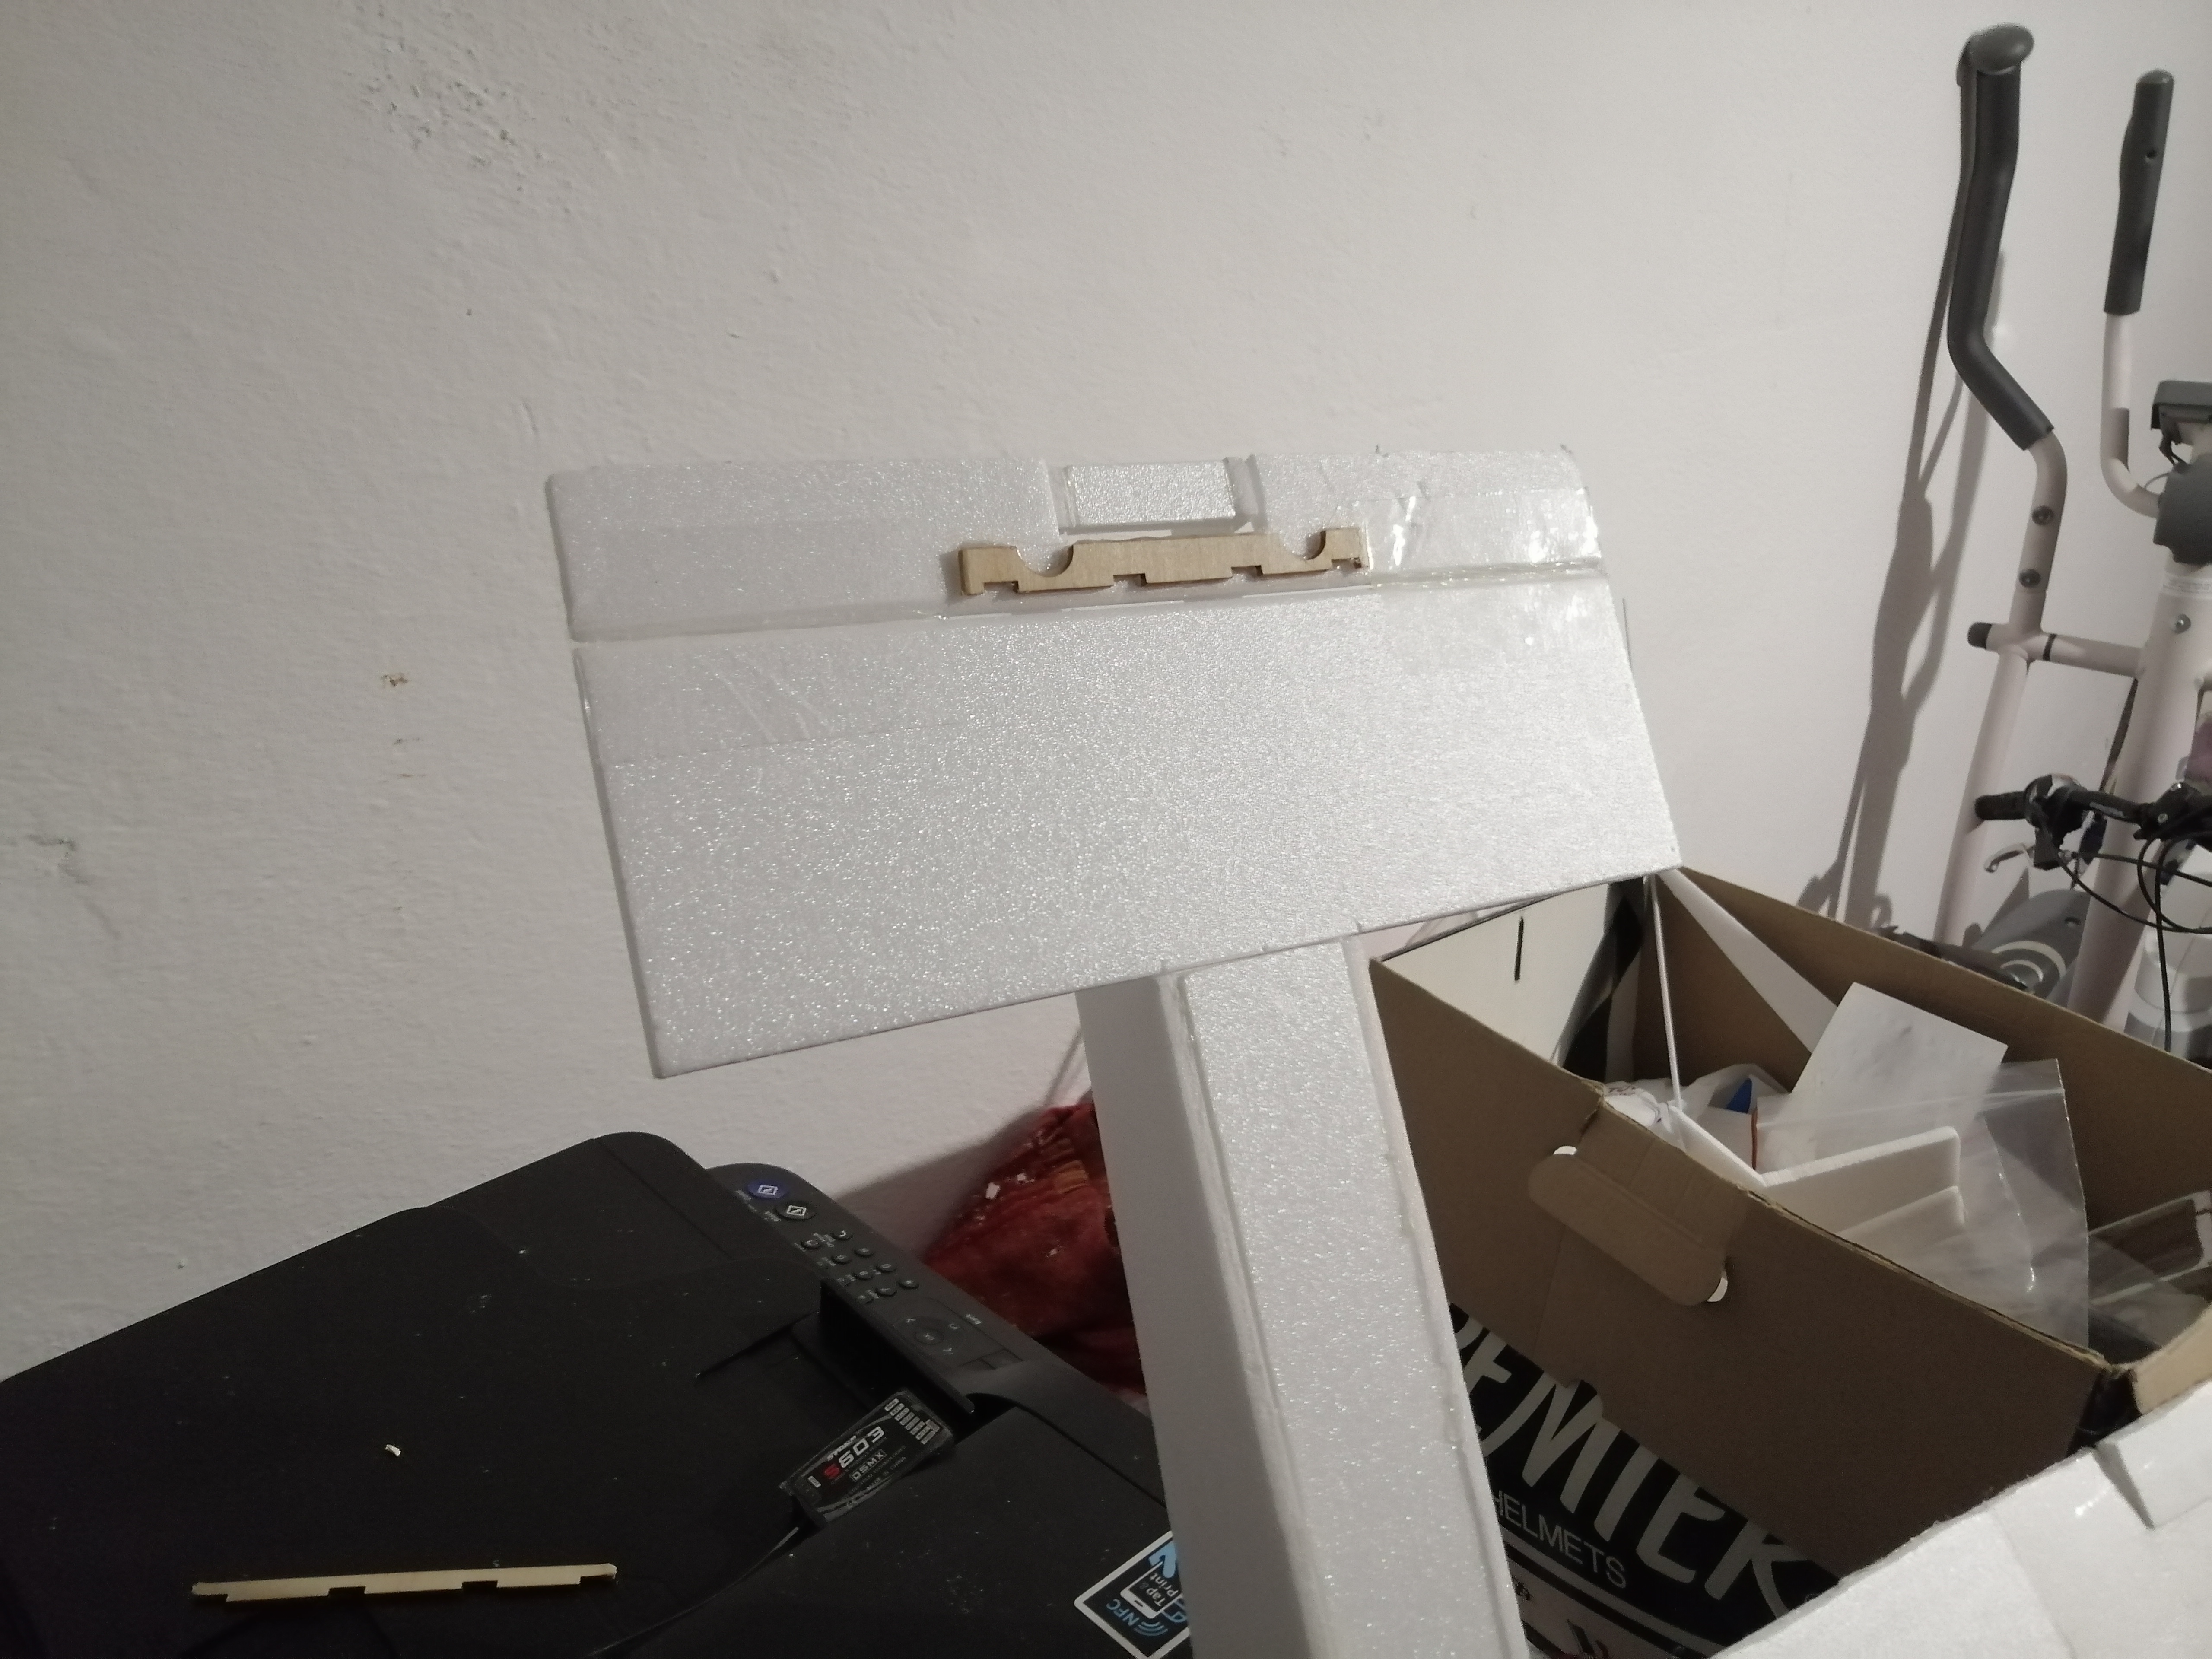
I have used a scrap piece of wood to reinforce my horizontal stabilizer. In this pic you can see the receiver as well (the little black thing on the big black thing), which will cause some problems later.
After that I started building the vertical stabilizer and the gear assembly (it had a steerable nose wheel). Note: all the control surfaces were hinged by some duct tape reinforced by a thin layer of hot glue (I learned the technique from Josh Bixler's building videos ).
).


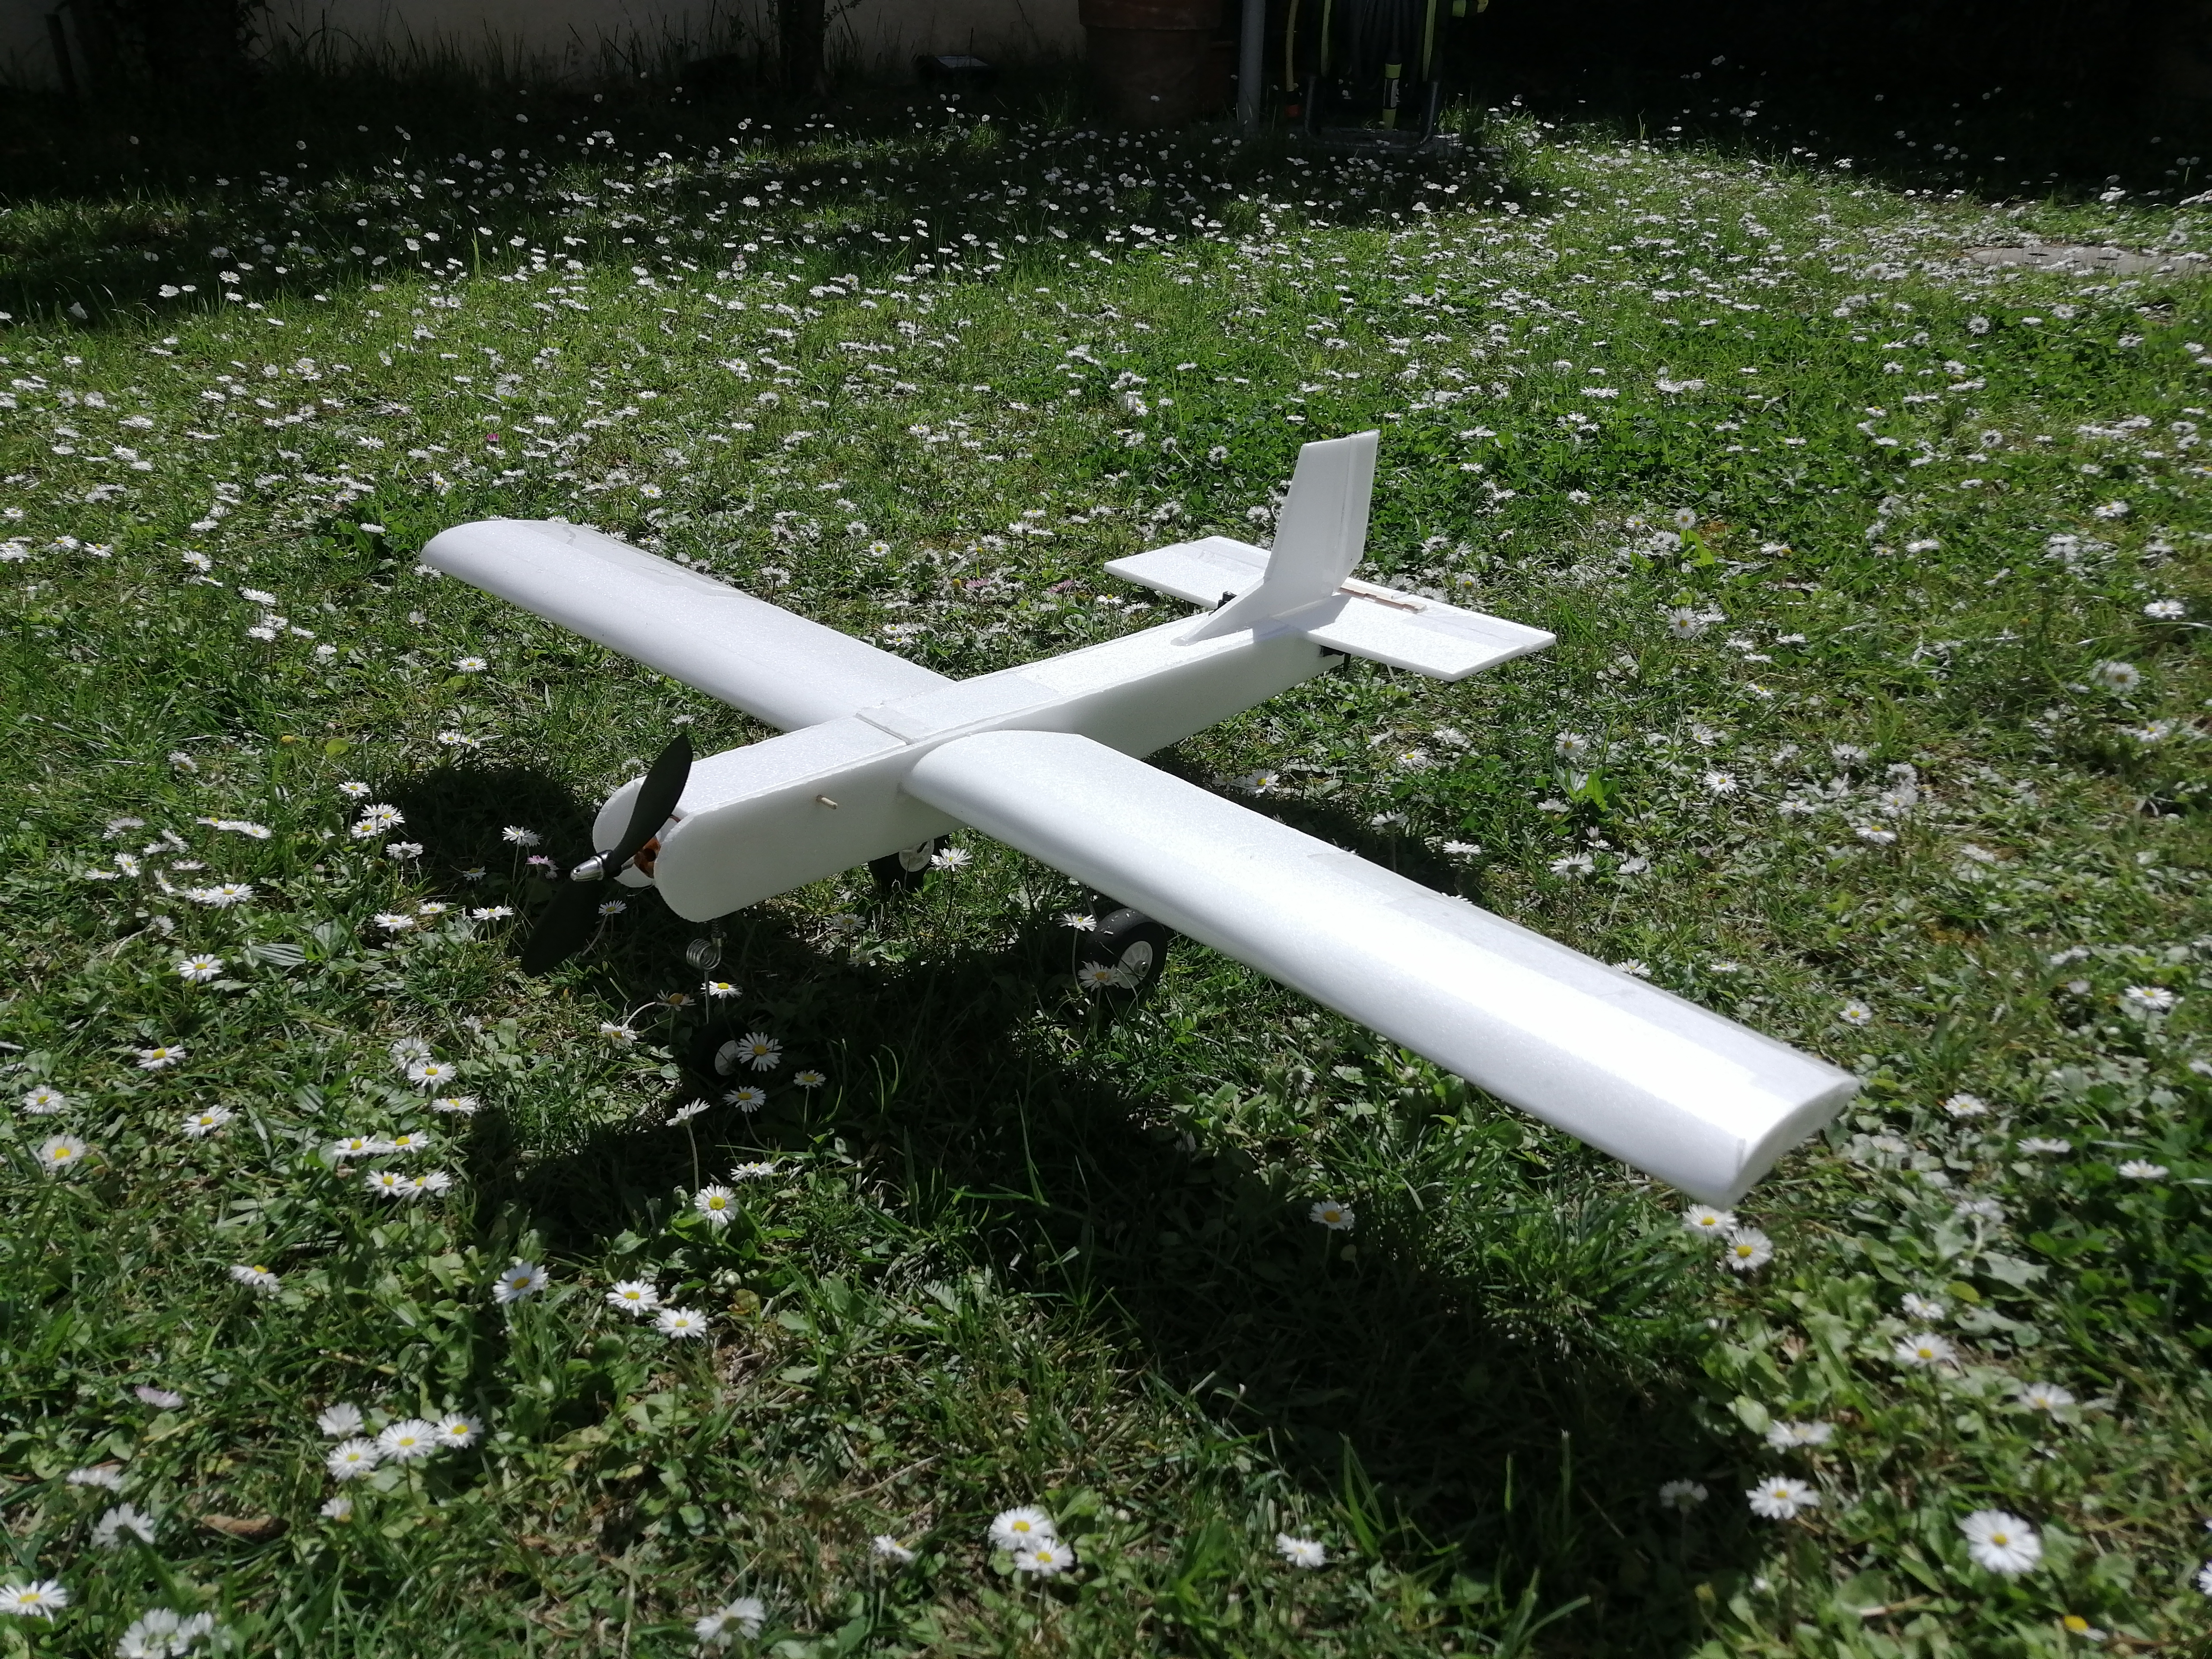
And this is the finished product! I had also built a battery hatch (the foreward upper part, parallel to the ground), which was kept in place by a BBQ sqewer that passed through a set of two alligned holes on the sides of the fuselage (one for each side) and two wooden "rings" glued to the lower part of the hatch.

here you can see the battery compartment in detail. You can see the wooden rings glued on the battery hatch. The receiver isn't seen from this angle as it is placed "behind" the wing, with its antennas forming a 45 degree angle.
At this point everything was ready and it was time to fly!!! here you can see some pics of the plane in flight.


The plane flew very well, almost no trimming needed, but unfortunatly the receiver was very cheap (that's what you get when you try to cut corners and save up on important parts!!!
and and it kept losing signal: sometimes after a couple of seconds it got the signal back, until it didn't.
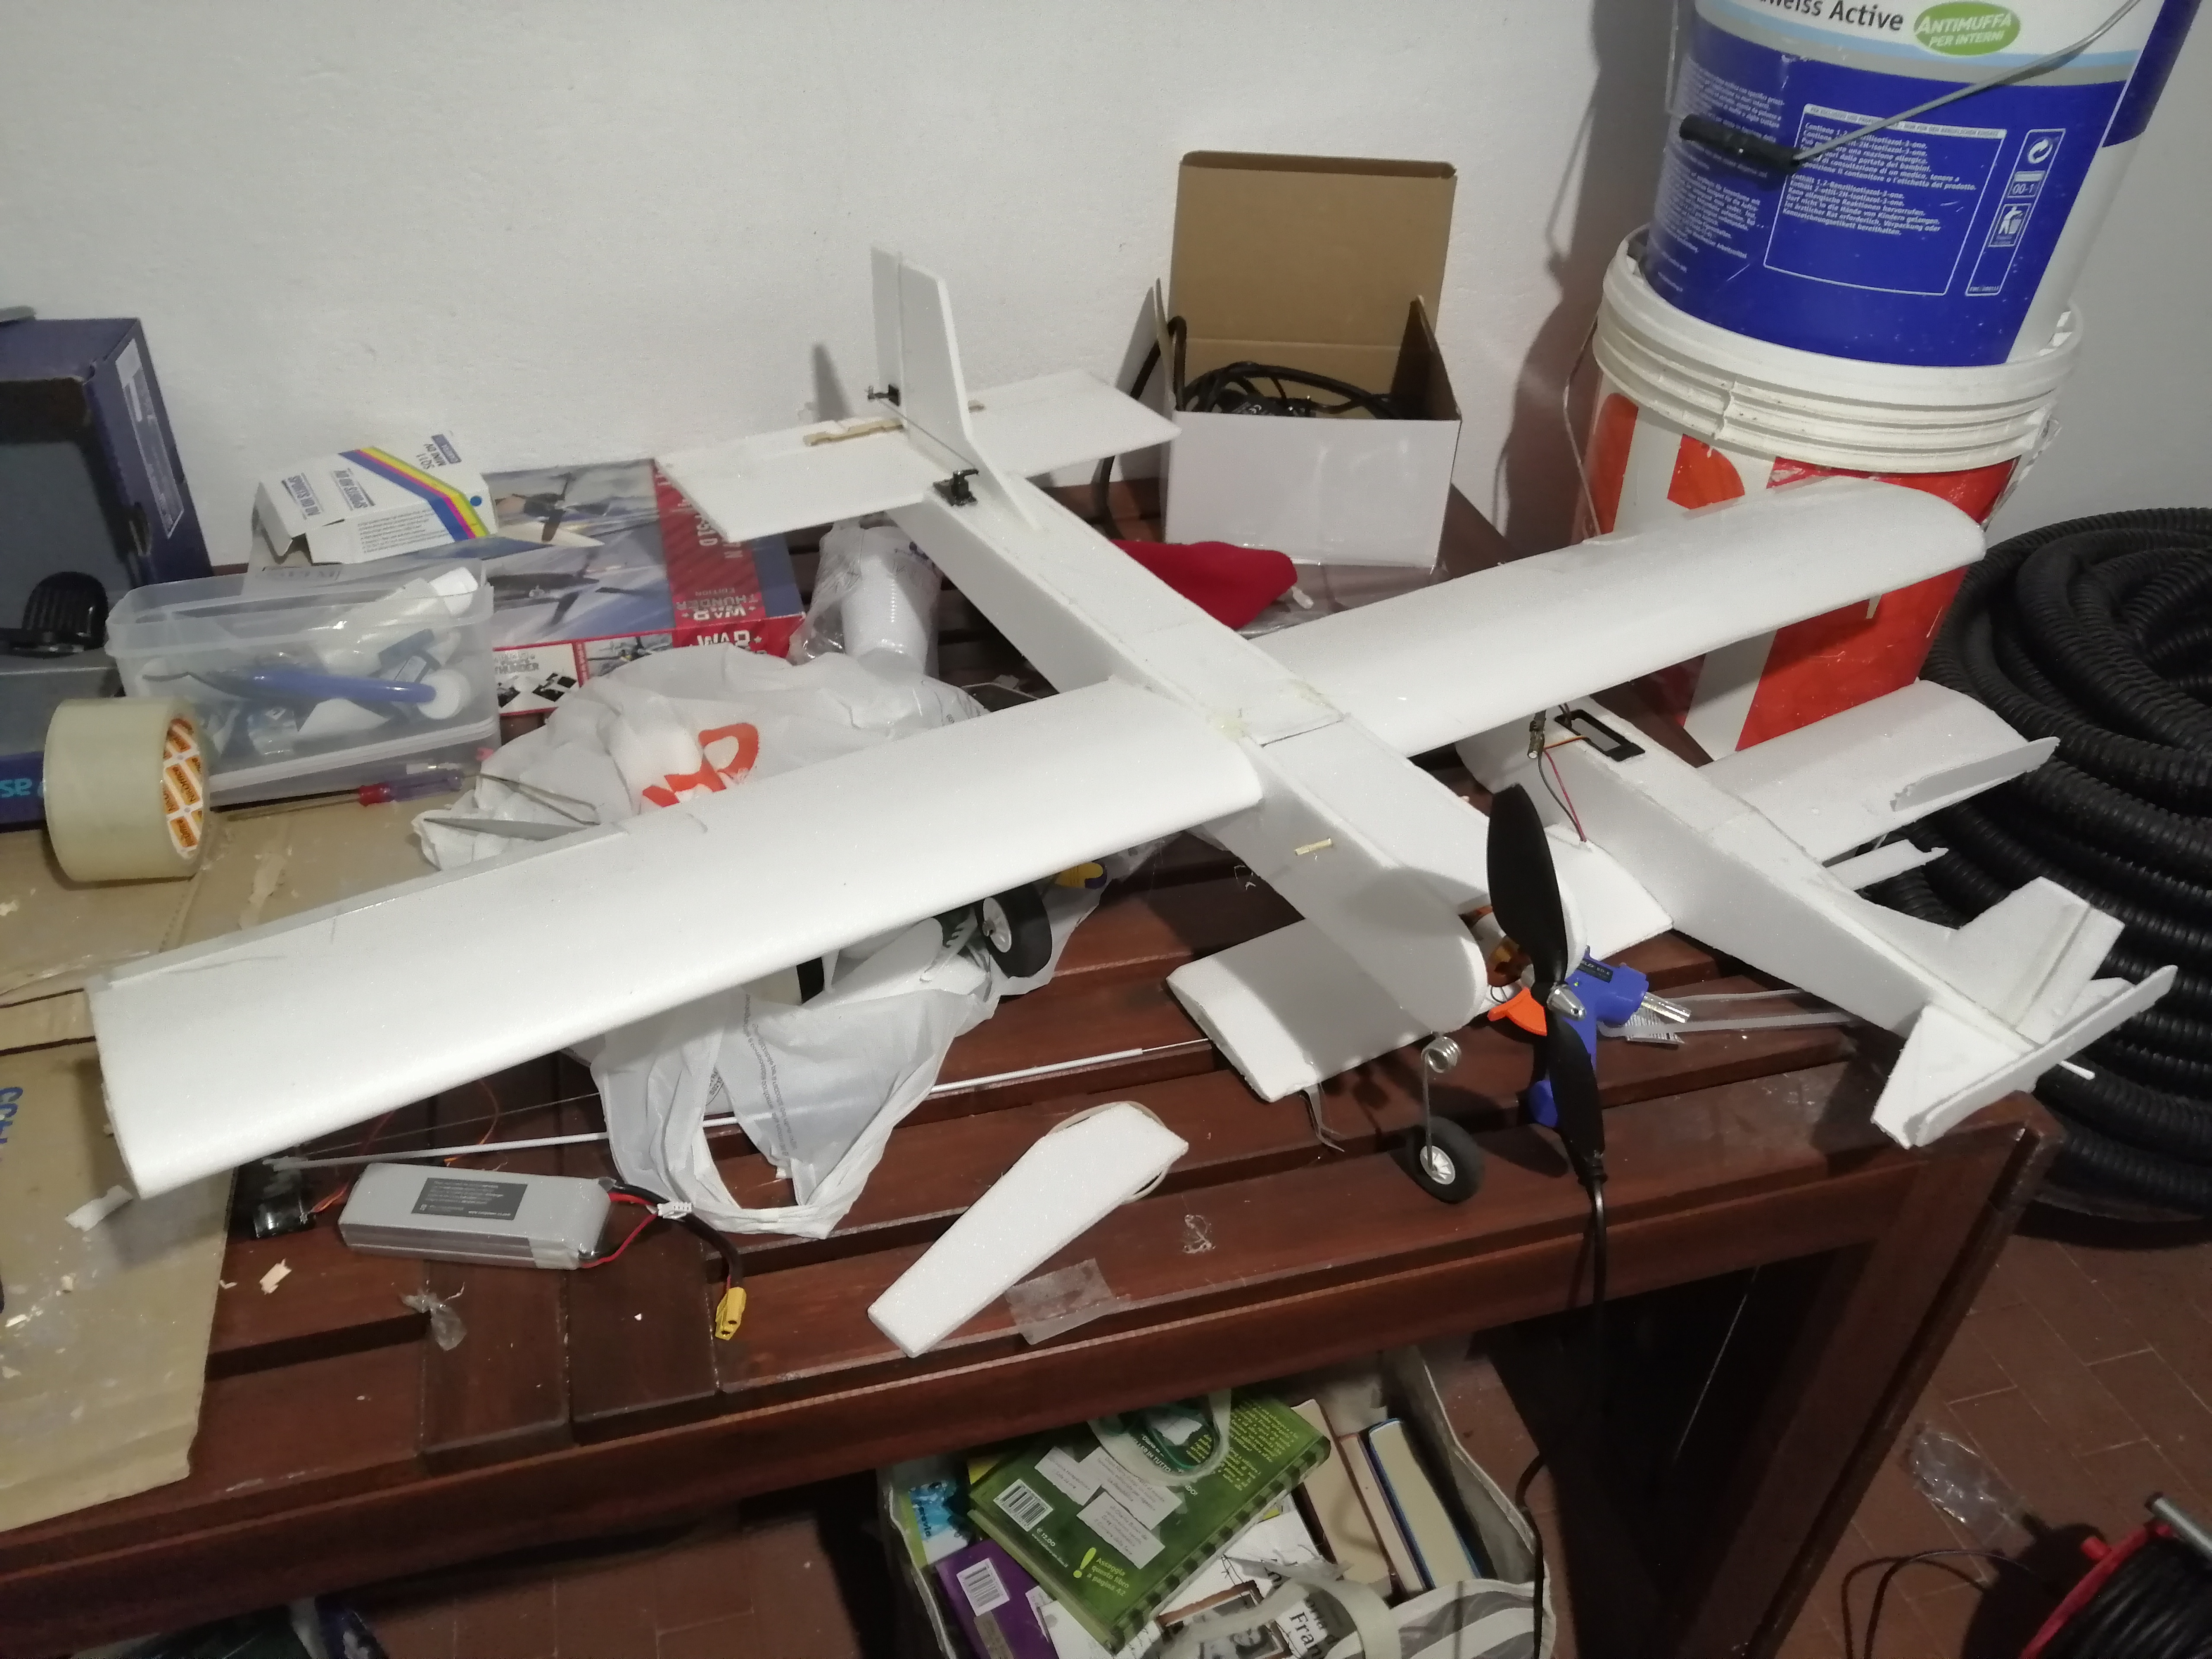
The plane crashed and it broke into two pieces (the spar broke in half as well, in the center). I don't have any photos of the aftermath of the crash, but after all it wasn't so bad so I decided to build back the plane; in the photo below, you can see it sitting next to my first scratch-built project!
It was now time to fly it again: this time I tried in a different field, far away from the telephone tower i flew next to the first time, but I didn't change the receiver. Once again, the signal was very poor and the plane crashed again, this time with far worse consequences.
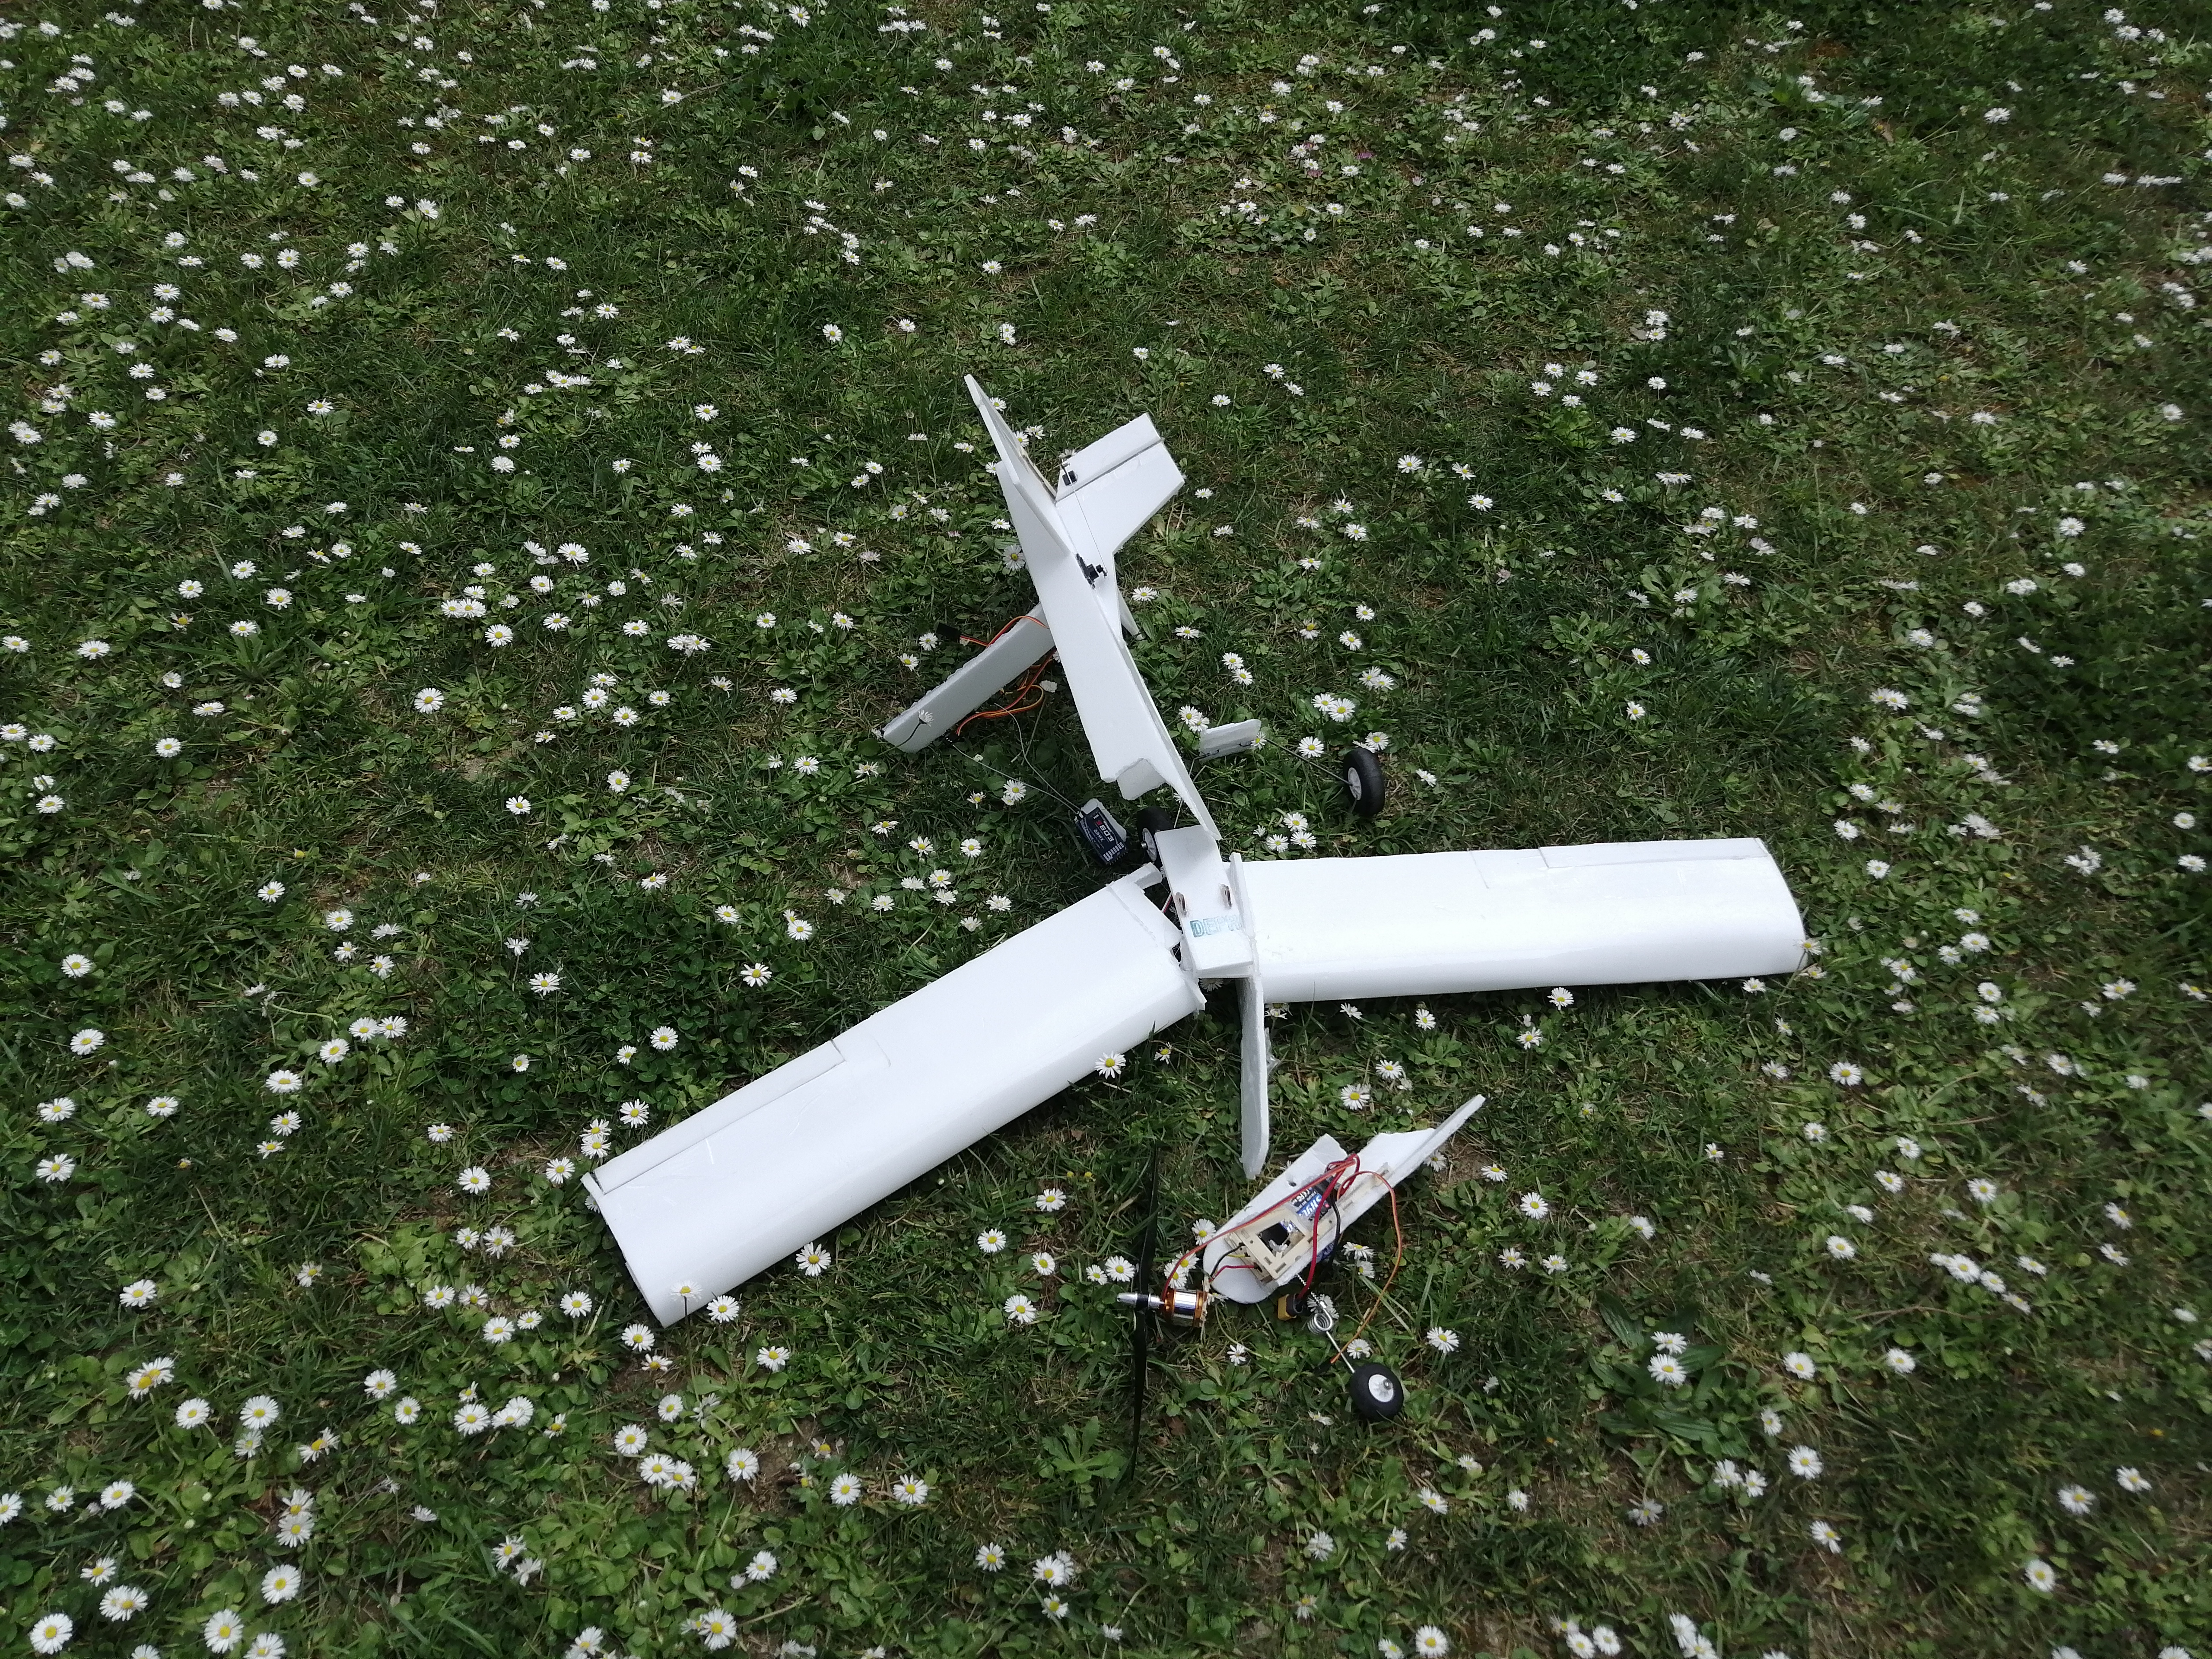
Here you can see it laying on my backyard: the gear had been ripped off the fuselage, the motor mount was destroyed (ironically the prop survived both crashes!), the wing broke in half, and the overall structural integrity was (obviously) critically compromised.
I blame the receiver, but i could very well be something else (maybe ESC AMP? even though that ESC used to fly on a 5ch Cessna 182, which drew much more power than this plane so i see it very unlikely).
Anyway, at this point the plane was pretty much unrecoverable, at least for my standards, so I decided to leave it in my garage to be used as a "bank" for spare parts....
If you have read this, thank you very much for your attention, and a special thanks to Josh Bixler and to FliteTest for having introduced me to the amazing world of flight!!!!
Don't forget to comment and write what you think about my plane!
Have a nice day!
Around summer '20 I decided to start building a RC plane: at first, I wanted to make a 1m wingspan, low wing, sport-style plane made out of depron (as we don't have Foamboard here in Italy) so I started drawing some sketches, and after a couple of days I ended up with a pretty decent project of a plane (it looked liek a mix of a F4u Corsair and a P-40 Warhawk). Anyway, I started building it by tracing an upscaled version of the plans on my depron sheets, but soon enough I realized that the project was way too difficult for my building skills, so I decided to change plans and to build a high wing, trycicle landing gear, trainer-like airplane.
I had a lot of things to do in the summer, so the only part that I have managed to finish was the wing: it had a wingspan of 1m, a clark-y airfoil (i cut around 10 clark-y formers and I hot glued them on a sheet of depron foam, which i then folded over the formers) and it was reinforced by a spar made out of five depron strips as long as the wing, which i hot glued together so that the spar was formed by three strips stacked one over the other and two glued vertically on the sides (the spar was held together with Hot glue reinforced by foam safe CA - possibly not the best idea but still - and its desing was inspired by the ones shown on the YouTube channel "Experimental Airlines").
After that, summer ended and I had to go back to school, so I didn't have a lot of time to spend building RC planes and my wing just sat in my garage for a very long time. Then, during spring break '21, I had some free time and I decided to pick up my project and I started building the fuselage and the horizontal and vertical stabilizers.

Here you can see the finished wing (as you can see the ailerons were cut into the wing's structure and they were not extra flat surfaces) a semi-finished fuselage with all the electronics inside. If I remember correctly, I had mounted a 1100kV motor and a 1045 prop, but I'll have to check because I can't quite remember. It was all powered by a 2200 3S LiPo, which was kinda hard to fit but in the end i found a way and it fit very well (the CG was perfect as well!!).

I have used a scrap piece of wood to reinforce my horizontal stabilizer. In this pic you can see the receiver as well (the little black thing on the big black thing), which will cause some problems later.
After that I started building the vertical stabilizer and the gear assembly (it had a steerable nose wheel). Note: all the control surfaces were hinged by some duct tape reinforced by a thin layer of hot glue (I learned the technique from Josh Bixler's building videos


And this is the finished product! I had also built a battery hatch (the foreward upper part, parallel to the ground), which was kept in place by a BBQ sqewer that passed through a set of two alligned holes on the sides of the fuselage (one for each side) and two wooden "rings" glued to the lower part of the hatch.

here you can see the battery compartment in detail. You can see the wooden rings glued on the battery hatch. The receiver isn't seen from this angle as it is placed "behind" the wing, with its antennas forming a 45 degree angle.
At this point everything was ready and it was time to fly!!! here you can see some pics of the plane in flight.


The plane flew very well, almost no trimming needed, but unfortunatly the receiver was very cheap (that's what you get when you try to cut corners and save up on important parts!!!
and and it kept losing signal: sometimes after a couple of seconds it got the signal back, until it didn't.
The plane crashed and it broke into two pieces (the spar broke in half as well, in the center). I don't have any photos of the aftermath of the crash, but after all it wasn't so bad so I decided to build back the plane; in the photo below, you can see it sitting next to my first scratch-built project!

It was now time to fly it again: this time I tried in a different field, far away from the telephone tower i flew next to the first time, but I didn't change the receiver. Once again, the signal was very poor and the plane crashed again, this time with far worse consequences.

Here you can see it laying on my backyard: the gear had been ripped off the fuselage, the motor mount was destroyed (ironically the prop survived both crashes!), the wing broke in half, and the overall structural integrity was (obviously) critically compromised.
I blame the receiver, but i could very well be something else (maybe ESC AMP? even though that ESC used to fly on a 5ch Cessna 182, which drew much more power than this plane so i see it very unlikely).
Anyway, at this point the plane was pretty much unrecoverable, at least for my standards, so I decided to leave it in my garage to be used as a "bank" for spare parts....
If you have read this, thank you very much for your attention, and a special thanks to Josh Bixler and to FliteTest for having introduced me to the amazing world of flight!!!!
Don't forget to comment and write what you think about my plane!
Have a nice day!


