So I bought a cheap 40w laser....

Grauwulf

Member
Doing two passes... that's something I would not have thought of to try and eliminate the undercutting! That's got to be my biggest pet peeve about using the laser cutter for my flight test kits. I'll have to fiddle with that to see what I can come up with for the laser cutter that I have access to.
 

Camperinho

New member
Did you already try to cut some FT plans? I bought myself a K40 too and tried to slice the FT LongEZ parts to fit the machine. However I am struggling with those SVG's files and lightburn, as the generated SVG's with photoshop / illustrator lose all color information and in inkscape I am just not getting on a proper path to slice them.
 

jhitesma

Some guy in the desert
Mentor
The only FT plans I cut so far is the mini firewall...and I think I may have messed up the scaling on that. I don't really plan on using the K40 for foam, I have my needle cutter on my MPCNC which I really like for foam since it gives nice clean cuts with no undercutting like the laser does. I will probably still dial the laser in for foam just because it's a nice alternative for smaller parts...but I don't really plan on cutting any planes with it.

I have made a little more progress:

20181102_082849.jpg


Picked up a 10k 10 turn pot off e-bay that comes with a nice counting dial (so you can tell what it's set to) that also locks (the little lever on the side) as well as a digital voltmeter. I'll be wiring these in across the power connections so I can control the max power from here and then let my gcode scale down. Right now I have to keep my power settings in lightburn under about 60% or the ma's go over what I want to pull on this tube. But once I dial it in so 100% from LB gives the max ma I want to see I should be able to have finer control over greyscale for engraving (not that I plan on doing much engraving...but I do want to try just for fun.)

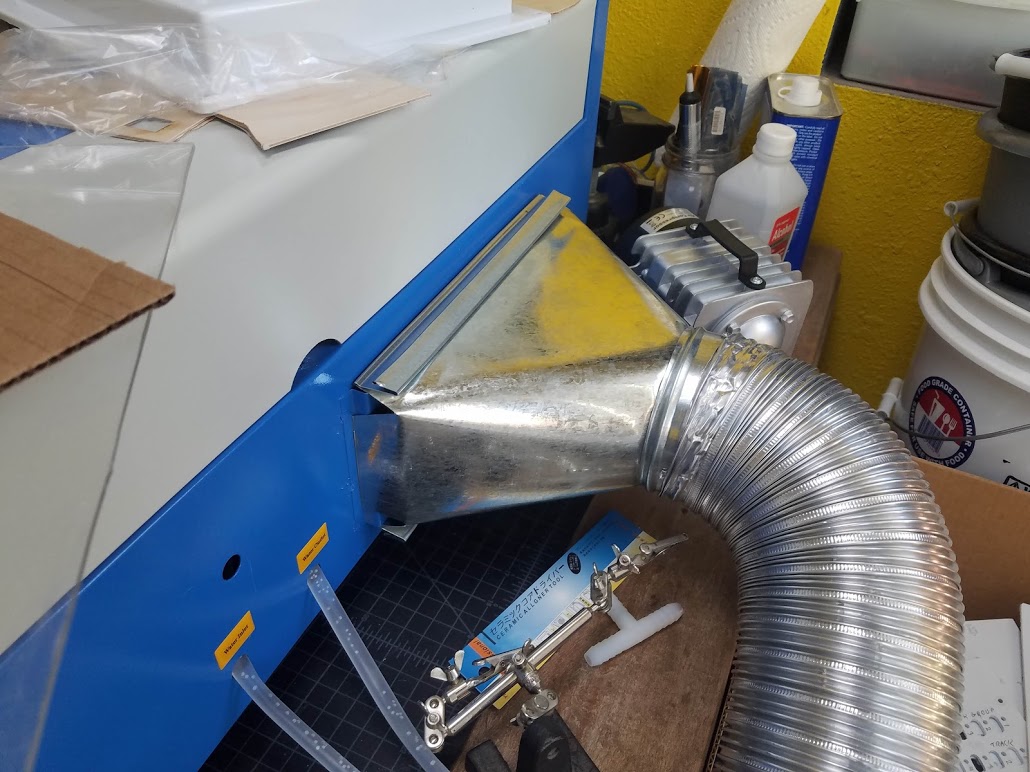
Also testing the alternative exhaust setup I rigged together. This is the register I found at the local hardware store that fit with just a tiny bit of bending:

20181102_082856.jpg


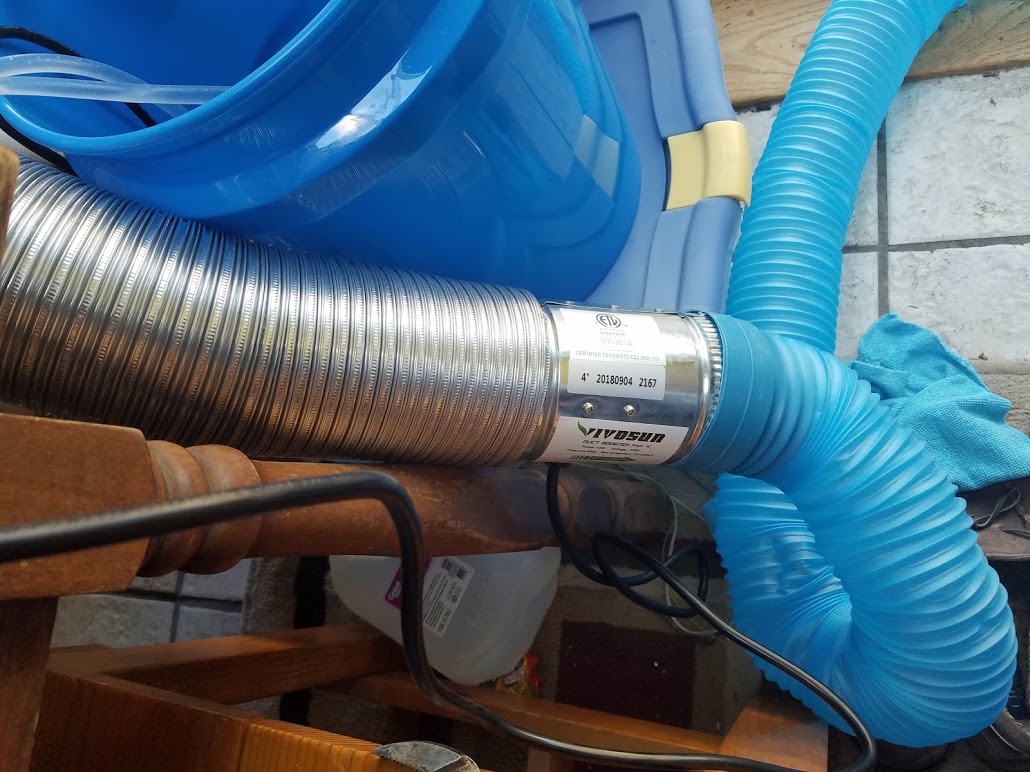
As you can see it's not airtight...but it still seems to work better than the stock setup. For a fan I'm using a $12 100CFM duct booster I got off Amazon:

20181102_082901.jpg


I need to do some tests to see if it works better as a push or pull - for now it's in the middle so it's half pushing and half pulling as a compromise. Don't think it does any worse than the stock setup so far...but also not convinced it's much better. The little 4" booster fan may not move enough air. But higher volume fans were significantly more expensive so I figured I'd try the cheap $12 option first ;) I also have to pick up a bit more duct so I can reach the existing vent just around the corner from where the machine is currently setup.

I also finally installed the lightobject air assist head and new larger higher quality lens. Oh, yeah, I also confirmed that the stock lens WAS installed upside down from the factory - they should be flat side down and mine was like many others flat side up. But that doesn't matter since the stock lens didn't fit in the lightobject head so I had to install the larger aftermarket lens. It's focus is a bit different though so I haven't really tested it's abilities yet.

Just haven't had a lot of time to mess with it since it's too loud to use after my daughter goes to sleep (we have a 1,000 sqft single story house and she sleeps with her door open - the only room I can really make noise in after she goes to sleep doesn't have room for the laser cutter in it.) So I can't really test much on week nights after she's asleep....and before she's asleep I'm usually busy helping with her homework or cooking dinner or taking her to school or girl scout events. So weekends are when I have time and weekends we're usually pretty busy as well. So progress is slow.

On the upside, I may have figured out a long term solution for where to keep this thing once I have it dialed in. Some friends of mine started an artists co-op a bit over a year ago and they've offered to let me keep it setup there. I offered to let them use it in exchange but they said no need they'd feel better with it only being used when I'm there anyway. They're only a few blocks from my house - but it's not as convenient as having it here so I'm not sure yet. Good to know I have an option though once it's finished and I want my dining room table back if I haven't come up with a better solution by then.
 

jhitesma

Some guy in the desert
Mentor
Did a bit of playing over the weekend. Still haven't wired in my analog power control or aligned the mirrors...but wanted to give the new lens a bit of a try.

Turns out the focus is higher not lower with this lens...in fact it's high enough I'm a little worried about the head being able to clear the material. I'm surprised as it's a 2"/50.8mm focal length lens which is what I thought the stock lens was as well. I had to raise my cutting bed about 6-7mm from where I had it to get into the focal point. (I still need to work out a more permanent bed as well, for now I'm just resting a piece of cardboard on top of the stock bed mounts and have a layer of DTFB on top of that to get to the focal point.)

I haven't yet swapped to the upgraded mirrors...though inspecing the stock mirror while swapping the laser head I'm really itching to now. Wow is the stock mirror iffy. At first I thought it was dirty...but it's actually just a really uneven coating with a number of flaws. I didn't get any photos of it...but...yeah it's pretty bad.

I also haven't aligned the mirrors yet - I was waiting on a new pair of safety goggles before I did...but I'm also waiting on a chance to do it when my daughter is out of the house just out of an abundance of caution. I can't really do it when she's asleep because it's just too loud running the machine.

So with the machine still in barely working order I continued to do a few tests for fun.

After a couple of test cuts I got DTFB cutting about as well as I think it's going to:
20181103_180724 (1).jpg


I still prefer my needle cutter since it has zero under cutting...but this seems to be about the same as the under cutting I saw on the quick build kits I've tried. This was two passes at 110mm/sec and 30% power. I could probably keep fiddling to get it even better...but since I don't really plan on cutting foam board with this very often if at all (unless I expand the size of the machine...and even then I'm not sure.) I'm calling this good enough for my needs.

Next I gave engraving a bit of a try. I haven't had any luck at all with greyscale engraving in lightburn. Not sure what I'm doing wrong but it doesn't fire the laser at all at any point when I enable greyscale. So I must still be missing something. With dithering though I was able to get surprisingly decent results on my first try:

20181103_180640 (1).jpg


The original image wasn't the greatest:
katie-face.png


And it seems like the dark parts got a bit over exposed...but overall for a first try I'm pretty happy. It may look better done larger so more detail would should. Hard to tell from the photo but this test was only about 1" across.

And my cut around it wasn't quite powerful enough to get through the 1/8" ply. It was just a random guess anyway...and I really want the air assist hooked up before I push cutting things too much more.

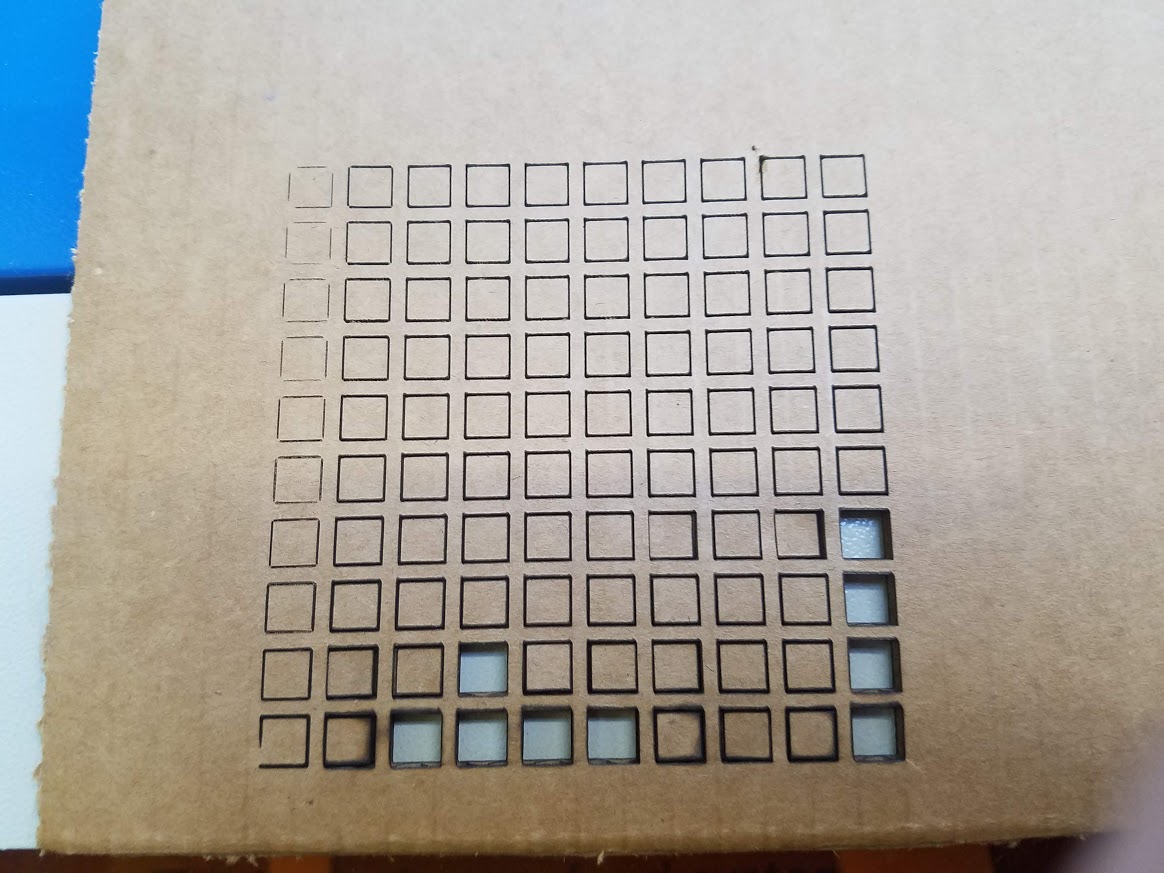
Even so I decided to do a few power tests. In lightburn I did a 10x10 grid. The cut itself is setup as 20mm/sec@60% power (which maxes out at about 15ma - I could push it a bit higher but I'd rather treat the tube gentle and try to give it as long of a life as possible) I then used the shape properties to change the power percentage starting at 10% on the left and going up 10% each square to 100%. Note - this is % of the actual cut setting. So it's 10% of 60% for the left most squares. Once I have my analog power control in I can set my max power limit with that and use 100% for the base setting here which would be less confusing.

Going up I increased the speed by 10mm/sec each row. So it starts at 20mm/sec and goes up - the top row is 110mm/sec because I suck at math and didn't think this through then didn't want to start over to get 10mm/sec-100mm/sec range to appease my OCD :p

I stuck in a piece of "standard amazon box cardboard" and let it rip:

20181105_073943.jpg


My daughter had fun pushing out as many of the squares as she could. But off the machine only the 20mm/sec@30% power piece actually fell out by itself. A few of the 100% squares and the 50%, 60% squares came out with a gentle touch - the rest she had to actually push on.

But this doesn't make much sense to me. Why would some of the higher power cuts not do as well? Something just seems really non-intuitive here. I'm not going to loose any sleep trying to figure it out until I have things more dialed in. Maybe the mirror alignment means that at some points it's not getting full power.

Also - note the uncut corners on the lower power squares. I think I may have too high of accelerations in smoothie causing the motion to be quicker than the laser can keep up with at lower powers....still need to experiment more to figure that out.

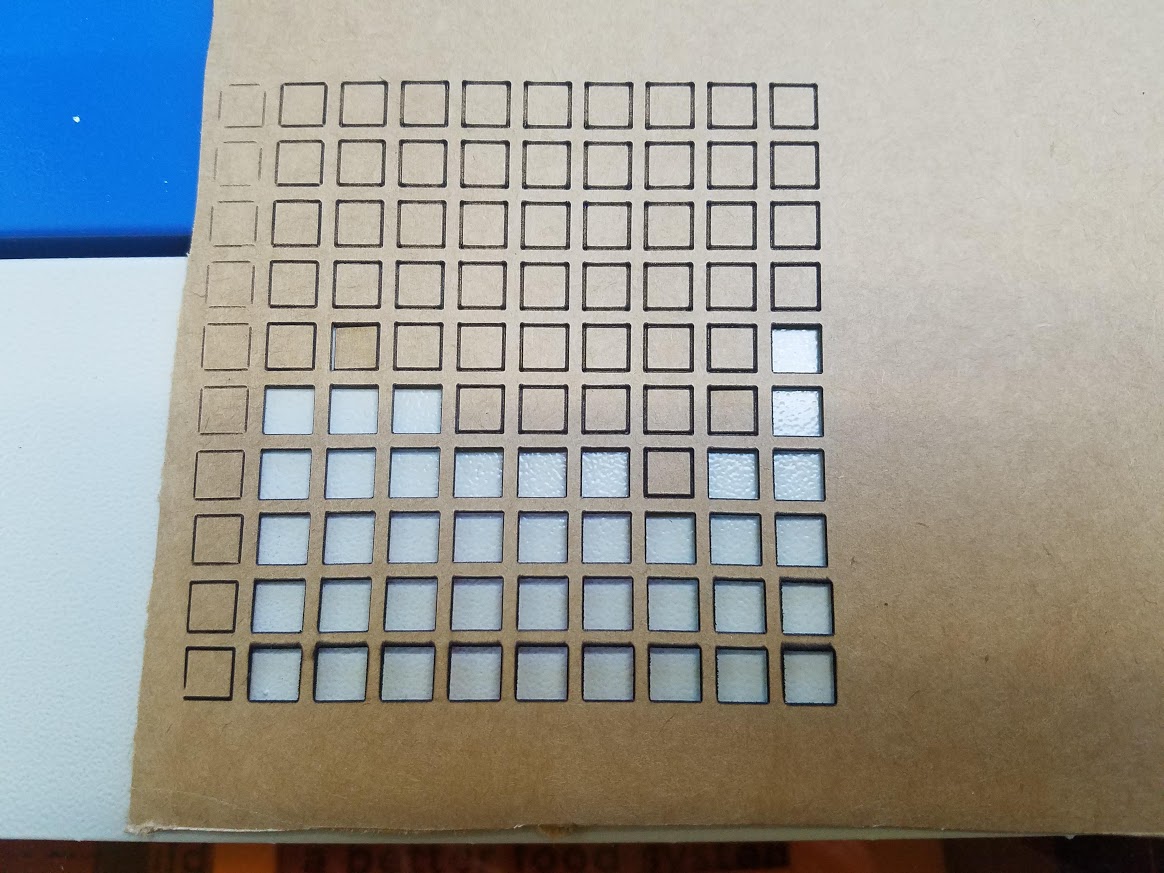
I repeated the same test on a piece of single thickness Jimmy Dean biscuit and gravy bowl box (I had a craving and didn't want to take the time to make it from scratch - don't judge!):


20181105_074004.jpg


As I expected this was able to cut reliably at lower powers and higher speeds - though it's still showing a lot of the same "issues" with higher power cuts not always being better. Also my daughter didn't get to try and remove any of these yet. Most of them just fell out by themselves...but I did tap the sheet against the table a few times to encourage more to drop. I suspect that quite a few more of these would be easily removed as well.

I did one more power test like this on some frisket material. That did NOT go well. The slower speeds were way too much and before the 5th square was cut I had to stop it and put out the fire. Will have to do a grid with faster speeds and lower powers before I try that again!

I also did a test cut on some 3mm thick white craft foam. With my 3watt diode laser I can cut 3mm black foam beautifully at fast speeds and low power...but even at it's highest power and low speeds it couldn't even mark white foam. The CO2 laser had no such issues. In fact instead I had the same issue I did with DTFB in that it cut too well. Will need the same kind of faster lower power multiple pass cuts to do it accurately without melting a 1mm wide kerf. I didn't get a photo of that though so you'll have to use your imagination.
 

kilroy07

Legendary member
Two pass foam cut looks good, yup, that's probably about as good as you are going to get with a laser. ;)

The slower speeds were way too much and before the 5th square was cut I had to stop it and put out the fire.
Was this with the air assist on? (That'll help with flaring up, maybe not stop it, but help)
 

jhitesma

Some guy in the desert
Mentor
Was this with the air assist on? (That'll help with flaring up, maybe not stop it, but help)

No, still no air assist. I've installed the new head but haven't hooked up a hose for it yet - very high on my list of things to do...but having too much fun burning stuff to bother just yet :D I know it will make a big difference so I'm really itching to do it...but I don't have the right size hose and haven't been able to drag my daughter to the hardware store to look for any yet.

Even so...the frisket material burned so quickly and so well I doubt the air assist would have saved it. It needed much higher speeds and lower power....and even then I'm not sure it will be laser friendly, might be too flammable for it. But I'll try again once I've got things a bit further along.
 

jhitesma

Some guy in the desert
Mentor
Been crazy busy with life the past month so haven't had much time to deal with the laser. Shortly after my last post I did get my air assist hooked up - so at least I have that going for me. But it's not yet fully integrated (i.e. I haven't added any extra relays and switches to control it I just plug it in by hand when I need it.)

I also picked up a plastic hood from Amazon that is a bit smaller and cleaner than the metal one I had from home depot:
20181106_135349.jpg


I didn't do the cleanest job with the weather stripping...but it still seals a lot better than the sheet metal one did.

But I haven't had time to wire in the current pot and voltage meter yet so haven't really touched the machine for most of November. I'm also still debating what to do about the work area. I picked up some expanded metal to use since it's cheap and locally available (unlike honeycomb) but still need to come up with a way to make it's height adjustable and make sure it sits level:

20181106_071652.jpg


You'll probably also notice I used some nice subtle hot pink duct tape to seal up the chamber more and assist the exhaust fan.

So far the cheap $12 exhaust fan seems to do better than the one it came with...but I'm probably going ot have to pony up for a bigger higher CFM setup if I keep this thing in the house long term.

Hoping I'll have time to do some more work on it later this month - but it's a pretty busy month too so not getting my hopes up.

Plus I got suckered in by a black friday sale and finally put my money where my mouth is and bought the 3D printer I've been recommending to other people despite not owning one myself:
20181130_141154.jpg


Yep, I joined the i3 MK3 club :D I don't anticipate it taking too much time away from the laser though - the kit is remarkably well done so should be a rather quick build. The only reason it may take more than an evening is I'm probably going to let my daughter help assemble it (if she wants to.)

I also splurged and went with the MMU 2.0 add on (though it won't ship until February) so I've got that to look forward too as well.

Now the big question is will I keep my old FolgerTech 2020 i3 as a backup....or strip it for parts to try my own design ideas...or sell it to someone local....
 

jhitesma

Some guy in the desert
Mentor
My daughter and I started assembling the MK3 last night. She was actually excited to help which got me even more excited about the project :D

And she actually did a really good job helping on the frame assembly. But when I had to take a minute to sort out parts for the Y axis assembly she got distracted by the TV and wasn't as big on helping anymore. I kept working on it after she went to bed and got both the Y and X finished but called it a night before tackling the Z. This morning she was excited to see how far I got and is apparently looking forward to helping with the Z after school tonight.

I have to say I'm blown away by the Mk3 so far. The packaging on the kit is astounding, even little details like the boxes show signs of extra thought being put into them (most of the parts boxes are fancier boxes with double walled sides so the flaps have slots to fit into and you don't risk getting them caught on the contents in the box when closing the box. A full color printed assembly manual!? Woah. I haven't had the pleasure of enjoying a kit this detailed and well thought out since Heathkit back in the 80's!

And the machine itself is impressing me more than I anticipated as well. (After working on the K40 which was even jankier than I expected it's such a joy to be working on something that's better than I expected!) My first printer was a FolgerTech 2020 i3 - mostly because of price...but also because I was never a fan of the all thread and plate frame of the official i3 and assumed the 2020 frame would be stiffer and easier to square. The Mk3 finally replaced the all thread with 2020 - and the plate is way beefier than I expected. This thing is SOLID. But it's also more compact than my 2020 i3. The PINDA probe is also way smaller than I expected which was a surprise. And that's not even touching on the electronic and software upgrades Prusa has done. I really can't wait to get this thing fully assembled and get it printing!
 

kilroy07

Legendary member
Maybe someday I'll be lucky enough to get a "real" Prusa!
I'd love to know your opinion of the build plate, probably the update that interests me the most.

Hope to see a Benchy tonight ;)
 

dkj4linux

Elite member
Congrats, Jason, on the Prusa purchase. You'll love it! I still have my FolgerTech 2020 I3 but, in truth, the Prusa is so much easier and less fiddly to use, I could easily do without a "backup" printer anymore. I've slowed down a lot and the Prusa easily handles anything/everything I need to do now. Good to hear from you! -- David
 

jhitesma

Some guy in the desert
Mentor
So bad news, something I ate did NOT agree with me and I spent a good portion of yesterday curled up in a ball or in the restroom. Good news...that meant I got the day off work. I had the printer about 90% finished Tuesday night before I went to bed. Just had to connect and route all the wires. So yesterday once I started to feel a bit better I wrapped that up and ran my first prints.

I was already blown away by the MK3 just by the thought that went into the packaging and kitting. And as I started to assemble it I got more and more impressed. Once I fired it up...wow.

The way it self-calibrates and walks you through it all is amazing. I did have to adjust my PINDA once since I had it a hair too high the first time. And I did have to do the z-adjust 3 times before getting it low enough (and could probably go a little lower - 1st layers are better than I had been getting with my old printer but look like they could be just a hair better still.) The removable build plate is great - and the PEI is working better than when I tried it on my old printer.

I cranked out the PRUSA logo as a quick first print and it was flawless. Then fired up the prepared tree frog...I had tried printing that guy many times on my old printer but never got a complete print - always had a leg come off the print bed even with a big brim. But with the mk3 it came out amazing!

Then I pulled out my old favorite Make magazine negative space tolerance test. Sliced it with all default settings and let it to. When I pulled it off the bed all but the last two pins literally fell out. The 2nd to last pin took just the slightest touch to dislodge, and the 0.2mm pin popped out with a lighter touch than bigger clearances sometimes took on my old printer!

With that success under my belt I decided to see if it was the beautiful prusa filament giving my success or the new printer. I pulled out a roll of MakerGeeks yellow that had always given me issues. It would jam, wouldn't stick to to build plate well, and was a year and a half old without having been stored particularly well. It was also a very short spool and ran out halfway through the next negative tolerance test (so I got to test the mk3's ability to deal with that!) swapped in some translucent blue (which I was afraid would have issues with the filament sensor...but worked great!) My two color negative space test with wonky filament came out just as good as the first test with the Prusa filament!

Oh - and this thing is freeky quiet. The fans really are the loudest thing on it. Though once I moved it into it's new home on my quick and dirty DIY printer table it doesn't really seem any quieter than I had got my old folgertech to be with the various upgrades I did to it. Apparently the loose board I'm using as a top for my table makes for a pretty good drumhead and is amplifying the sounds. So...need to make some time to finish that table properly and quiet things back down!

20181205_215725.jpg


I really like how it has a physically smaller footprint than my old printer...but a considerably larger build area!

20181205_215744.jpg


Not bad for the first day :D Also - love the print quality and texture on the printed parts. I had seen a few reviews that were critical of the print quality on the printed parts but mine were all amazing. I can't wait for the powder coated build plates to be available again so I can get one and achieve that nice pebbly surface finish. Though the smooth from my current sheet is quite nice as well.

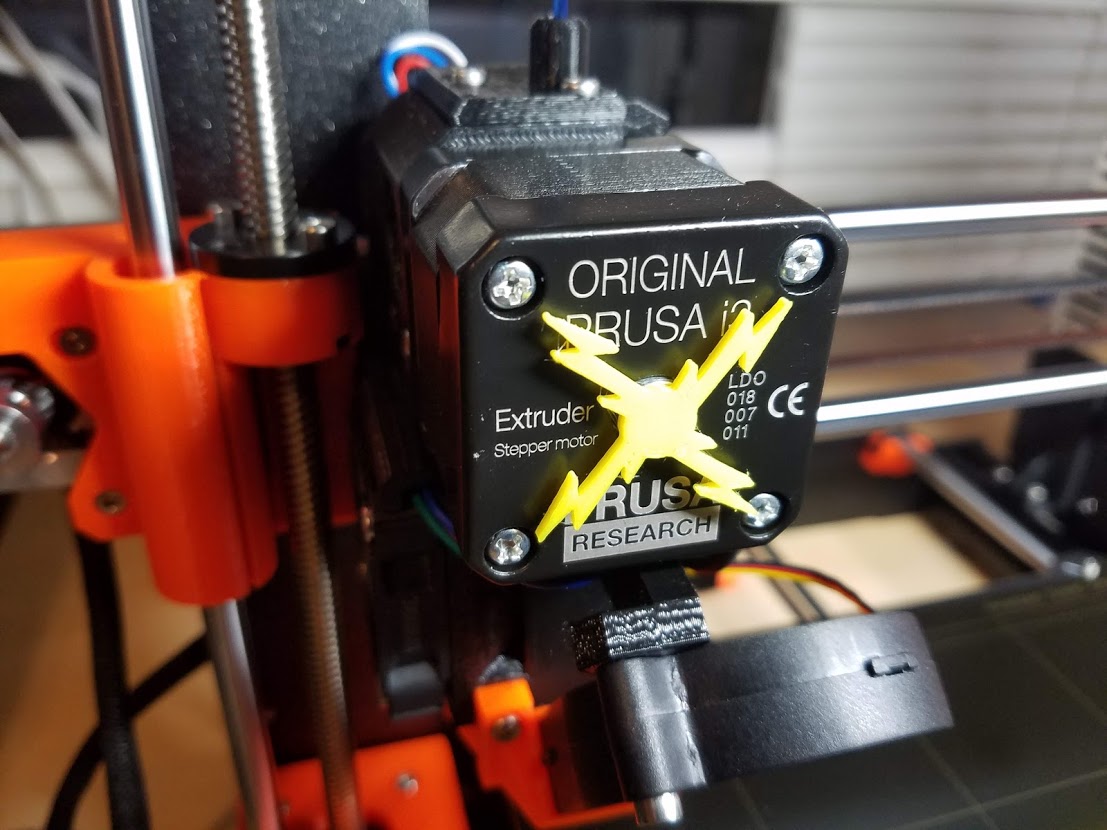
Already used it to print a few small upgrades for itself as well. Namely the pi door and support frame since I also picked up a Pi Zero W to install in it for octoprint - plated them up together and they came out perfect. So happy to be able to print more than one item at a time again (my old printer just hasn't been reliable enough lately to risk it.) And a couple of extruder motion indicators:

20181205_220005.jpg


I did a couple of them in different designs, been meaning to do one for the old printer for awhile anyway.

Overall I'm just totally blow away by this printer. Looking forward to trying a few prints that always failed on the old printer and see if I have better luck now. And excited about rebuilding my MPCNC with the latest burly upgrades now that I have a printer I'm willing to tackle the 12 hour plus prints on that those parts will require!
 

jhitesma

Some guy in the desert
Mentor
Oh - to be fair I did have a few very minor criticisms of the mk3. The electronics box is just a tiny bit small for the amount of extra wire I wound up with. Would have been nice for the box to be a hair bigger or the wires to all be an inch or two shorter.

I'm also not sure if I'm a fan of the textile sleeves on the wires, would have liked a short video showing the best technique for getting wires in and wrapped with that since I'd never seen it or worked with it before.

And I'm not huge on the LCD being out front like that, I liked having mine up on top and out of the way. I also prefer the graphical LCD but Prusa has done a good job with the 4 line setup they choose to go with.

I also hear that the fan PWM isn't optimal on the stock firmware and when printing PETG (which I haven't tried yet) the fan has an audible whine as a result. But it's an easy fix - just change one config in marlin - except that means rebuilding the firmware which is a bit of a pain.

I've also heard a few complaints about the power supply not working great on 110v and burning out when doing high temp materials...so I'll be keeping an eye on that.


One other thing I didn't realize about the Prusa...that orange. Holy cow. You really have to see it in person because it's out of gamut on just about any camera or screen. It's VERY bright orange and photos do NOT show it well.
 

kilroy07

Legendary member
:rolleyes:
You KNOW you're gonna make me petition the wife for an advancement on my allowance now don't you?!! :mad:
:LOL::LOL:

I'm glad I'm not the only one who's had issues with Makergeek... I have 4-5 spools I was going to toss on Ebay this week in fact!

Maybe once we get the farm rented out I can "Justify" it...
So, just to rub salt into my wounds, what was the black Friday special? (How much of a deal did I miss out on?)...

Thanks for the review, I had heard the nothing really compares to an original, nice to know the hype is in fact warranted.
 

jhitesma

Some guy in the desert
Mentor
:rolleyes:
You KNOW you're gonna make me petition the wife for an advancement on my allowance now don't you?!! :mad:
:LOL::LOL:

Just doing my part :D

I'm glad I'm not the only one who's had issues with Makergeek... I have 4-5 spools I was going to toss on Ebay this week in fact!

Yeah, I've gone through a lot of their filament but think I'm done with it. Just too inconsistent and most of it I can only get to print without jamming if I pre-oil it which I don't want to have to do on the new machine.

But....I got sucked back into their 2 year monthly geekbox anniversary special (which turned out to be a $100 gift certificate instead of an actual box.) I was pretty bummed by that because honestly shopping their site is terrible. Hard to find anything in stock and even if it is in stock that doesn't mean they'll actually ship it. The only thing they seem to reliably be able to ship are the grab bags which means random colors.

I wound up using the $100 GC on Cyber Monday since they were running a 50% off coupon that could be used in conjunction with the gift certificate. So I ordered $200 worth of grab bags which only cost me $40.

Except...I haven't received the November or December geekboxes that I paid for before re-canceling my subscription....and the big order of grab bags I placed on Nov 21st is still unprocessed :rolleyes: So who knows when or if it will ever show up. If it does show up I'll have 10 rolls of mixed PLA/PETG in random colors. But I think they may have bit off way more than they could chew with their specials and that $100 gift cert so we'll see.

So, just to rub salt into my wounds, what was the black Friday special? (How much of a deal did I miss out on?)...

It wasn't that great of a special, just free shipping. I don't even know what normal shipping is. But free shipping from eastern europe with 2-3 day delivery was enough to push me over the edge ;)

Thanks for the review, I had heard the nothing really compares to an original, nice to know the hype is in fact warranted.

I had my doubts. There are so many good budget priced machines out there now it seems hard to justify one this expensive. But so many things about it are so refined and well thought out that it really is a much better machine than I anticipated.
 

Fyathyrio

Member
Prusa shipping is $70 or $80 on a Mk3 kit, so you saved a good amount.

A quick wipe with blue Windex works awesome with PETG on the smooth PEI build plate. Don't use alcohol or acetone alone before printing PETG, gotta have something else as a barrier or the print will pull the PEI off the metal. PETG has quickly become my favorite stuff, I haven't experienced any of the issues you mentioned with mine. I like the finish and strength compared to PLA. I only want to print useful stuff, so I don't need all the pretty colors and decorative styles PLA offers, but it's nice for prototyping.

Downside of PETG is glue, almost nuthin' sticks to it. I just used Weld-On #3 for the first time in a structural 2 piece print, seems to have worked awesome. It's an adapter plate I designed to mount my 2.4GHz SpiroNet patch to my antenna tracker, and I'm confident it'll stay in one piece.

Prusa PETG works great, eSun has worked well for me too, just need to drop the temp 5 or 10 degrees. I just started a HUGE project in PLA, trying the Hatchbox stuff from Amazon and it seems to be working well one I dialed in the temps.
 

jhitesma

Some guy in the desert
Mentor
I figured shipping from overseas like that wasn't cheap :)

I haven't dug out any of my PETG to try on here yet. Looking forward to trying it but most of my PETG is a bit older now so I'm not expecting it to print very well. I haven't had any issues yet - just heard a number of reports from people who have. Mostly with fan noise...which I can easily see some people being more sensitive to than others. Since I still have considerably more high pitch hearing than most people my age I fully expect I'll be one of the people who can hear it and will wind up recompiling the firmware to change the PWM rate.

I will say that my old folgertech 2020 i3 still prints almost as well as the Mk3 does, and is almost as quiet. But...the Mk3 does this out of the box with no fiddling or experimenting. The 2020 i3 has taken 3 years of upgrades, tinkering, and tons of experimenting to find settings that worked this well. And the mk3 still has things like power loss recovery and skipped step detection/recover which the old printer doesn't.

The mk3 is pricey and you don't get a lot more print quality or speed for that price. But you do get a lot of quality, reliability, and convenience the value of which varies widely from person to person. 3 years ago I could never have afforded an actual Prusa and the experience I've gained from the 2020 i3 has been priceless so I don't regret buying it at all. Just saying that while I do highly recommend the mk3 I also would recommend lower cost machines to people who are a good fit for them.

Still debating what to do with the FT machine. My daughter has asked if it could be hers....so at least she's showing an interest....but it's not quite a 3rd grader friendly setup :D I'd much rather start her on the mk3. The old machine I'll probably strip down and then rebuild using ideas from the MP3DP (https://www.v1engineering.com/projects/project-3d-printer/) along with some of the changes I already did (Like using 2060 extrusion for the Y axis)
 

Fyathyrio

Member
I picked up a used food dehydrator like this off of Craig's List for $20 and cut the center out of all the trays. I dry my PETG filament and desiccant in it, toss in a ziplock bag, and it's good to go next time I print. Fits one wide spool or two skinny spools, I cook 'em for 4 to 8 hours depending on how long they were sitting out.
 

jhitesma

Some guy in the desert
Mentor
Well, it's been almost a year and I've overdue for an update.

But there's not much to update on - I haven't really touched the machine since last November or December.

Why?

Well....it's just a big pain to work on it on my dining room table. Like there's nowhere to put my notebook while controlling it. And I'm still debating if I want to try and get it working better as is or if I want to bite the bullet and just build a new motion system. The biggie though is ventilation and cooling. They're just a pain to deal with in the dining room. Yeah, I have a door right there to vent out - but that doesn't work in the summer when it's hot and the rest of the year most of the smoke just blows right back in. And the bucket of ice water got old fast. I really want to come up with a better cooling system.

So I finally dug in on making room in my back room. Spent a few weekends out there going through bookshelves got rid of a bunch of old books I'm never going to read (kept plenty more that I do plan to read someday) and a bunch of other random junk. So now I have room to get around back there again!

I still need to build a table to support the laser, which keep bringing me back to the debate of whether to support it as is - or start building something to make it bigger.

The big hold up is that the corner of that room I plan to put it in has a big hotel style A/C Heater unit in the wall. I haven't used it in almost 8 years since we tied that room into the main house HVAC (other than to turn it on from time to time to make sure it still works) so I want to remove it and put a vent in the wall for the laser instead. And it's just been too hot out to deal with holes in the wall like that :) But as of a few weeks ago temps have dropped and I've got a friend in town who's up for some projects - so that will hopefully be happening soon. (The friend is actually also looking for a unit like that one so swapping the work helping me remove it and patch the hole for the unit appeals to him.)

Which means there's a very good chance this will be moving forward soon. If I do get it moved into the back room with a dedicated vent I can live with the bucket of ice water for awhile...since at least it will be somewhere that I can run it at night after my daughter goes to sleep.

Besides...I really want my dining room table back. I've got some electronics projects to work on and need the space :D