Spitfire76
Well-known member
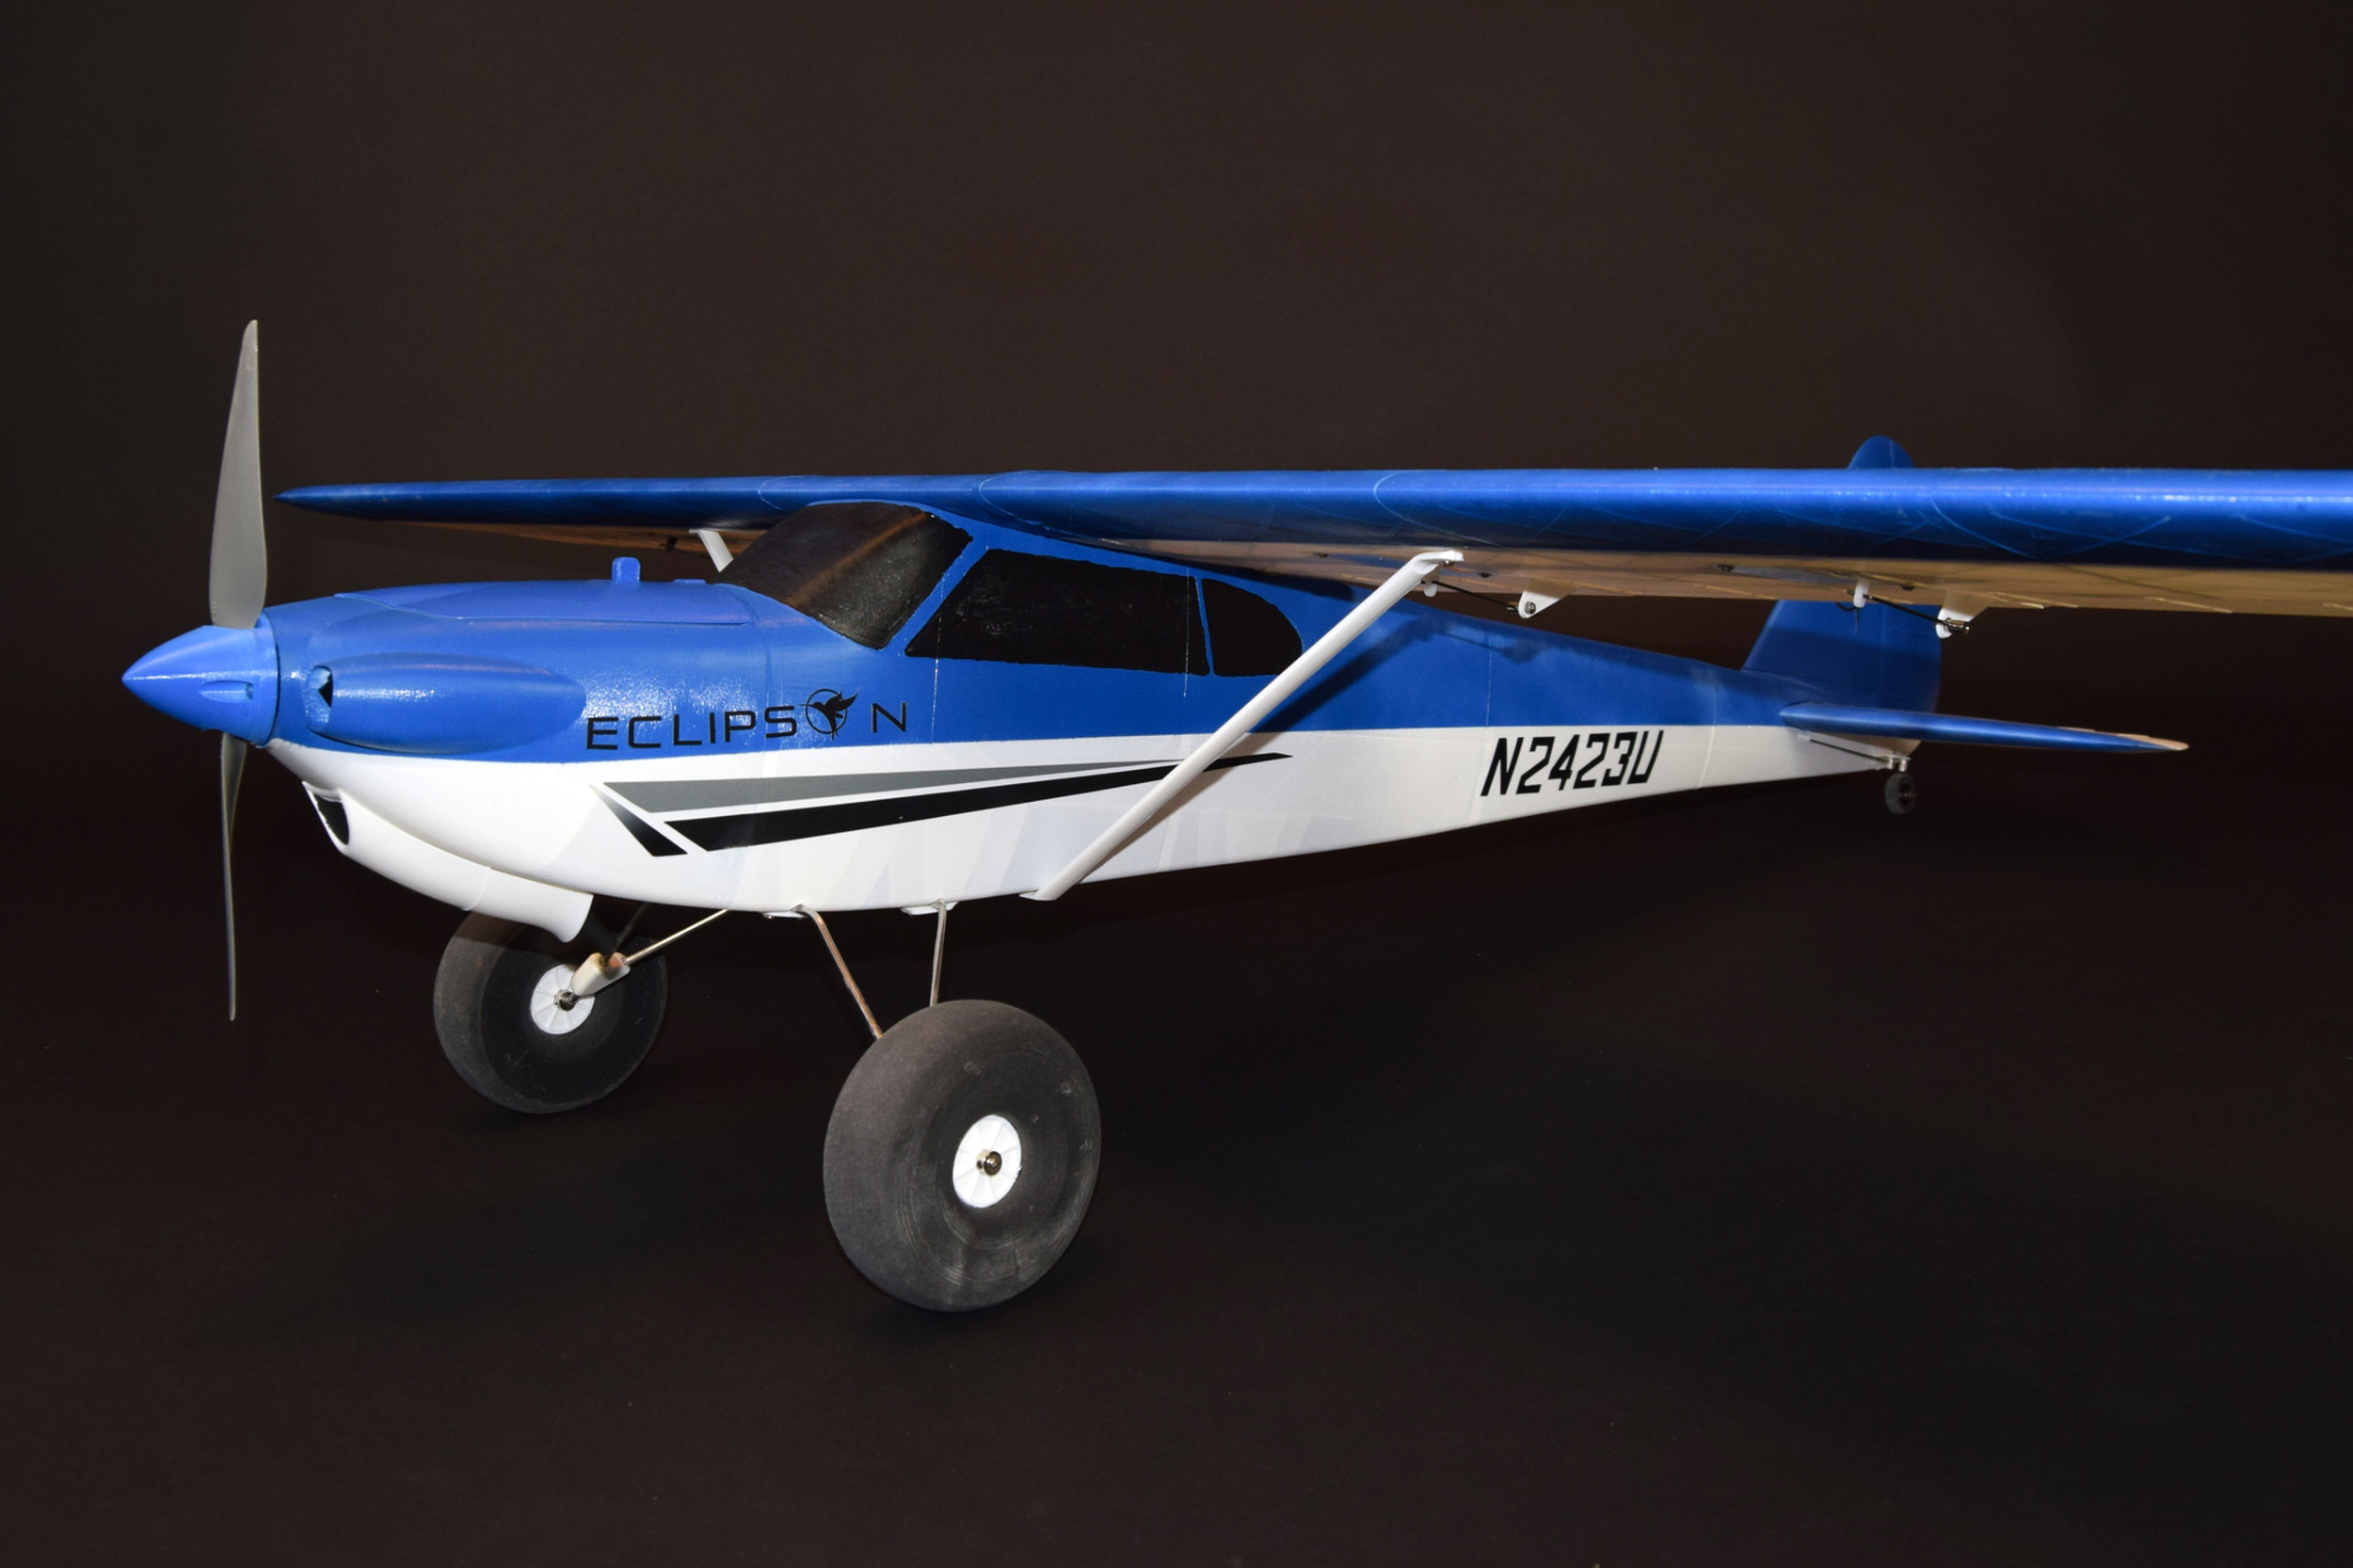
I've built and flown several 3dprinted planes from Eclipson including their original Model B but this one interested me as it was much larger with its wingspan of 1500mm/60in compared to the original model B of 1150mm/45in. Larger planes are easier to see and I understand actually easier to fly.
 www.eclipson-airplanes.com
I've also entered this build to the FTFC24: Buildruary Build-off Challenge along with several other 3d printed planes.
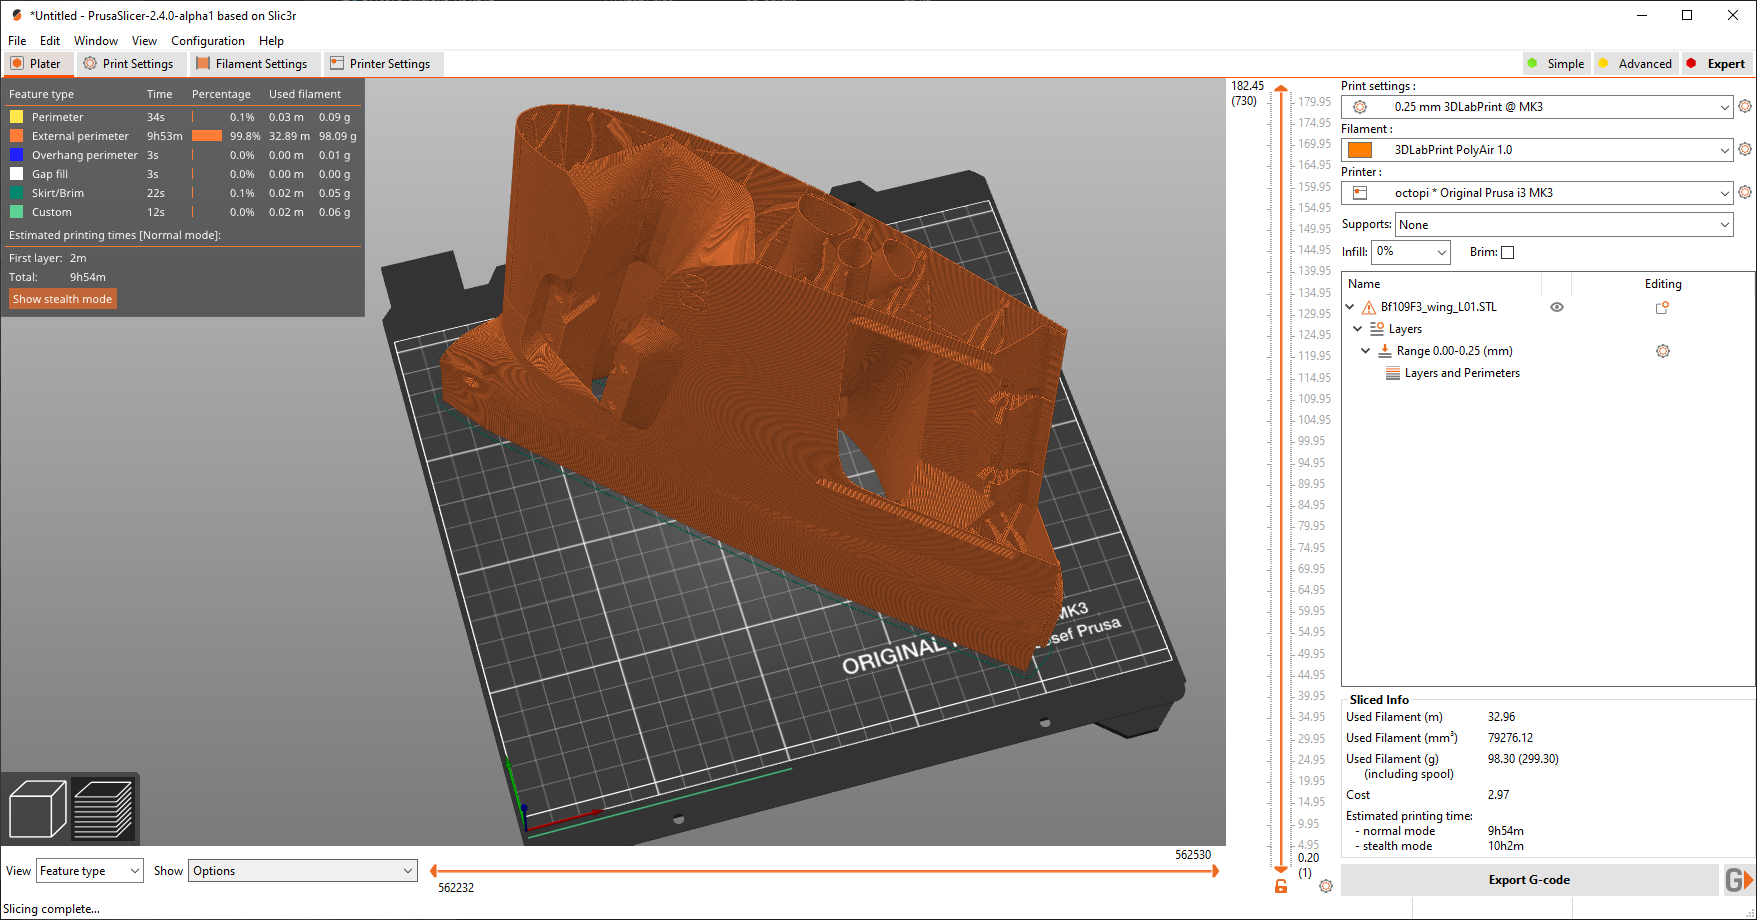
Fortunately the rules allow the parts to be printed prior to the beginning of the challenge (February 1) as printing 3d printed planes can take a really long time especially when they are this large. This is what I am using for printing the parts:
Printer: Bambu Lab P1P
Slicer: Bambu Studio
Filaments:
Eclipson model B XL/ 3D printed seaplane
www.eclipson-airplanes.com
I've also entered this build to the FTFC24: Buildruary Build-off Challenge along with several other 3d printed planes.
FTFC24: Buildruary Build-off Challenge
February is Build-Ruary Month! Hi All, Lets welcome another flying season, ready to go! Once Again, I challenge all here to turn February into Build-Ruary So Many Planes So Little Time: I, like most folk in this community, have a LONG build list of planes I would LOVE to build. Since I have...
forum.flitetest.com
Fortunately the rules allow the parts to be printed prior to the beginning of the challenge (February 1) as printing 3d printed planes can take a really long time especially when they are this large. This is what I am using for printing the parts:
Printer: Bambu Lab P1P
Slicer: Bambu Studio
Filaments:
- 3dlabprint Polylight 1.0 Cub yellow LW-PLA
- ColorFabb Verioshore LW-TPU (for tires)
- Bambu Lab PLA Matte White (for non LW parts)
- Bambu Lab TPU 95A HF Black (for hinges)
- Hatchbox PETG Orange (for motor mount)
BILL OF MATERIAL CHECK LIST
| Proposed | Have it? | Used | |
|---|---|---|---|
| Motor | Sunnysky 2814 1250kv | Y | FT-2814-1100kv (from crashed Scout XL) |
| Prop | Gemfam 8x6 | Y | Genfam 9x6 |
| ESC | Aerostart 50A | Y | FT-40A |
| Servos x 6 | Micro 9g MG90 | Y | EMAX ES08MA II 12G Mini Metal Gear Analog |
| Radio | 7 channels | Y | Radiomaster ELRS |
| Battery | 4s 2000mAh | N | Only have 3s 2200mAh |
| Gyro | None | to order | Aura 5 Lite |
| Wire for control rods | 1.2mm | Y | K&S 502 0.047in (1,19mm) |
| Wire for LG | 1 x 3mm | Y | K&S 507 0.125in (3.18mm) |
| CF Tubing 8mm | 1 x 500mm | Y | 1m long |
| CF Tubing 6mm | 2 x 500mm | Y | 1m long |
| Screws | 40 x M2x8mm | Y | M2 x 8 mm pan head/washer head self tapping |
| Bolts, nuts & washers | 2 x M3x30 | Y | M3x30 |
| Bolts, nuts & washers | 4 x M3x15 | Y | M3x16 |
| Linkage stoppers | on order | 1.3mm Hobbypark | |
| Wheel colletts | on order | Habbypark 1/8 | |
| Velcro | Y | Furry on battery) | |
| CA Glue & Accel. | Y | Bob Smith (Medium CA) | |
| Rubber band | Y |
Last edited: