
French
Construire Voler S'écraser Répéter
My wife’s three children — my daughter (6), my son (4), and me (36) — have recently gotten into Nerf blaster wars. We started building an arsenal of air powered plunger/springer blasters. Then I picked up the newest reskin in of the Stryfe flywheel blaster.

But me being me, I had to start tinkering. I knew I could make it better")
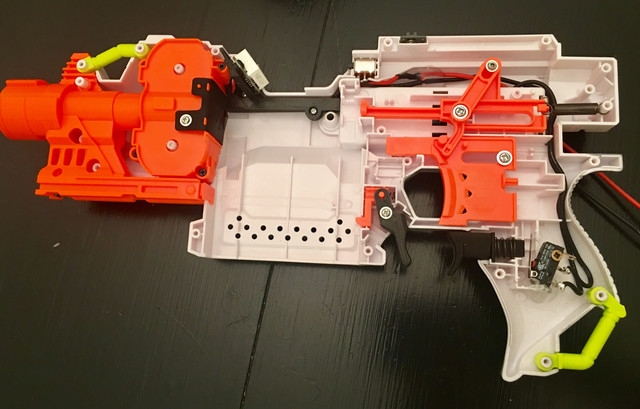
The blaster comes with mechanical and electrical safety locks (a magazine with darts must be inserted, the top door must be closed, etc.). It also comes with very tiny 22-24 AWG wire.
I started by replacing the 130 size brushed motors with upgraded motors. I also used silicone 18 AWG wire throughout.

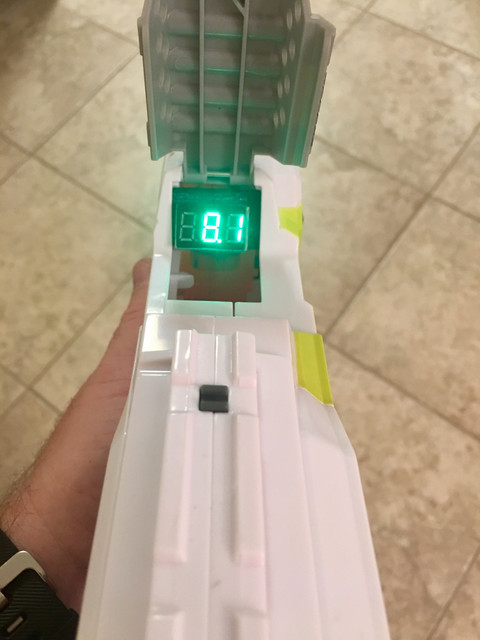
I knew I was going to use a 2S lipo to power the blaster, so I purchased a green LED volt meter and 3D printed an internal stealth mount for the meter to fit under the jam door.

I used the original three position switch for the jam door to wire the volt meter. It is only powered and on when the jam door is open.

I replaced the rev trigger with a more comfortable 3D printed one, and I replaced the rev switch with a much better microswitch.

Lastly, I replaced the magazine release trigger with a longer and more ergonomic 3D printed one. The 18 AWG wire runs to an XT30 in the stock battery tray (I had to cut out a few pieces of the plastic). From the outside the blaster looks completely stock, except the black rev trigger and mag release trigger.
When you open the jam door, you get a nice voltage readout of your lipo!
Overall it was a really fun project. I believe the stock blaster shoots between 55-60 fps. The new one shoots closer to 100 fps. Looks like this is Daddy's new blaster.
But me being me, I had to start tinkering. I knew I could make it better
The blaster comes with mechanical and electrical safety locks (a magazine with darts must be inserted, the top door must be closed, etc.). It also comes with very tiny 22-24 AWG wire.
I started by replacing the 130 size brushed motors with upgraded motors. I also used silicone 18 AWG wire throughout.
I knew I was going to use a 2S lipo to power the blaster, so I purchased a green LED volt meter and 3D printed an internal stealth mount for the meter to fit under the jam door.
I used the original three position switch for the jam door to wire the volt meter. It is only powered and on when the jam door is open.
I replaced the rev trigger with a more comfortable 3D printed one, and I replaced the rev switch with a much better microswitch.
Lastly, I replaced the magazine release trigger with a longer and more ergonomic 3D printed one. The 18 AWG wire runs to an XT30 in the stock battery tray (I had to cut out a few pieces of the plastic). From the outside the blaster looks completely stock, except the black rev trigger and mag release trigger.
When you open the jam door, you get a nice voltage readout of your lipo!
Overall it was a really fun project. I believe the stock blaster shoots between 55-60 fps. The new one shoots closer to 100 fps. Looks like this is Daddy's new blaster.
Last edited:


