80" PT-17: Flite Fest 2023 Community Challenge – Barnstormers!

wilmracer

I build things that fly (sometimes)
Mentor
So, after a long-stalled start I am finally ready to kick off my build for the Barnstormer challenge. Anyone that knows me knows there was only one choice for me to build. Some may remember this incident from a few years ago...


This plane was patched up and has been my favorite bird for years. She was lost last year to the oil-rig brownouts at Flite Fest, so now it is time to build back BIGGER!. Ben Harber (@Mid7night) and Dan (@SP0NZ) revamped the plans and I did a "quick" build video to walk people through building a 40" span version of this model


Now it is time to get rolling on my official build. The plan is to double the size, hack the model a bit, design a bunch of printable parts, and when everything is done fly a reasonable reproduction of my old girl Lucille in the barnstorming challenges :cool:. So watch this space in the comming days/weeks and please help keep me motivated! I often need a swift kick in the backside to get things done.
 
Last edited:

wilmracer

I build things that fly (sometimes)
Mentor
So I'm going to shoot for daily updates to force myself to keep steady progress and get this done before FF '23. Last night I got the skins for the upper wing cut and started planning out the attachment mechanism for the top wing. On Mk1 the wings were not removeable, which was both wonderful and aweful. Wondeful in that setup/teardown was nonexistent and aweful in that she was a PITA to move around.

So this one will have removable wings. I'm currently thinking I'll use a similar setup to the full scale but use a bolt/cotter-pin setup for ease of removal. I'll just need to make sure I have loads of spares because I always seem to lose those during assembly and teardown.

I also want to incorporate flying/landing wires into this build and want to keep them simple to remove/attach as well. Still working on that :)

I did get the upper wing skins cut last night and I'll be working on the internals tonight. I attached a picture of the full-scale strut attachment point. Please disregard the bugs on the leading edge. They have been removed now and she is much cleaner :p
 

Attachments

  • 20220827_170139 (1).jpg
    20220827_170139 (1).jpg
    1.8 MB · Views: 0
  • 20230226_191704.jpg
    20230226_191704.jpg
    122 KB · Views: 0
  • strut_attachment.jpg
    strut_attachment.jpg
    139.3 KB · Views: 0

cyclone3350

Master member
So I'm going to shoot for daily updates to force myself to keep steady progress and get this done before FF '23. Last night I got the skins for the upper wing cut and started planning out the attachment mechanism for the top wing. On Mk1 the wings were not removeable, which was both wonderful and aweful. Wondeful in that setup/teardown was nonexistent and aweful in that she was a PITA to move around.

So this one will have removable wings. I'm currently thinking I'll use a similar setup to the full scale but use a bolt/cotter-pin setup for ease ofhttps://forum.flitetest.com/index.php?threads/1-5-scale-gee-bee-model-d-from-foam-to-balsa.69228/page-6 removal. I'll just need to make sure I have loads of spares because I always seem to lose those during assembly and teardown.

I also want to incorporate flying/landing wires into this build and want to keep them simple to remove/attach as well. Still working on that :)

I did get the upper wing skins cut last night and I'll be working on the internals tonight. I attached a picture of the full-scale strut attachment point. Please disregard the bugs on the leading edge. They have been removed now and she is much cleaner :p

I know U want to keep it simple, so I'm not sure if there is anything that might be helpful here. https://forum.flitetest.com/index.p...e-bee-model-d-from-foam-to-balsa.69228/page-6 On post 116, U can see how I did these flat flying wires using flat nichrome wire form Jacob's. The BUSA turnbuckles R RH & LH threads. This allows me to turn the buckle and disconnect to remove the wings. Making them was time consuming. To attach the wing, I slide into place, attach nylon bolts & turn 3 buckles a side. It actually goes on quick. U do need to safety wire them as they will undo for sure in flight. The Stearman has I think, 8 a side which would make this cumbersome. U would know better than I on that number as U have one for real, U dawg U :LOL:! That's is why I've chosen to do the Fleet Model 2. I only have 3 per wing & do intend to use this method for it. This time I will use the clevis buckles from Proctor. I imagen there will be some buzz from these wires in flight so I am hoping wing stays ( I think that's what they R called. Those torpedoes between the wires ) will dampen that. I am finishing up my new work space so posting on the Fleet will be soon I hope :unsure:. BTW, If U make it to SEFF, I should be there.
 

wilmracer

I build things that fly (sometimes)
Mentor
Thanks! I've used a similar method on the D.Va and I'm HOPING to find something easier, although the turnbuckles made it relatively easy. Right now I'm trying to figure out if I can replace the wires with thin CF strips but that seems like it will add even more complexity. For the initial build I may just include the hard points and then figure it out after she flies at FF, but we'll see.

Progress has been slow due to other Stearman related distractions, but I did get the covering laid down on the upper wing. I'm doing it at this point because when I go to shape the wing the Oratex basically preforms the same function as the paper on DTFB and helps hold everything together. Before I shape the wing I do plan to pre-add some fun details, so hopefully I can knock those out this week :cool:

20230227_231411.jpg


That is a LOT of Oratex. I had to order another roll so I'd have enough for the rest of the build.

Oh, and here is what has had me distracted :)


wilmracer

I build things that fly (sometimes)
Mentor
Baby steps... got some work done on the spars for the top wing. One consideration when scaling up is the thickness of the foam. I am NOT doubling the thickness of the skin so the height of the spar was increased to keep the wing profile consistent. I debated various spar materials (ply, CF, aluminum) but the balsa lined foam spars in the last model held up like a champ so I'll be doing the same thing here. Light ply plates will tie into the spar and I'll secure aluminum brackets once the cabanes and interplane struts are fabricated.

Still working on the plan for the flying/landing wires but I'll get there eventually.
 

Attachments

  • 20230301_212349.jpg
    20230301_212349.jpg
    2.9 MB · Views: 0
  • 20230302_072632.jpg
    20230302_072632.jpg
    977.7 KB · Views: 0
  • 20230302_072639.jpg
    20230302_072639.jpg
    924.1 KB · Views: 0

wilmracer

I build things that fly (sometimes)
Mentor
Closing up the top wing. Hard points are in for the cabanes and struts. They are epoxied in and then backfilled with expanding foam to make them a bit harder to pull out. I have some airfoiled aluminum tubes on order to make the struts and cabanes.

I also picked up a pair of pinking shears as I want to attempt scale-ish rib stitching. We'll see how that goes :)
 

Attachments

  • 20230304_193815.jpg
    20230304_193815.jpg
    623.2 KB · Views: 0
  • 20230304_224332.jpg
    20230304_224332.jpg
    926.5 KB · Views: 0
  • 20230304_224400.jpg
    20230304_224400.jpg
    831.4 KB · Views: 0

wilmracer

I build things that fly (sometimes)
Mentor
Upper wing is closed up. In the pictures you can see the new wing next to the to upper wing from the previous big build. While not drastically larger I suspect it will feel that way once she's all buttoned up. The yellow Oratex is also much more scale, at least to Lucille. Although I'll miss the roundrels I won't be adding them to this model unless I add them to the real thing. If I find I have any trouble with orientation I'll reconsider but at this size and with the Stearman's shape I don't think that will be an issue.
 

Attachments

  • 20230305_172025.jpg
    20230305_172025.jpg
    458.9 KB · Views: 0
  • 20230305_180102.jpg
    20230305_180102.jpg
    854.5 KB · Views: 0

wilmracer

I build things that fly (sometimes)
Mentor
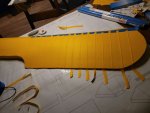
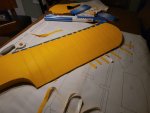
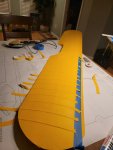
I decided to try my hand at simulated rib stitching. I've seen this done before but never tried it myself. So far I like the result but it is time consuming so will add a few evenings of construction to each wing.

Basically you use double-sided carpet tape, wrap string/thread around it, use a rolling razor to cut long strips, secure those to where the ribs would be, and then lay a strip of covering over the stitching. In this case the covering is cut with pinking shears to get the scale appearance. These are somewhat oversized for scale but don't stand out TOO much to my eye. The stitching detail is subtle at the moment but as the covering tightens more it stands out more. Once the entire wing is done I'll go back over it with a trim selling iron and pull out the detail. I'm not worrying too much about smudges or dents/dings as the real Lucille has plenty of both.
 

Attachments

  • 20230306_233128.jpg
    20230306_233128.jpg
    1,001.4 KB · Views: 0
  • 20230306_233118.jpg
    20230306_233118.jpg
    1 MB · Views: 0
  • 20230306_232742.jpg
    20230306_232742.jpg
    616.2 KB · Views: 0
  • 20230306_232840.jpg
    20230306_232840.jpg
    750.6 KB · Views: 0
  • 20230306_232814.jpg
    20230306_232814.jpg
    596.1 KB · Views: 0

RedTwilight

Member
It's looking GREAT! And the rib stitching and pinking are a real nice touch!
I'm looking forward to when the plans are released.
 

wilmracer

I build things that fly (sometimes)
Mentor
Baby steps.
 

Attachments

  • 20230308_000112.jpg
    20230308_000112.jpg
    768.4 KB · Views: 49
  • 20230308_000120.jpg
    20230308_000120.jpg
    718.6 KB · Views: 63
  • 20230308_000211.jpg
    20230308_000211.jpg
    781.3 KB · Views: 62

wilmracer

I build things that fly (sometimes)
Mentor
It has been a minute without an update but I'm making slow but steady progress. Upper wing is close to finished, at least until I add the mounting hardware. I'm not THRILLED with how the stitching came out, but it doesn't look bad. It is just too pronounced to be scale. TBH the rib lines on this are taller than the real thing, but it does give the wing a bit more of a "real" feel at this scale. I have some additional detailing to add in the fuel tank area and I'm going to add the cut-outs and handlebars that help with entry/egress from the cockpits.

I've started construction of the lower wing and hope to get that structurally wrapped up this week. Right now I'm laminating the spars.

The teardrop alluminum tubes showed up and I'm working on the cabane and interwing struts as well. I still need to work out how I'm going to attach all the flying wires, settle on a power setup, and finish the CAD for the R-985, but if I keep this pace she'll be flying before FF.
 

Attachments

  • 20230313_205808.jpg
    20230313_205808.jpg
    701 KB · Views: 0
  • 20230313_205745.jpg
    20230313_205745.jpg
    872 KB · Views: 0
  • 20230311_131543.jpg
    20230311_131543.jpg
    839.3 KB · Views: 0
  • 20230311_131126.jpg
    20230311_131126.jpg
    782.7 KB · Views: 0

wilmracer

I build things that fly (sometimes)
Mentor
Progress continues. Lower wing is coming together. I added internal hard points where I'll install alumium brackets for the struts to tie into. Also added filler foam to the leading edge in the center so I have some meat to glue the centering dowels to, and I'll be adding small ply plates in the rear for the wing retention bolts to pull against (instead of foam).

I need to get started on the fuselage this weekend. I think I'll need to work out all of the wing mounting before covering the lower wing so I need to get on that.
 

Attachments

  • 20230324_183906.jpg
    20230324_183906.jpg
    959 KB · Views: 0

wilmracer

I build things that fly (sometimes)
Mentor
More progress. Started on the fuselage this weekend. The landing gear is 1/4" music wire and it is REALLY strong. The landing gear plates are a bit overbuilt but I'm not going to worry about it as I am anticipating needing a fair amount of nose weight. Considering some of the fields I flew the last one from a beefy gear install will come in handy.

I'm hitting any visible areas inside the cockpits with several coats of green sharpie. It is MUCH easier to do this before assembling the parts.
 

Attachments

  • 20230326_173613.jpg
    20230326_173613.jpg
    1.1 MB · Views: 0
  • 20230326_202434.jpg
    20230326_202434.jpg
    803.7 KB · Views: 0
  • 20230326_224111.jpg
    20230326_224111.jpg
    806.1 KB · Views: 0
  • 20230326_224056.jpg
    20230326_224056.jpg
    864.6 KB · Views: 0

wilmracer

I build things that fly (sometimes)
Mentor
The plans are up!!!


I'm traveling with my daughter for spring break but will have hore updates this week,
 

wilmracer

I build things that fly (sometimes)
Mentor
Lots of progress.

- battery tray fabricated and installed
- nose section trimmed to firewall location to allow for R-985 radial installation.
- aft fuse built
- tailwheel mount plate installed
- lower wing centering/retention plate and dowels built and installed
- tail feathers built and balsa sheeted
 

Attachments

  • 20230330_231107.jpg
    20230330_231107.jpg
    909.3 KB · Views: 0
  • 20230330_231034.jpg
    20230330_231034.jpg
    731.6 KB · Views: 0
  • 20230330_231024.jpg
    20230330_231024.jpg
    902.5 KB · Views: 0
  • 20230411_211123.jpg
    20230411_211123.jpg
    801 KB · Views: 0
  • 20230412_062715.jpg
    20230412_062715.jpg
    928.5 KB · Views: 0
  • 20230411_165529.jpg
    20230411_165529.jpg
    1.4 MB · Views: 0

wilmracer

I build things that fly (sometimes)
Mentor
This one is going to be good 😎... Need to start printing soon though.
 

Attachments

  • R-985_mk1.png
    R-985_mk1.png
    1.5 MB · Views: 0
  • R-985_mk1_image2.png
    R-985_mk1_image2.png
    700.2 KB · Views: 0
  • R-985_mk1_image3.png
    R-985_mk1_image3.png
    1.4 MB · Views: 0

wilmracer

I build things that fly (sometimes)
Mentor
Lower wing retention installed. I added some structure to the rear of the lower wing so the bolts would have not stress the foam. The plates mate plywood to plywood and the bolt receivers sit flush to the ply on the wing so I can tighten as much as I want without stressing the foam at all.

I'll work this week on finishing the tail feathers and getting the servos and pushrods installed in the fuselage. Once I have a better idea of AUW I'll get a power system on order. I definitely want to ensure I have enough umph to pull this around similar to the old one. The only really challenging parts left are the strut/cabane connections, the dummy radial mount, and the flying/landing wires. The wires can be added later if I can't get them done for FF but I'm still hoping to have them on there. Fingers crossed!
 

Attachments

  • 20230422_215658.jpg
    20230422_215658.jpg
    899.7 KB · Views: 0
  • 20230422_215616.jpg
    20230422_215616.jpg
    1.1 MB · Views: 0
  • 20230422_215603.jpg
    20230422_215603.jpg
    1.2 MB · Views: 0