First Bat Bone Build

DDSFlyer

Senior Member
So here's how far I got tonight. Fully built bat bone frame with booms. Tail assembly put together and mounted motor directly to the motor mount (Crafty Dan - can you zip tie mount these 2826-1200kV motors somehow? I couldn't figure a way so I directly screwed into the motor mount. Dunno how it'll do with the front straight mounts, I'll know when I get them in the mail). ESC's approximated on the booms with zip ties. FT Camera mount mounted to the bat bone frame.
Some pics for reference follow.
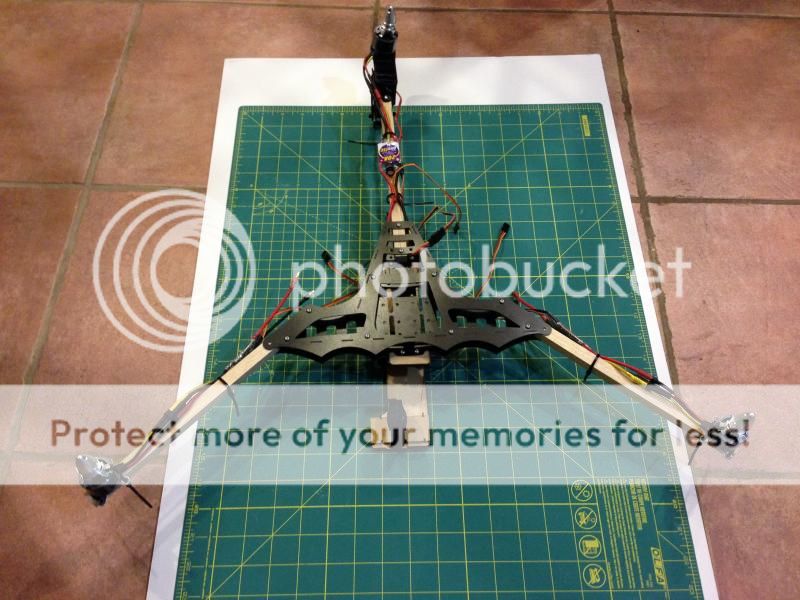
Overall view

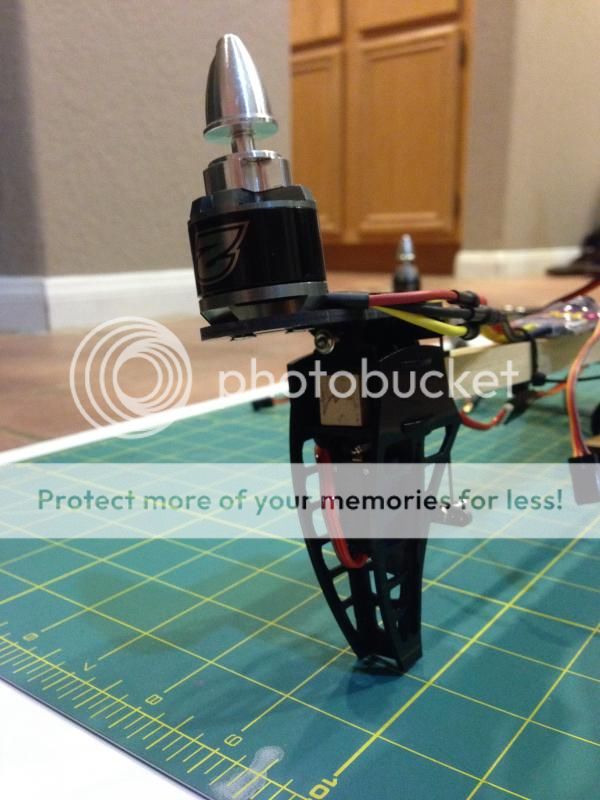
Tail mount view with directly mounted motor

FT camera mount

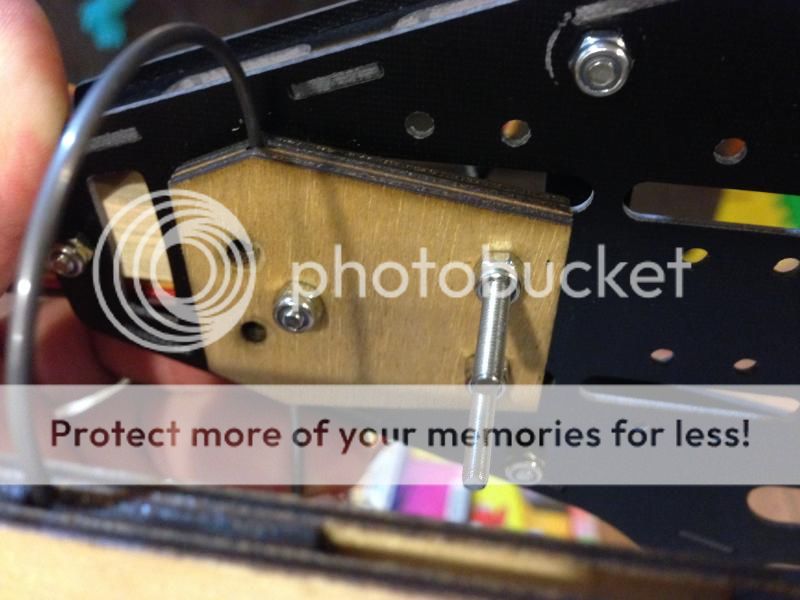
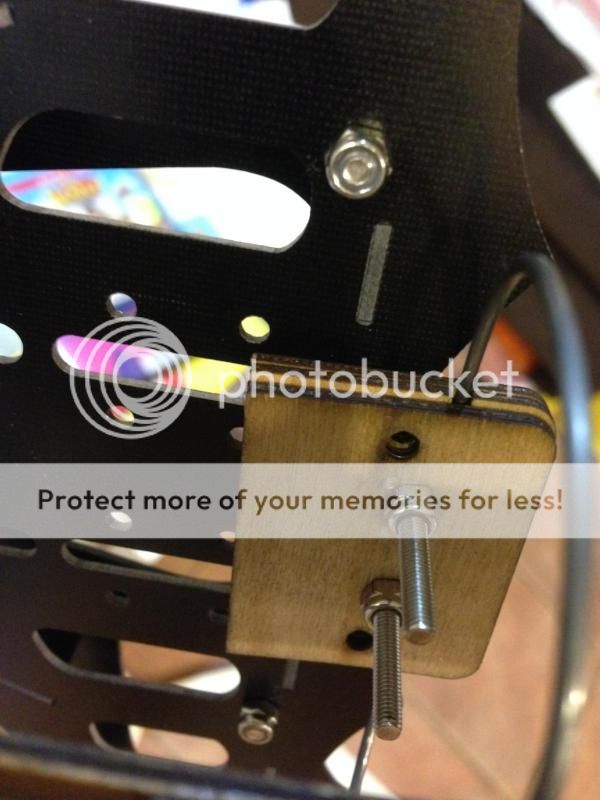
Close up of the back mount. I used one of the longer screws with the camera mount kit to go through the boom and into the mount, then used the rest for the two front holes. Instead of 4 screws it is now 3. Only thing I wish was that I had shorter screws, but hey I can always grind them off with the dremel

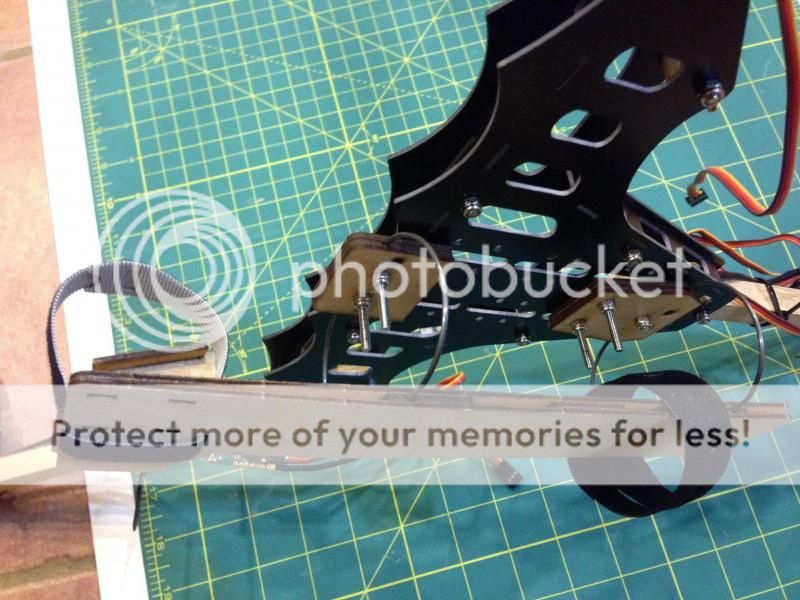
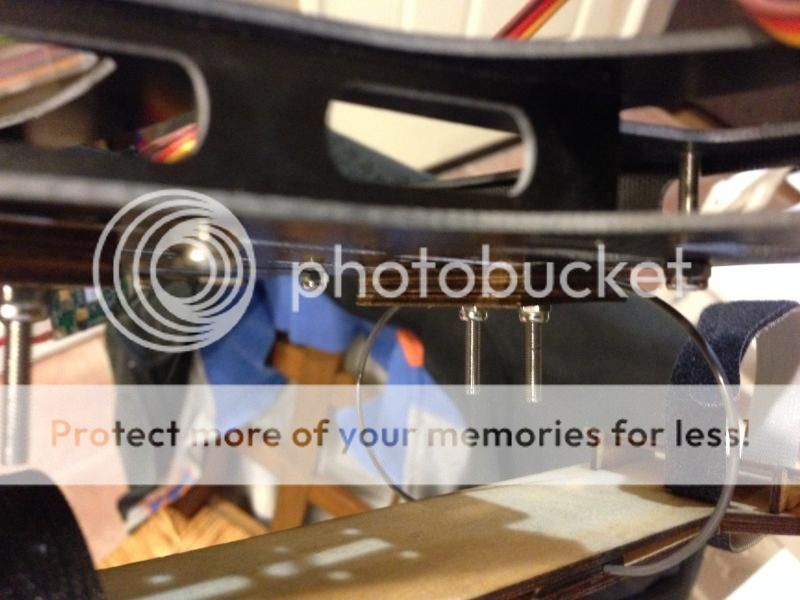
Here's the front mount. The inner holes lined up with the Bat Bone frame instead of the outer ones that are set a little farther back. It doesn't fit as well as I'd hoped because I put WAY too much tension in the wires (which David or someone else at FT made even though David said he wouldn't prebend those wires....hehe). Second picture shows how the back of the wood is trying to separate because there is so much tension and the screws aren't centered on the wood and are a little farther forward. It's tiny and I don't know if it'll matter, just bugged me since it didn't look that way before when I put it together with the other holes before I mounted it to the bat bone.


Anyways, that's where I left her for the night. Next up is measuring out wires for the breakout cable, soldering that up, mounting the KK2.0 board and Orange Rx and connecting them together, and countless other things...slowly but surely
 

Craftydan

Hostage Taker of Quads
Staff member
Moderator
Mentor
Coming along nice!

I enjoy flying my multirotors, but the build! Ugh. Everything you'd do for a plane you have to do 3, 4, 6, or 8 times! Forget Hex and octo copters -- they're just too much work to build!

Dunno about the FT mounts -- I scratch built my own tilt mechanism, and always ziptied motors and parts to the boom. Then again, I also cut my own frames on a scroll saw.

Make sure you trim those bolts before you mount a battery -- even if it fits. I've got one battery on the bench that's suspect becasue I left a bolt on my tri's boom long . . .

. . .for testing . . .

. . .you know how it is . . .

. . . anyway the "testing" involved an inverted rearward high speed landing, during which the battery ejected, right into that bolt. I got lucky -- doesn't appear to have damaged any cells, but there's a big hole in the padding around the connector end. I need to slowly discharge/charge while watching it before I tape up the hole.

Just be advised -- sharpish rigid pointy things are hard on the battery during high speed landings. Cut close then file it clean.
 

cranialrectosis

Faster than a speeding face plant!
Mentor
I second the cut the bolts short note from Dan. I also have a suspect battery from using the FT camera mount like you have it during a 'test' flight.

Protect your batteries. If they flame on you while attached to the copter due to a puncture you may lose it all.
 

DDSFlyer

Senior Member
Yeah, I'll definitely cut them and smooth them off for sure. Just rough assembly for now. I'm sure it has a long way until it achieves flight

So far I like the way this is going together actually. I am looking forward to making a hexacopter like Chad's from the Anycopter kit and maybe some landing gear from HK. Of course I say this before I'm done and find out the last electronic build part will take me three times as long and just as much headache to get right...
 

DDSFlyer

Senior Member
A few more steps made last night and a couple of tidbit information for the newbie. Do not overtighten the screws/nuts on the frame. I think a good distance is when the screw is almost flush with the bottom of the lock nut. It is very easy to overtighten these babies.
Made half of my breakout cable. Note: I need to stop trying to wire up multiple 12ga wires to an XT60...it's just too big... One 12 ga wire is just the right size for the connector alone. This is also why I only got halfway done...don't have red 16 ga wire. Added 3 JST plugs for KK2 board power voltage detector, and LED setup (2 in case I want to have on/off spot lights).

Also, since I didn't have a 12" servo extension for the tail servo and just 6" ones I just cut two and soldered them together! A 12" one is gonna prob be too long anyways. We'll see if I screwed something up there or not.

Off to the hobby shop to find some 16 ga red wire and finish this thing up!
 

DDSFlyer

Senior Member
Quick question...it wouldn't matter if I mixed and matched 3.5mm bullet connectors right? The ESC's came prebulleted and I just soldered on the same size ones to my breakout cable but they are longer than the ones on the ESC's. As long as they fit together right? Just a NOOB question but thought I'd ask anyways.
 

Craftydan

Hostage Taker of Quads
Staff member
Moderator
Mentor
- if it fits, it flies!

- if there's a small gap of exposed connector between the bullet and the socket because the bullet is too long, and you're worried about shorts between the connectors (worry about shorts) cut the shrink tube off of the bullet, slide on a new piece, plug it in and then shrink it such the tube starts where the socket ends.
 

DDSFlyer

Senior Member
Small update. Tonight I finished the break out cable. Connected it to all the ESC's and the voltage detector connector. Plugged in the ESC's and bound the Rx to my DX6i. Connected it to the KK board. Now I just have to figure out how to mount the KK board. I had double sided tape that I was going to use but now I can't find it...grrr. Guess I may hot glue the board to the foam and then slide the foam into the bat bone center. I test fit the piece but I don't think that it will sit fully level with my breakout cable underneath. Only slightly off but how much will that matter? Would rather double sided tape it to the top of the bat bone plate so I may try and find another way (velcro?). Still waiting on the motor mounts for the front motors, but they left akron, OH Jan 18th at 2AM so....maybe monday? I've just mocked it up for now, maybe get all the electronics hooked up correctly and in the right order before I mount the proper mounts and try and get her in the air. Multirotors are a crazy hornets nest of wires...I'm gonna have to look at streamlining future projects for sure.

Used eluminerRC's mod for the voltage speaker to put on the KK board (although I do have the light coming in the mail I may use both)
 

Craftydan

Hostage Taker of Quads
Staff member
Moderator
Mentor
Hornets nest of wires is pretty typical at this stage. keep 'em out of the props and you're good until you're ready to clean it up.

I've always routed the cables around the board, but then again I haven't built the batbone yet. My mount is usually a friction fit sandwich -- bottom frame \ pad \ kk2 \ spacers (earplugs) \ top frame -- but don't know if the hole in the top would let you do that.

BTW, good idea about the gift-card landing skids. Those will do great until the legs arrive.
 

cranialrectosis

Faster than a speeding face plant!
Mentor
"I test fit the piece but I don't think that it will sit fully level with my breakout cable underneath. Only slightly off but how much will that matter?"

If I read this right, you are asking how much it will matter if your KK2 is not exactly level or straight on the BatBone frame.

It matters a TON. You want your KK2 as flat as level and as straight on the BatBone as you can possibly get it. Too far off and your copter will be VERY challenging to fly if it is flyable at all.

Move your breakout cable. The KK2 is the foundation of flight for your copter. It should point straight at forward for your copter and it should be absolutely as level (flat and parallel) with the frame as you can make it and it should not be able to shift from that position.

Build the BatBone around the KK2. These copters are pretty forgiving on many points, but this is not one of them.
 

DDSFlyer

Senior Member
I figured the level KK board was pretty important. I've rerouted the breakout cable and got everything hooked up. The KK board is now sunken inside the bat bone frame on the foam top it came in. Yeah!
Now in setting up my DX6i should I set it up in plane or heli mode? I've never set it up in Heli mode so I dunno the difference.
Also I have a Orange Rx 6 channel and for the Aux channel on the KK board should I plug it into the Gear channel or Aux channel on the Rx?


cranialrectosis

Faster than a speeding face plant!
Mentor
I have only ever used heli mode on my Turnigy 9X.

I use the gear switch on my transmitter to flip aux on and off. Gear is top right on my transmitter. I can hit it with my social finger without taking my eyes off the copter or hands off the stick. I use it to toggle autolevel.
 

DDSFlyer

Senior Member
Yeah I've never used heli mode vs acro mode on my DX6i. It seems that another thing that is set up on this model that I am using for the bat bone is that the flight mode/gear lever is switching my throttle, aileron, and elevator controls. Also, my elevator is attached with my aileron and aux channels as well...I'm confused.

EDIT: well I found out that the swash function was on...still confused, but I turned that off and now I have individual control functions again. But I'm not sure if my gear switch is now just a flight mode switch now and the flap switch is non existent. wondering how I'm going to turn self level on and off on the KK2 board
 
Last edited:

Craftydan

Hostage Taker of Quads
Staff member
Moderator
Mentor
. . . which is why most of us leave the multirotors on aero mode.

The Heli mode has the distinct advantage of being able to create a curve on the throttle channel (think Expo) but not only is it finicky to set up right, pretty much everything else is a little scrambled.

Basic rule of the game -- let the control board fly the airframe. That means you need to send the directions in the simplest/rawest way possible . . . which is aero mode.
 

DDSFlyer

Senior Member
Ok, I'll switch it back. I never even thought to ask about this earlier. A guy that I fly with sets all of his plane in heli mode for the throttle cut switch for safety but didn't even know the other differences.

I was so anxious to see this thing fly I put on the all black 8x4.5 props (found out that I don't have a black 9x4.7 RH rotation for the tail. I have green ones for the front two) and tried to get it to hover. Messed with the tail servo filtering to see if I could get rid of that first. Set it at 70. Never got above 6" but it was pretty satisfying to see it move at least.

I should have the motor mounts tomorrow, so I'll add those, get the LED's going and wired. Then go for more tuning and hovering.
 

cranialrectosis

Faster than a speeding face plant!
Mentor
On the mode, I defer to Dan. I have only ever flown in heli mode. I do have three copters flying in heli mode but I have yet to play with the throttle curve (although I have been tempted).

Congratulations, 6" is better than flipping on launch. It means you got a lot right.
 

DDSFlyer

Senior Member
Well because of MLK holiday the USPS decided it was ok to get my straight mounts to the post office and NOT put them in my PO box...so I have to wait until tomorrow to get them installed. Glad I'm only working a half day tomorrow!
I ran a battery through hovering and trying out the yaw control. Kept it under 6 feet of hover and within a driveway courtyard I was flying in. When I actually want to test it I will move off of the concrete (just isn't nice to any sudden force of gravity).
Anyone want to walk me through some of the first things to look for and change?
I switched my DX6i to Acro mode so I know what it's doing again. I got my self level working, but I'll switch the channels so it's on my gear lever instead of my flaps switch. (hopefully that won't be hard to configure compared to the flaps) Once I get the new motor mounts on I will recalibrate the sensors to find level. Should I start tuning with or without self level turned on? If without, for self level the settings will then need to be copied over? Or setup again while flying in self level mode?
I can't wait to get the motor mounts on and start tuning! I've got many batteries sitting fully charged to go through!

On a side note, I think I fried my LED headlamps I was gonna use for this (that's possible right?) I soldered a JST connector to them and hooked them up to a balance port connector and they just flickered and then stopped...I'm even a worse NOOB when it comes to any electronics...oh well no spotlights for me just LED strips that will be mounted once I can get this thing tuned to fly
 

Craftydan

Hostage Taker of Quads
Staff member
Moderator
Mentor
If it's tuned enough to be flyable, focus on learning the feel.

Your experience with the nano will speed this up, but tuning will need to be done in acro mode first, so you'll need to get used to the feel of a craft that won't level itself. Take her up over a large grassy area, flip off the self level and fly slow circuits. Be ready to switch her back if she starts to pick up speed -- acro mode will get away from you *quickly* if you let it.

When you can comfortably control her in acro mode, then start tuning. I would ignore their recommended settings (start with what you have) but the method described in this is a good way to dial in a kk2's PI controller:

http://www.hobbyking.com/hobbyking/store/uploads/475200704X68736X56.pdf

BTW, go ahead and swap out the motor mounts, but until you've got her dialed in, stick with the cheap giftcard LG. Delrin is pretty durable, but not indestructible.
 

DDSFlyer

Senior Member
I've flown a few hovers in acro mode and I can see it getting away from you very quickly. The nano really helps even though I mostly fly it in self level mode too. The default PI settings are way high compared to the levels in that link. The p gain is 100 and the p limit is 20. I'll have to check the others, but I'll probably set it lower like the link and try it out. I will be watching a lot of tuning vids on youtube. DHDSRacer has a simple one that I watched that looked simple enough to get started. As far as getting it tuned and then going to self level, it has it's own settings right? Instead of the PI editor it's the self level settings but the same concept or am I mistaken? Here's where the real fun begins!
 

Craftydan

Hostage Taker of Quads
Staff member
Moderator
Mentor
The proicedures are pretty much universal, but most folks have their own take on it. some are better than others, but most will work fine.

Keep in mind, the kk2.1 board has a *much* more sensitive sensor onboard, and becasue of that the raw numbers don't line up with the old kk2's. if she's flying fine without oscilatting, go ahead and start where she is now.

Self Level's tuning is a bit different. For one thing it's only a P controller, and another it seems reversed in the implementation -- lower P = stronger self correction. worth playing with, but if she flys fine, that's all that matters.