FTFC20 Spitfire Mk.I designed by PlanesGuy888

PlanesGuy888

Airplane crasher
For the FTFC20 build challenge, I decided that I would like to participate this year with an aircraft of my own. I chose the Spitfire Mk.I because it has always been a favorite of mine and I have always loved the look. This Spitfire is not going to be a normal FT Spitfire though. It has been designed for indoor flight, in a similar manner to joker24458's Bf-109. For years I have admired the look and flight characteristics of joker24458's Bf-109, and I finally decided that I am at a point where I could try to design my own. I have been working on these plans for a month or two now and I decided that since they met the FTFC20 Build Challenge requirements, I might as well enter them. I started drawing the Spitfire off of these AeroFred plans: https://aerofred.com/details.php?image_id=91058

The Slo-Fly Spit, as I have nicknamed it, is intended to run off of an FT B-sized power pack. It will use six 5 or 9-gram servos, and a 2s 1000mah LiPo. All of the foam is de-papered, to save weight and to aid in the forming of the fuselage skins.

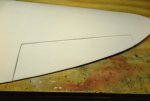
The plans are currently not finished, but I have started construction. I have started on the wings. I printed out the wing templates and cut them out.
IMG_2942.JPG IMG_2943.JPG
The next step is to roll the wing on the edge of the table to curve it. This is similar to how the FT Master Series is done, but the wing is de-papered and is much more prone to cracking. The wing is going to be a single surface under cambered airfoil to have high lift/high drag, which is good for slow flight.
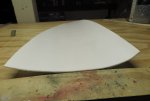
IMG_2953.JPG
Next, I glued in the inboard 3 ribs to the wing skin. It is important to take your time because the wing skin does not like to bend to the ribs. The first 2 ribs went on fine but the third gave me trouble.
IMG_2955.JPG IMG_2957.JPG
Before I glued on the 4th and 5th ribs, I cut out the aileron. Then I beveled the upper surface and made a tape hinge on the bottom. I made sure to reinforce the hinge with hot glue, and it helped it's strength a lot.
IMG_2958.JPG IMG_2962.JPG IMG_2973.JPG
That's all for today, hopefully more updates will follow soon!
 

PlanesGuy888

Airplane crasher
Small update today. I got more work done on the wings of the Slo-Fly Spit, and I installed the wing servos. The flaps had to use a mini control horn to clear the bottom of the wing skin when retracted. The ailerons used normal control horns because there was room for them.
IMG_2985.JPG IMG_2986.JPG
The wings are done now, except for the spars. I am going to hold off installing the spars until I have the fuse built so that I can test fit them first. I am working on cutting out the fuse as I type this so hopefully it won't be long.
 

PlanesGuy888

Airplane crasher
Sorry for the lack of updates, school and life has just been busy lately. I have made a lot of progress and I have pictures. I plan to post an update in the next few days. Happy flying!
 

PlanesGuy888

Airplane crasher
Big update incoming! I have not posted in the past few weeks because I have been focusing on building so I can finish the plane for the Spitfires Around the World event on January 1. I have gotten a lot of work done and I will likely wrap up in the next day or so.
I first printed and cut out the plans for the fuselage, and then cut them out from the foam.
IMG_2987.JPG IMG_2988.JPG
Next, I started on the center spar of the fuselage. As with all pieces that run the length of the fuse, they must be spliced together from 2 pieces of foam. If only the dollar store sold giant sheets of foam! One half of the horizontal spar was glued on next.
IMG_2990.JPG IMG_2992.JPG IMG_2994.JPG
After assembling the spar I put the formers on this half. I found it easier to assemble it one half at a time because the added strength from the finished side will aid in the construction of the unfinished side.
IMG_2995.JPG IMG_2996.JPG
I then put the top and bottom stringers on the backside of the attached formers.
IMG_2998.JPG IMG_2997.JPG
I assembled the elevator and attached it to the fuselage. I have no idea why I did this before assembling the other side of the fuselage, and that is probably why the elevator leans to that side now. :oops:
IMG_2999.JPG IMG_3000.JPG IMG_3002.JPG
The horizontal spar was glued on to the right side and the formers attached. It's starting to look like a Spitfire!
IMG_3003.JPG IMG_3004.JPG
I have gotten a lot farther in construction since these pictures were taken and I will post the newer pictures later today. I am almost ready to attach the wings and maiden it. More updates soon!
 

PlanesGuy888

Airplane crasher
I have been working some more and now I am almost ready to maiden the Slo-Fly Spit. I am almost completely done with the fuselage with the exception of the final piece of covering foam. I will likely maiden it in the next few days so it is ready for the Spitfires Around the World event.
After attaching the elevator I glued the vertical stabilizer on top of it. It is reinforced by a barbecue skewer that runs the length it to the bottom of the fuselage. The rudder was attached with box tape which functioned as a hinge.
IMG_3005.JPG IMG_3006.JPG
After installing the control surfaces I applied the skin to the fuselage section below the elevator. This helped strengthen the area so it wouldn't be damaged from being moved around during building.
IMG_3012.JPG
The next part of the fuselage I worked on was the wing joint area. I started by gluing the belly pan on the bottom of the fuselage. Next, I started working on the spar holders. I designed the spar holders so that the wings are removable and the spars are held in by friction. The spar holders are made from 1/16 balsa and de-papered foam. Each piece of balsa is backed by a piece of foam. The vertical piece is glued to the fuselage formers so there is only one additional foam piece attached. Unfortunately, I do not have a picture of them installed in the fuselage because this is when I was focused on building so much that I forgot to take pictures.:rolleyes:
IMG_3007.JPG IMG_3008.JPG IMG_3009.JPG
Then, of course, I installed the servos in the tail, definitely didn't forget about it until the fuse was almost finished. No forgetting here.:rolleyes:
IMG_3020.JPG
After the installation of electronics and the routing of cables, I applied foam skin over the middle fuse and the wing fillet. I feel really good about how the foam on foam joint fit and, in hindsight, think this joint turned out to be the best of the airplane.
IMG_3026.JPG IMG_3019.JPG
After working on the midsection, I moved to the front section. I was rushing to finish for the SAW flight and the front did not fit that good. Oh well, more stuff to improve in V2! I added a hatch to the left side of the fuse so I can access the electronics.
IMG_3022.JPG IMG_3025.JPG
The firewall is mounted to what is basically a shortened power pod with slots for the other firewall piece. They slotted together and are glued to the front of the fuselage. For this build I am using Power Pack B with a 11x4.7 prop. I hope to get a bigger 3 blade prop for V2.
IMG_3017.JPG IMG_3018.JPG IMG_3021.JPG
One other thing I worked on was the foam spinner. It was created by stacking foam circles and spinning the motor while sanding them with sandpaper. The way it attaches is hard to explain so here are the pictures as well as a video.
IMG_3013.JPG IMG_3014.JPG IMG_3015.JPG IMG_3016.JPG IMG_3024.JPG IMG_3023.JPG
That's all for now as I am going back to building. I am almost ready to fly the Spit, and the next update will likely include a maiden video!
 

mach1 rc

Master member
I have been working some more and now I am almost ready to maiden the Slo-Fly Spit. I am almost completely done with the fuselage with the exception of the final piece of covering foam. I will likely maiden it in the next few days so it is ready for the Spitfires Around the World event.
After attaching the elevator I glued the vertical stabilizer on top of it. It is reinforced by a barbecue skewer that runs the length it to the bottom of the fuselage. The rudder was attached with box tape which functioned as a hinge.
View attachment 152716 View attachment 152717
After installing the control surfaces I applied the skin to the fuselage section below the elevator. This helped strengthen the area so it wouldn't be damaged from being moved around during building.
View attachment 152718
The next part of the fuselage I worked on was the wing joint area. I started by gluing the belly pan on the bottom of the fuselage. Next, I started working on the spar holders. I designed the spar holders so that the wings are removable and the spars are held in by friction. The spar holders are made from 1/16 balsa and de-papered foam. Each piece of balsa is backed by a piece of foam. The vertical piece is glued to the fuselage formers so there is only one additional foam piece attached. Unfortunately, I do not have a picture of them installed in the fuselage because this is when I was focused on building so much that I forgot to take pictures.:rolleyes:
View attachment 152719 View attachment 152720 View attachment 152721
Then, of course, I installed the servos in the tail, definitely didn't forget about it until the fuse was almost finished. No forgetting here.:rolleyes:
View attachment 152722
After the installation of electronics and the routing of cables, I applied foam skin over the middle fuse and the wing fillet. I feel really good about how the foam on foam joint fit and, in hindsight, think this joint turned out to be the best of the airplane.
View attachment 152723 View attachment 152724
After working on the midsection, I moved to the front section. I was rushing to finish for the SAW flight and the front did not fit that good. Oh well, more stuff to improve in V2! I added a hatch to the left side of the fuse so I can access the electronics.
View attachment 152725 View attachment 152726
The firewall is mounted to what is basically a shortened power pod with slots for the other firewall piece. They slotted together and are glued to the front of the fuselage. For this build I am using Power Pack B with a 11x4.7 prop. I hope to get a bigger 3 blade prop for V2.
View attachment 152727 View attachment 152728 View attachment 152729
One other thing I worked on was the foam spinner. It was created by stacking foam circles and spinning the motor while sanding them with sandpaper. The way it attaches is hard to explain so here are the pictures as well as a video.
View attachment 152731 View attachment 152732 View attachment 152733 View attachment 152734 View attachment 152735 View attachment 152736
That's all for now as I am going back to building. I am almost ready to fly the Spit, and the next update will likely include a maiden video!
Looks great
 

BATTLEAXE

Legendary member
I have been working some more and now I am almost ready to maiden the Slo-Fly Spit. I am almost completely done with the fuselage with the exception of the final piece of covering foam. I will likely maiden it in the next few days so it is ready for the Spitfires Around the World event.
After attaching the elevator I glued the vertical stabilizer on top of it. It is reinforced by a barbecue skewer that runs the length it to the bottom of the fuselage. The rudder was attached with box tape which functioned as a hinge.
View attachment 152716 View attachment 152717
After installing the control surfaces I applied the skin to the fuselage section below the elevator. This helped strengthen the area so it wouldn't be damaged from being moved around during building.
View attachment 152718
The next part of the fuselage I worked on was the wing joint area. I started by gluing the belly pan on the bottom of the fuselage. Next, I started working on the spar holders. I designed the spar holders so that the wings are removable and the spars are held in by friction. The spar holders are made from 1/16 balsa and de-papered foam. Each piece of balsa is backed by a piece of foam. The vertical piece is glued to the fuselage formers so there is only one additional foam piece attached. Unfortunately, I do not have a picture of them installed in the fuselage because this is when I was focused on building so much that I forgot to take pictures.:rolleyes:
View attachment 152719 View attachment 152720 View attachment 152721
Then, of course, I installed the servos in the tail, definitely didn't forget about it until the fuse was almost finished. No forgetting here.:rolleyes:
View attachment 152722
After the installation of electronics and the routing of cables, I applied foam skin over the middle fuse and the wing fillet. I feel really good about how the foam on foam joint fit and, in hindsight, think this joint turned out to be the best of the airplane.
View attachment 152723 View attachment 152724
After working on the midsection, I moved to the front section. I was rushing to finish for the SAW flight and the front did not fit that good. Oh well, more stuff to improve in V2! I added a hatch to the left side of the fuse so I can access the electronics.
View attachment 152725 View attachment 152726
The firewall is mounted to what is basically a shortened power pod with slots for the other firewall piece. They slotted together and are glued to the front of the fuselage. For this build I am using Power Pack B with a 11x4.7 prop. I hope to get a bigger 3 blade prop for V2.
View attachment 152727 View attachment 152728 View attachment 152729
One other thing I worked on was the foam spinner. It was created by stacking foam circles and spinning the motor while sanding them with sandpaper. The way it attaches is hard to explain so here are the pictures as well as a video.
View attachment 152731 View attachment 152732 View attachment 152733 View attachment 152734 View attachment 152735 View attachment 152736
That's all for now as I am going back to building. I am almost ready to fly the Spit, and the next update will likely include a maiden video!
I like it. It will be a little odd to see a slow fly Spit, I like how you are opening up the possibilities and creativity in design
 

PlanesGuy888

Airplane crasher
She flies!
So good news and bad news. The good news is that she flies pretty good. There were some minor tweaks to be made and some trims to adjust which should help it fly better. The bad news is that the design of the aircraft needs some improvement. It is waaaay too heavy which means it has to carry more speed in flight. This contributed to the wing flutter halfway through the maiden. Other bad news is that I crashed it on a later flight during the day.
20200101_130735.jpg

Even though it should be easily repairable I will likely use this as an excuse to start the V2 build.
 

PlanesGuy888

Airplane crasher
Sorry for no new updates recently, I do not plan on finishing this for the FTFC 2020 challenge. I instead am teaching myself Fusion360 so I can design version 2 in cad. I doubt I will be able to finish this before January 30 but I might have it done in the following month. This should help with some minor issues like poor piece fitment, and also help me visualize the design better. Thanks for all the encouraging words on my little experiment!