JART Build ie HOW to vacuum your bags ie HOW to laminate foam wings

thenated0g

Drinker of coffee, Maker of things
Mentor
1537377415384.png

Vacuum bagging has been an interest of mine for some time. Its an old process though which has really made it hard to find enough information to make me comfortable to get started. I believe that because it is an old process that we have a couple things making it hard to research. You have older guys (in the hobby for a long time) maybe not sharing the process cause thats not there thing, assumed knowledge in the build threads that are around (they totally skip entire sections of the build and assume you know what they mean), really old build threads buried in some website that only "old" guys know about, and terminology. I personally feel that these last two points, particularly the terminology one are the biggest walls to my research so far.

"the body of terms used with a particular technical application in a subject of study, theory, profession, etc. "
1537377260596.png
1537377286699.png


See to find information about vacuum bagging you can search for "vacuum bagging" and you will find some info but there are a TON of new names for process and parts and material and techniques that you will not find unless you type in that word which you don't know because you don't know anything yet ...

So much like my CNC hot wire cutter build thread, i am going to be documenting my full dive into this rabbit hole. I have spent a lot of time researching this but am a total noob at this and will be making mistakes and stating things that will later be changed and all that. If you have experience please share it it wont hurt my feelings also please dont get your feelings hurt if you suggest something and i dont listen and learn things the hard way lol. I will probably come around to the "correct" way eventually :)
 

thenated0g

Drinker of coffee, Maker of things
Mentor
I have been hot wire cutting for a few years now. My current process to stiffen and cover the wings has been to put internal spars top and bottom, wrap in filament packing tape, and than finish with 5mil iron on laminate. This process works amazing well on a "thicker" airfoil like flying wings for fpv where you want a thick airfoil so you can bury a big lipo battery. The insulation foam wing is extremely rigid, even on my 90 wingspan wing. But this does make a heavier plane and the finish is not that great.

Recently i got interested in slope soaring. These are much much thinner airfoils. I would always avoid doing these by hand as i had trouble cutting the wings that thin but now that i have a cnc to cut them it is no different than cutting any other wing out. The problem now is how to keep the wings rigid and strong given the amount of force they are applied. Also recently i had the chance to go thru a few of the blejzyk slope soaring kits while at aloft hobbies. These wing are amazingly pretty.

At the same time in the past week i have had a breakthrough in my research of the different processes and came to the realization that it is very easy and cheap to get started.

At the moment i am planning on starting out with gorilla glue as my glue and 1/32 balsa sheets as my covering material. I will use this to practice and make a couple planes. My current goal is to make it to epoxy and fiberglass covering when i am comfortable with the process.

Gorilla glue and balsa is a proven method and depending on who you talk to or read it is superior in weight to strength vs fiberglass planes. So it may turn out to be something i am fine with and keep doing it.

Equipment:

Pump: Basically anything that pulls a vacuum. A hand pump from the car section for pulling break lines, a fish tank pump, an old compressor from a refridgerator. So obviously this can be in the $FREE-whatever range. Obviously a hand pump is going to take a LONG time to evacuate a large bag. Thats fine if you dont care, but you need to make sure your glue's working time fits into that so its tight well before it starts setting up.​
Bags: Food save bags, vacuum space saving bags for clothing, plastic sheets, plastic tubing, on up to specific use vacuum bagging bags.​
Connectors: A way to connect the pump to the Bags. Basically anything that will hold a vacuum and connect your parts. Rigid water parts, gas parts, tubing. You want tubing that will not collapse on itself in a vacuum.​
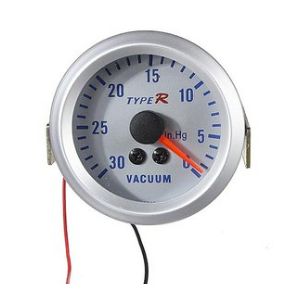
You will probably also want some kind of pressure gauge eventually. You can create crazy amounts of pressure even with a little vacuum pump. Were talking the equivalent of like 5,000lbs+ sitting on top of the foam. You can totally crush the foam flat. The other side is that you could be applying too little pressure and the materials do not bond as well as they could.​
And than you need glue and covering material obviously.​
Now as far as thinking outside the box on this i found this interesting setup. Its for vacuum forming skate board decks:
1537380511523.png
Its called a Thin Air press kit and the bag is14"x47". It comes with some breather cloth, so all the air comes out and doesnt get trapped, a one way valve on top which you can quickly evacuate using a shop vac, and than a little hand pump to create negative pressure.​
My current plan is to pickup a little vacuum pump from banggood for about $20, some space saver vacuum bags from Homedepot, these are made to hold queen size bedding, a couple premade ports insert into the bag for the vacuum hose to connect too, and than when i get these items go the hardware store and find the tubing/parts i need to connect them up.​
1537380919864.png
1537380777220.png
1537380896766.png
1537380936881.png
 

thenated0g

Drinker of coffee, Maker of things
Mentor
1537386395165.png
1537386408943.png

The JART has been on my list of possible things for a while. I decided to use it as a test for vacuum bagging as the leading and trailing edges are straight.
1537386358393.png


The Wings and horizontal stabilizer/elevator are usually foam cut airfoils covered in some way. The fuselage is made in various methods, very often using the "lost foam" method. That means that you create your foam shape, wrap it in several layers of fiberglass and epoxy, and after curing you pour acetone inside the fuselage to "lose" the foam. Leaving you with a hollow fiberglass fuselage.

The wings are a pretty basic shape so it is something that i can setup on my CNC to easily make a stack of foam cores that i can "mess up" as i learn this process.

I have some full size plans on order from staples and i got my foam sized and setup this morning so i can start cutting them out when i have time.

IMG_20180919_125042_239.jpg IMG_20180919_125031_029.jpg IMG_20180919_125037_463.jpg IMG_20180919_125049_423.jpg
As a side note for why i love the R-Tech insulation foam from home depot, i can cut 5 full planes (2 wings halves and full elevator) from a $20 sheet of foam. $4 a plane. And thats with me cutting out a lot more foam than i will need, until i figure out the correct shape i for the cnc block. Or if you look at it as how many cnc jobs I can "learn on" thats 15 different things im cutting out that i can practice vacuum bagging on.
 

thenated0g

Drinker of coffee, Maker of things
Mentor
Got my full size plans from Staples and this morning I'm starting to dial in the temperature I need on my CNC.
IMG_20180919_173056.jpg IMG_20180920_062747.jpg
 

thenated0g

Drinker of coffee, Maker of things
Mentor
I recieved my little 12v pump and inHg gauge. I took them to Ace hardware and just sat there for 20 minutes sorting thru connections and tubes until i had something that worked. The pump was able to drop it down to 20 inHg which i thought was pretty impressive. I plan on working between 8 and 15 so thats great. I used some iron on laminate to make a temp bag and it made a nice outline of my horizontal stabilizer. Next i need to seal the connections better and get some better bag material.

IMG_20180923_155954.jpg IMG_20180923_170038.jpg IMG_20180923_170033.jpg IMG_20180923_170009.jpg
 

thenated0g

Drinker of coffee, Maker of things
Mentor
File this under "if i had to do it again".

If i was starting from scratch and in the future when i need replacements, i would totally buy the connectors i need from acpsales.
I was trying to diy a lot of the connections that i need, which works just fine, but i would have saved myself some money and time just buying the appropriate parts from them. I found them as i wanted an automated vacuum switch that will turn the pump on and off to keep the vacuum at a set inHG so i don't have to continually watch it. Its about $40. But than i started looking around and they have really reasonable prices on all the supplies i was trying to diy. I also ordered some of the bag clips that let you reuse your plastic bags or make bags out of plastic.
https://store.acpsales.com/categories/341/vacuum-bagging-fittings

1537980276215.png 1537980288387.png
 

thenated0g

Drinker of coffee, Maker of things
Mentor
Great find! Love those reusable bag clips...
I have seen diy versions of these. I think they get conduit and cut one side off or get aluminium U bars and than you get a matching rod to put inside. It can be pvc, carbon, whatever gives a good seal. I wanted to try this company out and see how they are to deal with before i order any more expensive stuff later, such as fiberglass, kevlar (live hinges), and carbon cloth.
 

thenated0g

Drinker of coffee, Maker of things
Mentor
I don't have any pictures but as another test of ways to seal the bags i used some caulking. Just layed down a good bead and than squished the two sides together. I have seen this work in rcgroups, but still it was surprising how well it worked. Very convenient and cheap, but your going to have a big mess. I wouldn't do this with material you wanted to reuse. Another thing i see guys use professionally (guys doing this for money) is butyl tape. It is a very squishy tape. They use this on all seams and should work in a similar way as the caulking but without the mess and can be reusable if you can keep the strips clean between uses.

1539191117874.png
 

thenated0g

Drinker of coffee, Maker of things
Mentor
Got one wing bagged this weekend. Turned out great. I didnt do any video on this one as i knew i was doing another, so for now just pictures.But it went really really well. Was super easy.

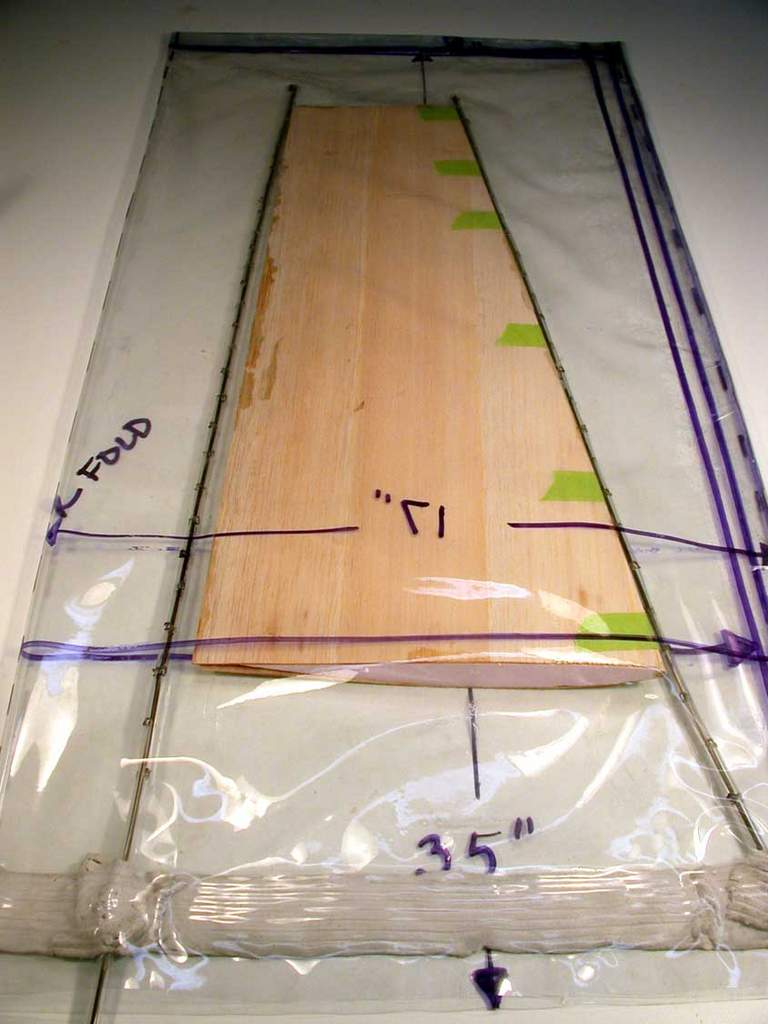
  • first i took 3 sheets of my balsa and taped them together as seen in the previous post just above ^
  • Next i traced the wing shape onto the inside of the balsa. I made sure the leading edge was flush and than added about 1/4 of an inch to the trailing edge. The leading edge will get sanded back and some stronger leading edge stock glued to it so the balsa sheets do not need to be touching.
  • Than i used a razor blade to cut them out.
  • Next i placed the top and bottom pieces on the foam and got them into the position i want them to be, taping the trailing edge with a few pieces of tape creating a hinge.
  • Than open up the balsa and lay it flat on a surface you dont mind getting water and glue on.
  • Using a squeege begin applying a very thin layer of gorilla glue over the entire surface. You can apply a lot of pressure, you want the barest amount of glue. You can see the wood surface change color like its getting wet. Make sure its everywhere especially the edges.
  • Once both insides are coated place the foam in between, position them correct and tape the leading edge with 2 or 3 pieces of foam.
  • Cover the entire top and bottom of the wing in paper towels. This absorbs the excess glue and creates a path for all the air to escape to the vacuum. The paper towers create a big mess later but is very easily removed with a foam sandpaper block.
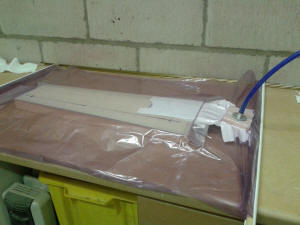
  • Next draw enough vacuum down to remove the excess air but still be able to position the wing in the bag.
  • Place the wing in the upper and lower wing beds to keep it straight and true and place weights on top.
  • Draw full vacuum. For my white foam i did 6-8 inches of mercury. My automated on/off switch has an upper and lower range. If it drops to 6 it than pumps up to 8.


IMG_20181015_110417.jpg IMG_20181015_110504.jpg IMG_20181015_110533.jpg IMG_20181015_110546.jpg IMG_20181015_110555.jpg IMG_20181015_125840.jpg IMG_20181015_125848.jpg IMG_20181015_125902.jpg IMG_20181015_125909.jpg
 

thenated0g

Drinker of coffee, Maker of things
Mentor
I left the wing in the vacuum for about 5 hrs. The vacuum pump ran only for about 5 seconds ever 1-2 minutes. I believe this is a result of the bag clips i am using in combination with the food saver bags. The clips themselves are not a perfect seal and the food saver bags have lots of divots to help the cheap food saver vacuums get all the air out.

The wing is crazy strong. So rigid. I plan on adding monokote for color but i think it would be fine just adding a couple coats of polycrylic to seal the wood. I think in a non acrobatic wing you wouldn't even need a joiner spar between the cores.

There was a little bit of work to remove the GG that went thru a few points in the skin and the paper towers really stuck to it. But like i said it is very easy to remove with a sanding block. The masking tape is probably the most difficult to remove as its over the joints and GG seems to really stick to it. But again nothing a razor and sandpaper cant take care of.
IMG_20181015_160902.jpg IMG_20181015_160935.jpg
IMG_20181015_160730.jpg
 

Merv

Site Moderator
Staff member
My automated on/off switch has an upper and lower range. If it drops to 6 it than pumps up to 8.


Tell us more about the automatic switch. Where did you get it.? Is it fixed or can you adjust the on & off points?
Any trouble with things moving around as you pulled the vacuum?