Simpson
Crazy Engineer
First I'd like to start by thanking everyone at Flite Test for giving us something to come together and build this community.
Next I'll move on to a little background about me. I have been flying sense June 2014 and my skills jumped after talking with everyone at FliteFest. You may remember me as the guy with Josh "the crazy Hawaiian who loved to talk". I can not say thanks enough for the people that took time out of flying to talk about build and flying tips, all of the help and knowledge I gained brought me to this point.
I have been able to keep in contact with a small few. I may have lost your info or never got the chance to ask for it, so if your not one of them and want to be send me a message.
I will be updating this as I finish notable points in the build
posted 12/10/14
NOW on to the build!
I started this build weeks before every buying anything. Looking, reading, talking, planing. Understanding what I wanted out of this 200% Spitfire was key to know what I would have to find a way to make it work. I wanted this plane to be able to last, to be strong, to be waterproof. With in my search I came across an Article "Super Strong, Waterproof Foam Core by HilldaFlyer" that really showed me where I should start and I did.
I already had some left over Red Rosin paper so it made my choice easy to me. I slowly started redoing the paper on full sheets of foam board


It takes some extra time but I believe it will be worth it in the long run. After only getting 4 boards complete I started the task of editing the plans for the plane into manageable sizes for printing. I noticed after that others like NerdNic did the same and also shared the files. Once I got them printed out I was able to tape them together, to a board, and start cutting. *only used 104 pages of standard 8x11 paper*
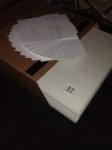

It was not as easy to cut, you could tell it was a stronger paper. Glue seemed to be just about the same, might want to just keep in mind to make sure you have a good strong bond other wise hot glue could peel off. So far I have seen the foam board take a beating from moving it around the house. It has been bounced around with out getting dented up like unedited foam board.
As I was gluing some of the parts together I found the nice red color to look amazing.
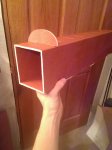
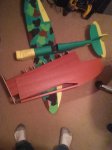
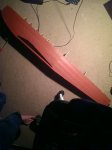

Update #1
posted 12/17/14
The build got put on the back burner for a bit but helped keep my mind busy after the passing of my Grandfather. I spent most of my birthday working on the tail making up for some lost time.
Dry fitting only 2 of the 4 pieces to get an idea on length and control rod placement.

The paper does not like to peel off the foam nicely.

Even with help it still likes to take some foam with it.

The 4 become 2. Didn't think the hot glue would stay hot enough so I just slapped on another coat of polycrylic and put them together. After leaving them for over 24 hours they came out quite nice.

With a little help I was able to start working on cutting out the wing.

Once all the top parts of the wing were cut out I just had to lay them end to end. Its nice to see this is going to be truly HHHUUUUGGGEE!

Yes I did tape it to the wall just to find out how short I'm going to feel next to this thing.

Update #2
posted 12/31/14
Small update. I just got my first order of electronics in. I have had quite a few people ask me what I'm going to use so I will list them. I will only list items once I have them in my hand. I have a few options picked out but have no clue what will end up in the plane.
Let me get this out the way. The big question "What motor?" Answer: I'm not there yet. I don't know what my ground clearance is going to be with my landing gear so I don't know what size prop I'm going to use.
Servos. Ended up going with the same servos David used. HobbyKing HK47111MG
Retracts. I over sized the retracts as 1) I dont know the end weight 2) better safe then sorry if I have some hard landings.
Struts. 169mm
Wheels. 4inch


Update #3
posted 3/2/15
Well Life always has other plans so this update is quite late but I'm happy to announce that the plane is once again being worked on.
Just received my 2nd order of parts and picked out what will be used as a spar.
the start of the spar. Two 1"x1"x3' poplar

the Turnigy motor

the big box of parts that was shipped on Friday from Hong Kong and showed up at my door on Monday

Update #4
posted 3/14/15
Built the spar with space for the retracts

After looking over the plans I was able to find that I needed a 10 degree angle

one of the test fits for the landing gear

Bottom panels are glued in and ready for servo mock up

couple of spots that will be filled in and made to look flat and the retract access

Update #5
posted 4/10/15
Well today is the 5 month mark for this thread and now on to the update
The wing is nearing completion, all 4 servos and landing gear are in and working. The only hold up now is usps with my plug and socket to keep it easy for installing/removing the wing for storage/transport. Once I solder everything in the wing I will be-able to glue the top on.
The fuselage is finally getting more work done with the tail being glued in place and the hatch cut into it for the battery/electronics. Currently looking at places to mount the tail servos and starting to mock up the mount for the tail wheel.
test fitting the top
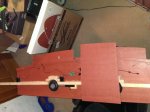
The hatch


The horizontal stabilizer is just a tad warped.. just a little irritating.

Update #6
posted 4/17/15
Finally got the wing all put together with only some small details to still work on. the fuselage has started mock up for servo placement and will shortly be getting a firewall.
Single connector between wing and fueslage

the finished wiring of the wing
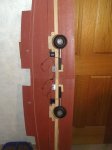
Gluing on the top of the wing

more of the top being glued on
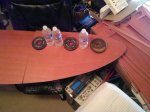
the wing completely together next to the fuselage

The first time for the fuselage to sit on top of the wing.

Update #7
posted 5/12/15
Its been going slowly again, getting close to my finals in school. The top of the fuselage as started to get covered and the firewall is built and ready to be mounted. I've got the tail servos installed and the rudder is all hooked up.


Update #8
posted 6/1/15
Another month passes and I get a little bit closer to having her up in the air. She must be ready for flitefest!
Side/wing supports

firewall installed
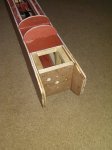
starting the front cover

taking up the couch
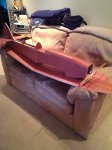
gluing part of the wing mount onto the wing

working on the back turtle deck

sitting in the yard with a normal sized ft spitfire

getting its good side photographed

Update #9
posted 6/14/15
I think its about time I start letting everyone see just what I'm playing with over here.
I might miss something so don't be afraid to ask if you want to know something.
Motor
ESC
Battery
Servo
Retracts
Struts
Wheels
Flight Controller
Receiver
UBEC
Update #10
posted 6/23/15
Well its coming down to the wire with getting her flyable for flitefest and I've had my first true setback. Had he wing laying across the armrests of my chair gluing up part of the wing locking system and my girlfriend bumped into it, knocking it over onto the fuselage. the damage was only the front of the cover being pushed in cracking some foam and bending up the left wing tip. I've already repaired the front cover and added some support. The wing tip took a lot more damage. A good amount of foam was crushed making it very weak other then the paper not much was keeping the tip attached. Repairs on the wing tip are slow and more supports need to be added now but work continues.

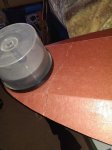
Limit reached of 50 attachments per post. Images will continue on post #48
This is all the progress I have so far. As I said this will be updated as I finish notable parts so if you wish to keep up with the build please check my Instagram to see the latest pictures of the build.
Thanks for taking the time to read this thread.
Next I'll move on to a little background about me. I have been flying sense June 2014 and my skills jumped after talking with everyone at FliteFest. You may remember me as the guy with Josh "the crazy Hawaiian who loved to talk". I can not say thanks enough for the people that took time out of flying to talk about build and flying tips, all of the help and knowledge I gained brought me to this point.
I have been able to keep in contact with a small few. I may have lost your info or never got the chance to ask for it, so if your not one of them and want to be send me a message.
I will be updating this as I finish notable points in the build
posted 12/10/14
NOW on to the build!
I started this build weeks before every buying anything. Looking, reading, talking, planing. Understanding what I wanted out of this 200% Spitfire was key to know what I would have to find a way to make it work. I wanted this plane to be able to last, to be strong, to be waterproof. With in my search I came across an Article "Super Strong, Waterproof Foam Core by HilldaFlyer" that really showed me where I should start and I did.
I already had some left over Red Rosin paper so it made my choice easy to me. I slowly started redoing the paper on full sheets of foam board


It takes some extra time but I believe it will be worth it in the long run. After only getting 4 boards complete I started the task of editing the plans for the plane into manageable sizes for printing. I noticed after that others like NerdNic did the same and also shared the files. Once I got them printed out I was able to tape them together, to a board, and start cutting. *only used 104 pages of standard 8x11 paper*


It was not as easy to cut, you could tell it was a stronger paper. Glue seemed to be just about the same, might want to just keep in mind to make sure you have a good strong bond other wise hot glue could peel off. So far I have seen the foam board take a beating from moving it around the house. It has been bounced around with out getting dented up like unedited foam board.
As I was gluing some of the parts together I found the nice red color to look amazing.


Update #1
posted 12/17/14
The build got put on the back burner for a bit but helped keep my mind busy after the passing of my Grandfather. I spent most of my birthday working on the tail making up for some lost time.
Dry fitting only 2 of the 4 pieces to get an idea on length and control rod placement.

The paper does not like to peel off the foam nicely.

Even with help it still likes to take some foam with it.

The 4 become 2. Didn't think the hot glue would stay hot enough so I just slapped on another coat of polycrylic and put them together. After leaving them for over 24 hours they came out quite nice.

With a little help I was able to start working on cutting out the wing.

Once all the top parts of the wing were cut out I just had to lay them end to end. Its nice to see this is going to be truly HHHUUUUGGGEE!

Yes I did tape it to the wall just to find out how short I'm going to feel next to this thing.

Update #2
posted 12/31/14
Small update. I just got my first order of electronics in. I have had quite a few people ask me what I'm going to use so I will list them. I will only list items once I have them in my hand. I have a few options picked out but have no clue what will end up in the plane.
Let me get this out the way. The big question "What motor?" Answer: I'm not there yet. I don't know what my ground clearance is going to be with my landing gear so I don't know what size prop I'm going to use.
Servos. Ended up going with the same servos David used. HobbyKing HK47111MG
Retracts. I over sized the retracts as 1) I dont know the end weight 2) better safe then sorry if I have some hard landings.
Struts. 169mm
Wheels. 4inch


Update #3
posted 3/2/15
Well Life always has other plans so this update is quite late but I'm happy to announce that the plane is once again being worked on.
Just received my 2nd order of parts and picked out what will be used as a spar.
the start of the spar. Two 1"x1"x3' poplar

the Turnigy motor

the big box of parts that was shipped on Friday from Hong Kong and showed up at my door on Monday

Update #4
posted 3/14/15
Built the spar with space for the retracts

After looking over the plans I was able to find that I needed a 10 degree angle

one of the test fits for the landing gear

Bottom panels are glued in and ready for servo mock up

couple of spots that will be filled in and made to look flat and the retract access

Update #5
posted 4/10/15
Well today is the 5 month mark for this thread and now on to the update
The wing is nearing completion, all 4 servos and landing gear are in and working. The only hold up now is usps with my plug and socket to keep it easy for installing/removing the wing for storage/transport. Once I solder everything in the wing I will be-able to glue the top on.
The fuselage is finally getting more work done with the tail being glued in place and the hatch cut into it for the battery/electronics. Currently looking at places to mount the tail servos and starting to mock up the mount for the tail wheel.
test fitting the top

The hatch


The horizontal stabilizer is just a tad warped.. just a little irritating.

Update #6
posted 4/17/15
Finally got the wing all put together with only some small details to still work on. the fuselage has started mock up for servo placement and will shortly be getting a firewall.
Single connector between wing and fueslage

the finished wiring of the wing

Gluing on the top of the wing

more of the top being glued on

the wing completely together next to the fuselage

The first time for the fuselage to sit on top of the wing.

Update #7
posted 5/12/15
Its been going slowly again, getting close to my finals in school. The top of the fuselage as started to get covered and the firewall is built and ready to be mounted. I've got the tail servos installed and the rudder is all hooked up.


Update #8
posted 6/1/15
Another month passes and I get a little bit closer to having her up in the air. She must be ready for flitefest!
Side/wing supports

firewall installed

starting the front cover

taking up the couch

gluing part of the wing mount onto the wing

working on the back turtle deck

sitting in the yard with a normal sized ft spitfire

getting its good side photographed

Update #9
posted 6/14/15
I think its about time I start letting everyone see just what I'm playing with over here.
I might miss something so don't be afraid to ask if you want to know something.
Specs
Motor
ESC
Battery
Servo
Retracts
Struts
Wheels
Flight Controller
Receiver
UBEC
Update #10
posted 6/23/15
Well its coming down to the wire with getting her flyable for flitefest and I've had my first true setback. Had he wing laying across the armrests of my chair gluing up part of the wing locking system and my girlfriend bumped into it, knocking it over onto the fuselage. the damage was only the front of the cover being pushed in cracking some foam and bending up the left wing tip. I've already repaired the front cover and added some support. The wing tip took a lot more damage. A good amount of foam was crushed making it very weak other then the paper not much was keeping the tip attached. Repairs on the wing tip are slow and more supports need to be added now but work continues.


Limit reached of 50 attachments per post. Images will continue on post #48
This is all the progress I have so far. As I said this will be updated as I finish notable parts so if you wish to keep up with the build please check my Instagram to see the latest pictures of the build.
Thanks for taking the time to read this thread.
Last edited:
