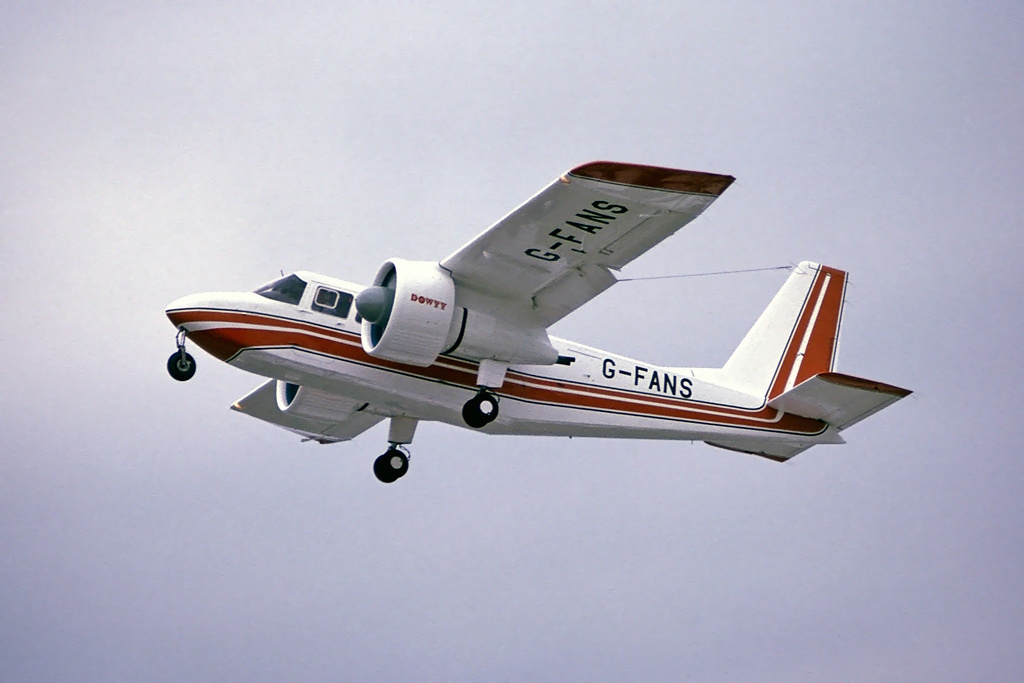
Britten bn-2 Islander mighty mini twin build

Ailerons? Landing Gear?

  • Ailerons yes

    Votes: 5 83.3%
  • Ailerons no

    Votes: 0 0.0%
  • Landing gear yes

    Votes: 4 66.7%
  • Landing gear no

    Votes: 0 0.0%
  • keep as is

    Votes: 1 16.7%

  • Total voters
    6
  • Poll closed .

FlyerInStyle

Elite member
As a successor to my flawed mini guinea, I have decided to build a better plane, improving on the weak points of the mini guinea. This will be a bn-2 Islander, slightly modded to have a cargo door. Since the Islander had oversized wings and empennage, I have decided to leave it scale for the first prototype. this will be a 1/13th scale build.

here is the first progress and the spreadsheet with the specs.
 

Attachments

  • islander spec sheet.pdf
    217.3 KB · Views: 0
  • Britten Norman islader rc progress 1.jpg
    Britten Norman islader rc progress 1.jpg
    69.5 KB · Views: 0

FlyerInStyle

Elite member
and another update. plans are competed, posting the plans here if anyone wants to give it a go, but just a note, the tiled plans ARE raster and not vector so they may be harder to trace. also, wait till I post build pictures, as I have an Experimental airlines technique in mind for the fuse and tail. I have also included svg full size plans for those who have a needle or laser cutter. by full size I mean all together, larger than a sheet of foam.
Britten Norman islader rc.jpg


v2 plans are in post 21 on the second page, the motor pods are the same
 

Attachments

  • tiled plans for the islander v1.pdf
    109.3 KB · Views: 0
  • Britten Norman islader rc.svg
    56.7 KB · Views: 0
  • islander pod.pdf
    2.3 KB · Views: 0
Last edited:

FlyerInStyle

Elite member
another update. the plans are layed out. this is just the wing and tail, and a tape dispenser is there for scale. The wingspan is a little larger than the mini guinea and the tail is too so far. just a note, this is all to scale, no enlarging of any control surfaces so far. I am also working on a realflight model maybe
 

Attachments

  • 20220105_101516.jpg
    20220105_101516.jpg
    1.8 MB · Views: 0

FlyerInStyle

Elite member
And next update. wonder why this thread is so silent. All the plans put together, and the long strips are actually drawn as part of the wing, but are spars that need to be cut off. the papers on the side are the motor mount plans that I will be doing last, after the plane is built. I think this deserves the full image size.
20220106_164240.jpg
 

Bo123

Elite member
And next update. wonder why this thread is so silent. All the plans put together, and the long strips are actually drawn as part of the wing, but are spars that need to be cut off. the papers on the side are the motor mount plans that I will be doing last, after the plane is built. I think this deserves the full image size. View attachment 215063
Looking good. I have always liked the look of the islander.
 

SSgt Duramax

Junior Member
Thats cool. I didn't even know those planes existed until now. What program are you using to draw plans? I am using inkscape to try and make my first set but it is cumbersome. Also, there is this...

Britten-Norman_BN-2A-3_Islander_%28mod%29_AN2059491.jpg
 

FlyerInStyle

Elite member
Thats cool. I didn't even know those planes existed until now. What program are you using to draw plans? I am using inkscape to try and make my first set but it is cumbersome. Also, there is this...

Britten-Norman_BN-2A-3_Islander_%28mod%29_AN2059491.jpg
I have been wanting to do that, but not right now. I use SketchUp as I take a 3d visual model and can then unfold it with the flattery extension from sketchucation. I then export as svg and into a program called scalari, by lionair rc, a YouTube channel, and it tiles it. I would recommend importing into inkscape after SketchUp though as it makes it a nice clean vector. I did not do that for this build though, and the plans look blocky.
 

FlyerInStyle

Elite member
all parts cut out and ready to build. all the seams on the fuselage are score cut and run through with a bamboo skewer. the picture is missing one of the nose pieces, as I had to do some surgery on it, and when it is good to go I will take a picture of it and edit it into this post. The wings are like an armin wing so you haev to bevel the thin strip of removed paper, then curve the large one, as that is the top of the wing, and also double bevel it.the small triangular pieces are wingtips. the plans have two identical ones. make sure that you remove the paper so that they are mirrored.

edit: there is nothing wrong wiht the nose piece, but while experimenting with it, I did finish the nose, so that will not be photographed.
 

Attachments

  • 20220108_130420.jpg
    20220108_130420.jpg
    1.8 MB · Views: 0
Last edited:

FlyerInStyle

Elite member
Here is how to build the wing.

You start off with removing the paper and beveling the thin strip, and then double beveling what will be the leading edge. that can be seen in the photo in the previous post. then, you take the wingtips, with the paper peeled off and two mirrored wingtips, you carefully bend and glue them on to what will be the top of the wing, the large part with paper removed. 20220108_131359.jpg this is what it will look like. the wingtips can be left out if you want a higher performance wing. be careful not to use hot glue that is too hot as it will melt the foam and glue the wingtip at an angle.

then, you glue on the 1 inch spars, which are goin to go, around the 1/4 inch stripe that you see on the plans. 20220108_131754.jpg again, that is what it will look like.

then carefully aligning the 2 inch spar, glue it on with a thin bead of glue and then come back with another one on each of the edges. you then test fit the wing, curving it over, making sure that the under camber can extend over the edge of your table.

then apply glue to the leading edge double bevel, the 2 inch spar, and the trailing edge bevel. fold it over and hold for at least 30 seconds (I did 45). 20220108_132639.jpg


This is what your finished wing halves should look like. WARNING: DO NOT JOIN WING HALVES TOGETHER FOR NOW!
20220108_132653.jpg


Now its time to put in the dihedral. take 4 popsicle sticks and layer them at a 10 degree angle. You should have something like this 20220108_174232.jpg 20220108_174421.jpg then, as in this photo, you put them into the 1/4inch gap, and right behind the end of the main spar. Making sure to test fit, glue them in first to one side, then the other. don't be afraid to use lots of hot glue. If needed, glue in some strips into the gap between the twon wings when joining them.
 
Last edited:

FlyerInStyle

Elite member
Next up is the fuselage. score cut and the inner fold lines and crush them down with a bamboo skewer. also, bevel the edges that will connect as consistently as possible. if confused, read on. 20220108_143310.jpg then, carefully apply glue to all the seams, and the edges that will join together, doing the front and back halves separately. you will end up with something like this: 20220108_143814.jpg its all right if your seam is higher than the other end bend, you can adjust that later.

For the next step, make sure your hot glue gun is really ho, as that will slightly improve adhesion here and significantly needed. you apply glue to the 3 sides of the seam, then carefully lift it up and press over the table. Hold it together under pressure for at least a minute.
20220108_145545.jpg


you are done with the fuselage. next post will be the tail


The wing rubber bands on with the trailing edge just in front of the bend in the fuselage (Where you glued the tail section to the front section.

also, the nose piece builds just like the mini guinea nose. Flitetest does a better job of describing it so refer to that build video if confused. make sure ot add some supports to level out the wing if it sits tilted.
 
Last edited:

FlyerInStyle

Elite member
For the tail:
first slide in the tab on the rudder into the elevator and glue on at 90 degrees to each other.
20220108_150057.jpg

then, cut a slot in the fuselage for the rudder. if you are using the final plans that will not be necessary.
20220108_145954.jpg
after that slide it in and glue it in.
20220108_150903.jpg

your tail is done.

to install electronics, just glue servos directly onto the rudder or elevator, or just sue the scotch extreme mounting tape, which is better in my opinion. This plane may not have ailerons. if you want me to put them on, please post it here, adn I will add them.

next up are the motor pods.
 

FlyerInStyle

Elite member
Next up are the engine pods. you just cut them out, slide the tabs together, and glue it together wit hot glue. nothing else to it really.
20220109_135015 (1).jpg


then you cut the slots for the tabs, and for the back of it in the wing. 20220109_140303.jpg Make sure to cut them so that the nearest to the middle of the wing is 3.5 inches from the fuselage. this is to provide extra clearance for a standard 6 inch propeller.

Then, glue it in, and take some scrap paper you peeled off the wing if it isn't in the garbage yet (if your like me, it definitely isn't), and cut out some pieces to glue on and cover up where you had to cut out the foam for the back of the motor pods. 20220109_141634.jpg 20220109_153058.jpg and there you go, your islander is almost ready for flight. servo installation for the tail is coming up soon. if you want it to have ailerons please say so in this thread.
 

FlyerInStyle

Elite member
mounting servos on to the tail. very simple just take scotch's extreme outdoor mounting tape, (or hot glue) and glue them on.
1641777367500.png
20220109_201720.jpg 20220109_201913.jpg Make your connections (You will need really long extensions for the servos on this one, but after that you are ready to fly! maiden coming soon. landing gear would just add complexity so I am leaving it out at the moment, as with ailerons. those will later be updated.
 
Last edited:

Ligbaer

50 Percenter
Next up are the engine pods. you just cut them out, slide the tabs together, and glue it together wit hot glue. nothing else to it really.
View attachment 215349

then you cut the slots for the tabs, and for the back of it in the wing. View attachment 215350 Make sure to cut them so that the nearest to the middle of the wing is 3.5 inches from the fuselage. this is to provide extra clearance for a standard 6 inch propeller.

Then, glue it in, and take some scrap paper you peeled off the wing if it isn't in the garbage yet (if your like me, it definitely isn't), and cut out some pieces to glue on and cover up where you had to cut out the foam for the back of the motor pods. View attachment 215352 View attachment 215353 and there you go, your islander is almost ready for flight. servo installation for the tail is coming up soon. if you want it to have ailerons please say so in this thread.
ailerons
 

FlyerInStyle

Elite member
One more response for yes landing gear and i will stump my brain on how to do it!
I did add ailerons though.
20220112_111159.jpg
its pretty simple, just bevel them on the ailerons. Just make sure to draw a line where the back former goes through and place it before that. its 1/4 inch off the edge that touches the wingtip, and 1/4" off of the the motor pod too.

the hatch is held on with magnets. it is the canopy. here is a video of what it looks like. they are small neodymium magnets.
ezgif.com-gif-maker.gif
 

FlyerInStyle

Elite member
So I did get another response for landing gear so time to think about how to do it. CG though is calculated, and must be 2.4-2.7" back of the LE of the wing
 
Last edited: