
You are using an out of date browser. It may not display this or other websites correctly.
You should upgrade or use an alternative browser.
You should upgrade or use an alternative browser.
F/A-18 E Super Hornet SUPERSIZED 150%
- Thread starter HilldaFlyer
- Start date
-
- Tags
- f-18 super hornet supersize
HilldaFlyer
Well-known member
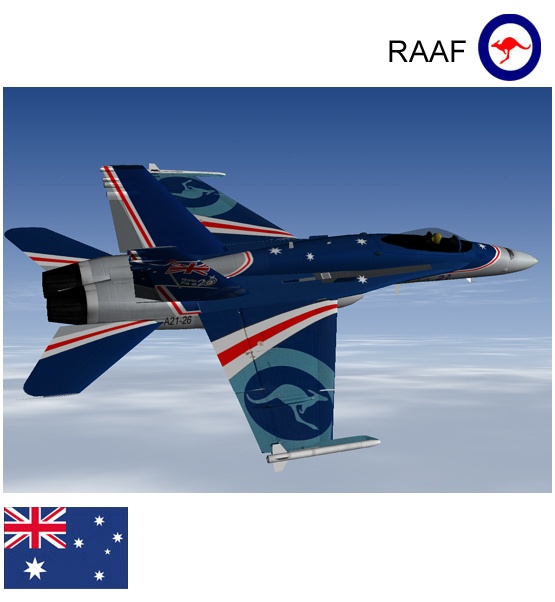
My favorite paint scheme is the Australia stripes, when I rebuild your smaller version, I will attempt it:
Love it! Can't wait to see it fly... so post your progress.
Looks really intricate. The paint will probably take longer than the build
") , but Oh, how nice it will look. You'll have everyone wanting one.
, but Oh, how nice it will look. You'll have everyone wanting one.
Last edited:
HilldaFlyer
Well-known member
Great work David, as usual. I have a quick question. Do you know of an easy way of removing paper from Ross FB. I love the stuff, much better than dtfb, but as of now i am using a rattle can of white spray paint applied to the board and the paper comes off easier. (found this out by accident)
Well Dustin... Looks like you discovered a solvent/method that works... My answer is... when you need to peel the paper, use Readi-Board
. I have a stock of Readi-Board and Ross. When I'm re-skinning I just grab the Readi-Board and peal the sheet. However, there are times when I only want to peel one side, and that is a job for Ross. So...The only technique that seems to work with Ross is to pull on the paper at 90 degrees from the foam. Lay the foam core flat on a table and start at one end. Go slow, the foam actually has to fracture away from the paper. I use my aluminum straight edge to hold the foam down behind the paper being peeled and inch by inch work across.I'll have to try the solvent thing, I have lots of old spray paint laying around that will never be used for any real projects. I bet enough solvent get through the paper to weaken the "glue"
_ Thanks for the tip! Now a question back at you. Do you let the spray paint dry or peel right away while still drying?Best to you - David
Last edited:
RCman50
family, faith, foam, fun!
Thank you sir. I only let it on there for a few minutes so its still wet. The reason i asked is the last time it didnt work so well but it was a different brand of spray paint, also using up cans that have no purpose. The paint that made it come off like dtfb was really old and I'm thinking newer paint isn't as potent maybe? A guy on rcgroups said peeled ross was much like depron. I've never worked with depron so i wouldnt know but was wondering if you have, and are they truly similar? I want to try depron but the $$$ plus shipping, im good for now. Normally I do exactly what you said use dtfb for peeled applications and ross for paper on but i want to try different things with the ross delaminated. I just like the peeled foam itself better. Im sure from one foam junkie to another you would understand. I've been looking for your post all day at work to see what you thought, it seems like you have both brands figured out so who better to ask. I'll also try your method tonight. My main goal is to get the paper off as easy as dtfb. Talk to you soon Dustin
edit- by the way the first time i used this method i did 4 boards and went to peel more and it wasn't as easy as the first time, it could be as simple as how long i left the paint on the paper, or how much paint was applied, I don't know.
. I've been looking for your post all day at work to see what you thought, it seems like you have both brands figured out so who better to ask. I'll also try your method tonight. My main goal is to get the paper off as easy as dtfb. Talk to you soon Dustinedit- by the way the first time i used this method i did 4 boards and went to peel more and it wasn't as easy as the first time, it could be as simple as how long i left the paint on the paper, or how much paint was applied, I don't know.
Last edited:
HilldaFlyer
Well-known member
Well, RCman50, I've never used Depron because of the cost. When I started into the hobby, I was following Dave Powers. I used fan fold foam in its place, but that didn't work out too well. Then I built a hot wire cutter and made my own EPS foam sheets. After all that I started using Readi-Board, and now Ross. The only thing I wish is the Readi-Board and Ross were 24" x 48" or longer. Building the bigger planes is really a hassle to spice together a couple of sheets... but it is doable.Thank you sir. I only let it on there for a few minutes so its still wet. The reason i asked is the last time it didnt work so well but it was a different brand of spray paint, also using up cans that have no purpose. The paint that made it come off like dtfb was really old and I'm thinking newer paint isn't as potent maybe? A guy on rcgroups said peeled ross was much like depron. I've never worked with depron so i wouldnt know but was wondering if you have, and are they truly similar? I want to try depron but the $$$ plus shipping, im good for now. Normally I do exactly what you said use dtfb for peeled applications and ross for paper on but i want to try different things with the ross delaminated. I just like the peeled foam itself better. Im sure from one foam junkie to another you would understand
edit- by the way the first time i used this method i did 4 boards and went to peel more and it wasn't as easy as the first time, it could be as simple as how long i left the paint on the paper, or how much paint was applied, I don't know.
RCman50
family, faith, foam, fun!
yes i hear you on that one. I had good luck again last night peeling the ross board with the rattle can and i also tried your method. Both worked well, peeling left the glue on though, not a big deal at all but i'd like you to try a scrap with my method and see what you think. I think the last time i did it and it didnt work to well i let the paint dry and maybe not quite enough paint. When its done rite you can see the pores or cells in the foam, hard to explain. Let me know what you think. I wished we lived closer I need a friend in the hobby and I did alot of hanging out at a club this summer but if you dont have a 400$ ship people seem to treat you different flying foamies. Beautiful flying field and its on a state park so you don't have to be a member but you can. I'm still looking for a more foamie friendly club. I'm sorry I am taking up so much space on your thread so i'll shut up now Have a good one and thank you, Dustin
Have a good one and thank you, DustinHilldaFlyer
Well-known member
Sorry that your club isn't keen on DIY.
I'm pretty lucky to be a member of a club that has a very diverse set of people (QMFC). The web page ain't hot, but the flying is fun. We have a bunch of DIY guys... especially Eric (most active youtuber) who has built just about every DIY project there is. Jim, from RA Cores, lives nearby and he frequents the indoor fly during the winter months. Then we have the guys like Dave who do the 1/3 and 1/4 scale. The best thing about home built foamies is that I'm not afraid to try new things.
I'm pretty lucky to be a member of a club that has a very diverse set of people (QMFC). The web page ain't hot, but the flying is fun. We have a bunch of DIY guys... especially Eric (most active youtuber) who has built just about every DIY project there is. Jim, from RA Cores, lives nearby and he frequents the indoor fly during the winter months. Then we have the guys like Dave who do the 1/3 and 1/4 scale. The best thing about home built foamies is that I'm not afraid to try new things.
Last edited:
HilldaFlyer
Well-known member
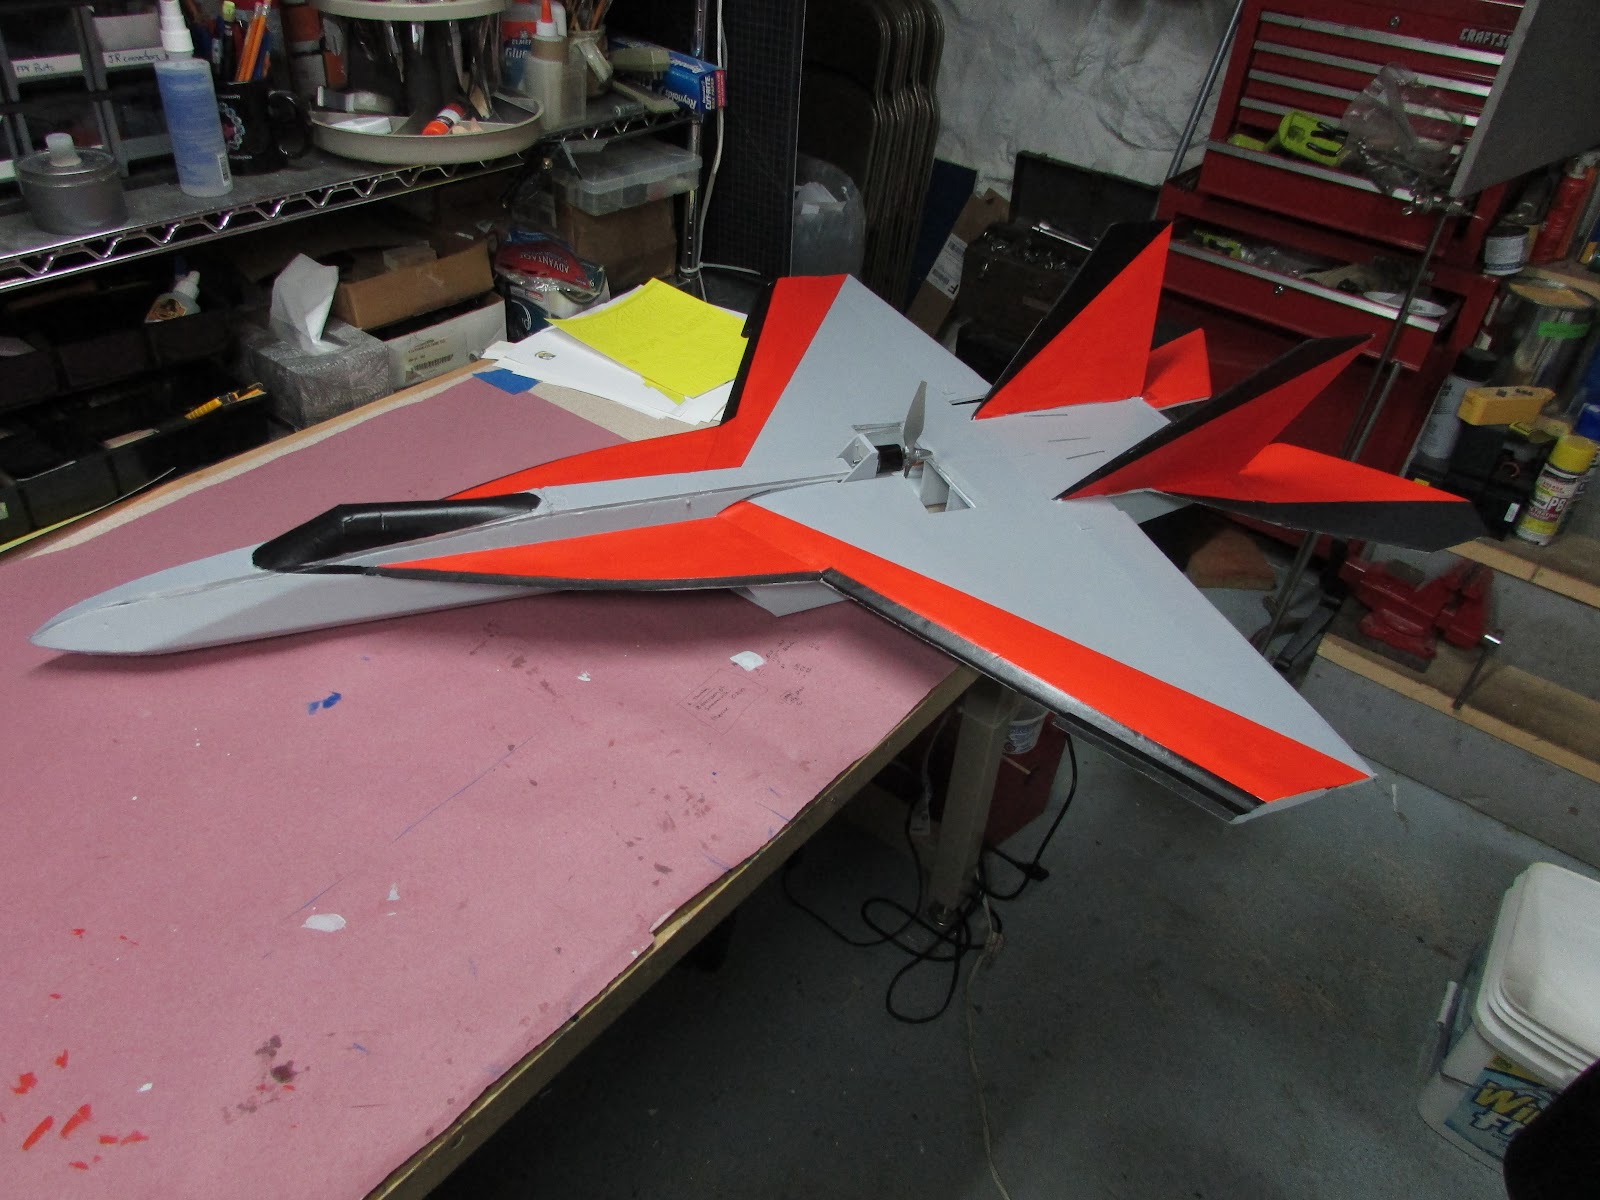
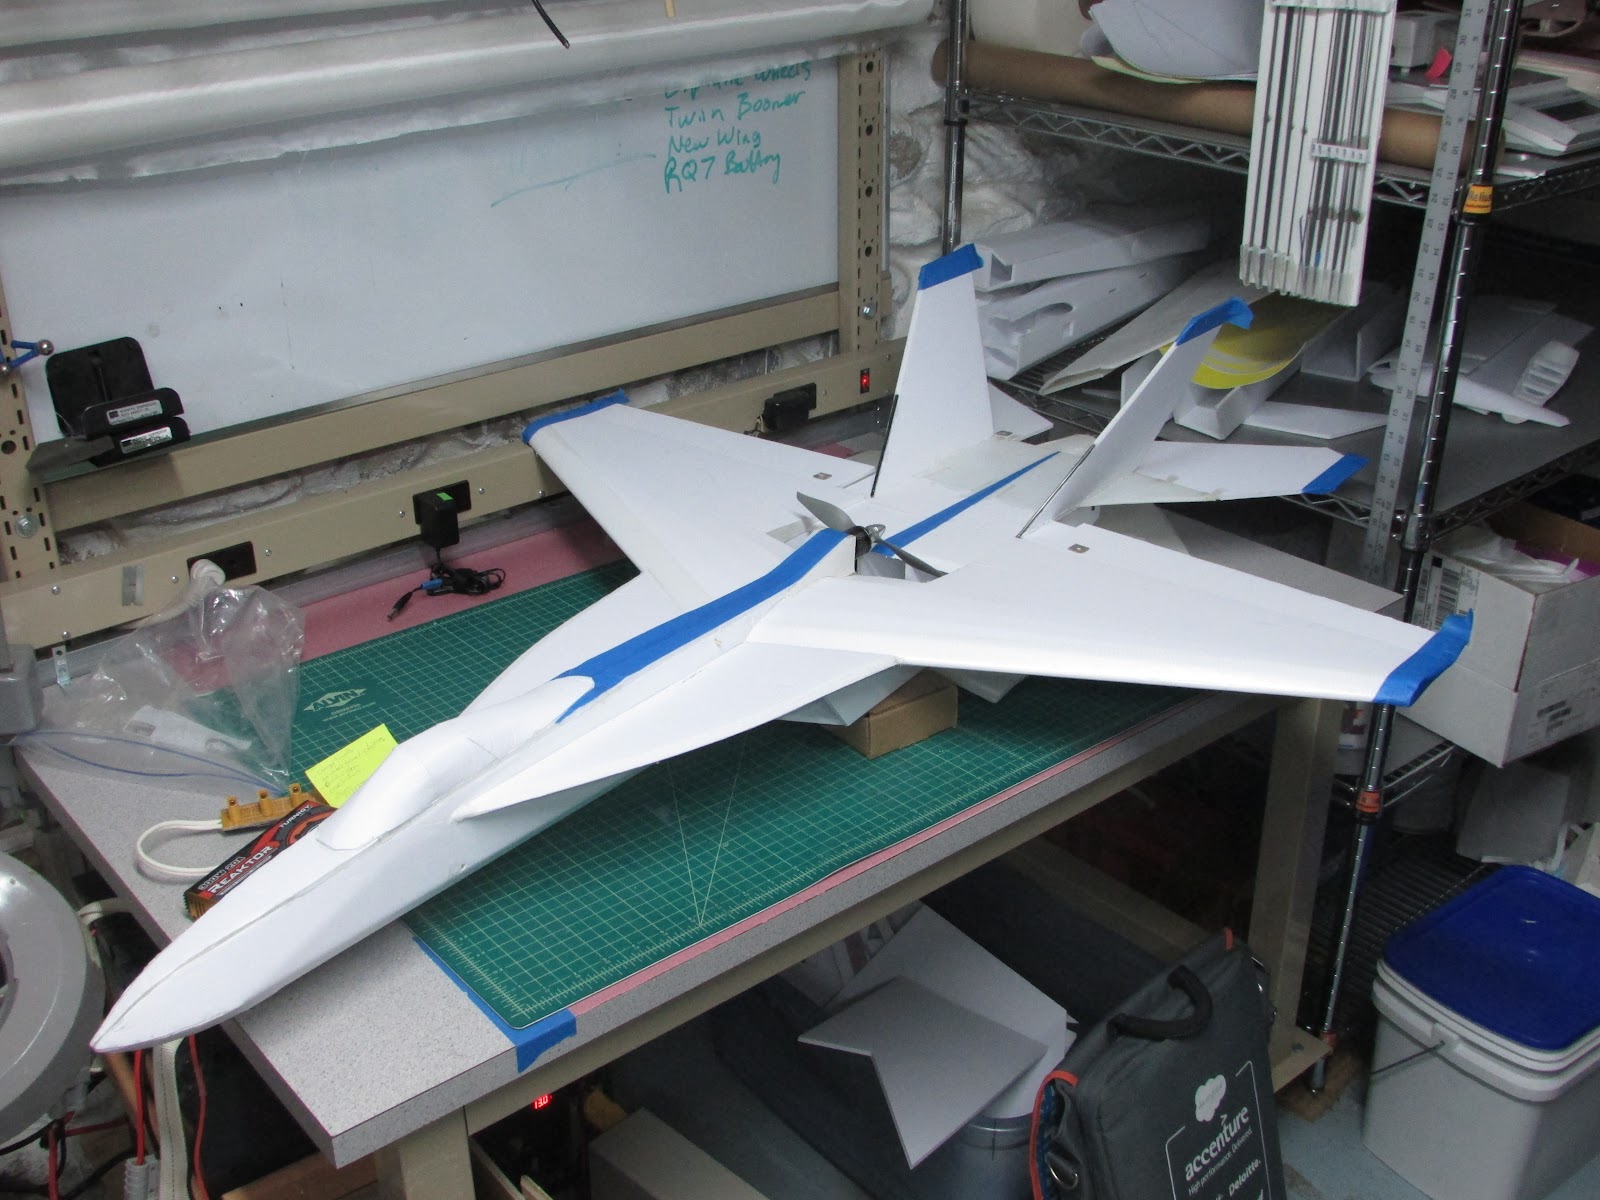
Paint Added
Added a little color last night. Didn't spend the time to make a curved tape line, so I settled on straight edges.
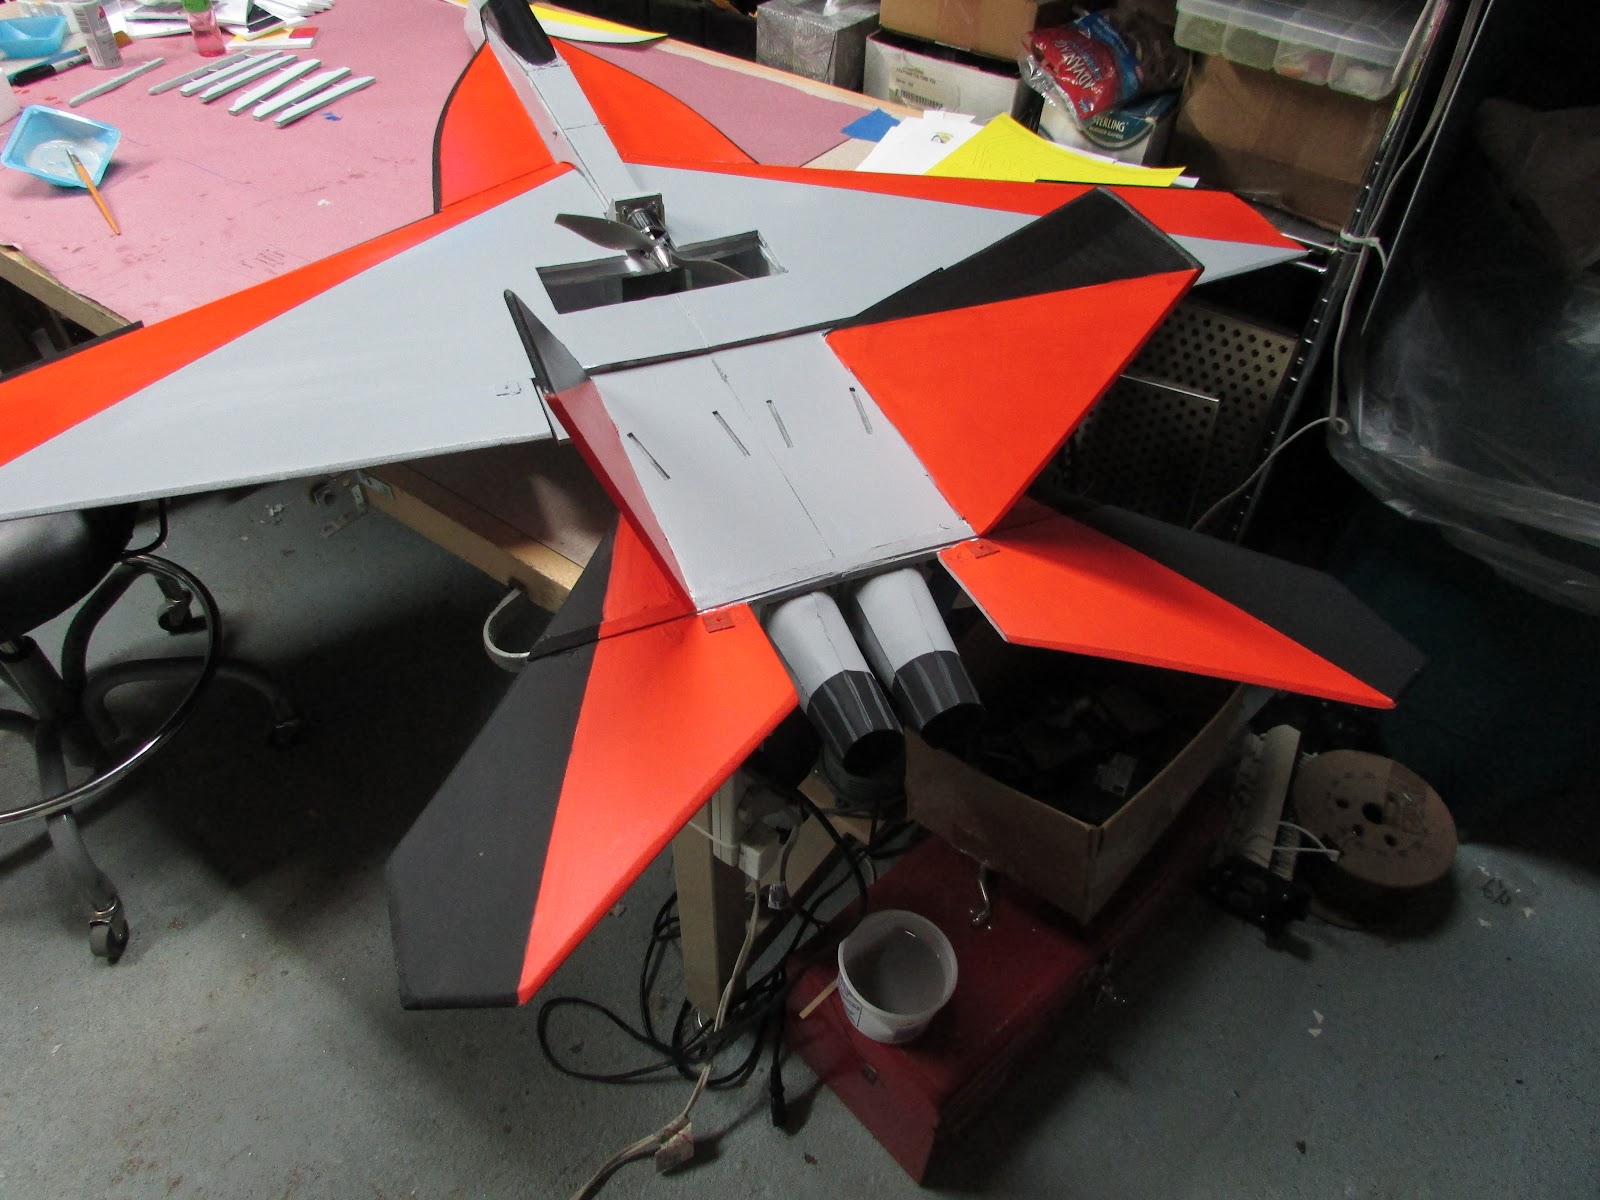
Military grey with red and black.
Added a little color last night. Didn't spend the time to make a curved tape line, so I settled on straight edges.
Military grey with red and black.
Looks awesome. The faux jets are cool. I really need to go crash my ft-22 so i can start working on another big jet
HilldaFlyer
Well-known member
Looks awesome. The faux jets are cool. I really need to go crash my ft-22 so i can start working on another big jet
Oh, don't be crashing it on purpose... I was just looking at your FT-22 x200... and I just decided to go to FF2016. All I could think of is formation flying, a 150% and 200% FT-22's side by side. We could crash together, or dogfight.
Anyway, expecting sub zero temps tomorrow so the F/A-18Ex150 maiden will have to wait till March.
I'll add a few more decals tomorrow. Usually I maiden before paint and such just because I'm too used to picking up pieces on the first flight. I'm fairly confident this one will fly. I think I just jinxed myself.
i would love to go to FF east, but its like 2,500 miles one way. I will for sure be at west though.
HilldaFlyer
Well-known member
Maiden Flight completed
AWESOME - I didn't even have to trim it, flew straight and true.
You should build one!
AWESOME - I didn't even have to trim it, flew straight and true.
You should build one!
smithhayward
Large Child
Congrats! That's amazing looking and flying. I've got a lot of projects on my list, but this ones going to have to be added I think.
Can you explain how you calculated the CG and what you needed to do internally to get the right balance?
Can you explain how you calculated the CG and what you needed to do internally to get the right balance?
HilldaFlyer
Well-known member
CG Determination
Great question, and I'm glad to say the answer is NOT - "I Guessed!"
The CG was calculated a few different ways and then I used a my patented method of ballpark convergence to drop it on the plan. The basic concept is that each wing style will have its own center of lift.
1) There are several really good calculators on the web (like this one) that can help narrow down where CG should be on a wing. Regardless of the plane, the wing is key to CG. The CG calculators, however, do not consider things like leading edge extensions of the F-18E. I rationalized that the leading edge extensions would add a bit of "wing" to the forward, so I wasn't surprised the the calculated CG was a little to the rear.
2) I built a smaller version of the plane before hand, the FT-18E, and used it as a test subject. Since the Supersized version was a scaled up of the small one, I just assumed the CG would be pretty similar. I didn't know how the airfoil wing would affect it, if at all... so that was kind of a guess.
3) I took the CG from other peoples plans, like the RCSuper Powers F-18 which I built a few years earlier. The dimensions of the planes were different and the wing shape slightly different, so I just scaled the measurements as best I could, using % from the wing's leading and trailing edges.
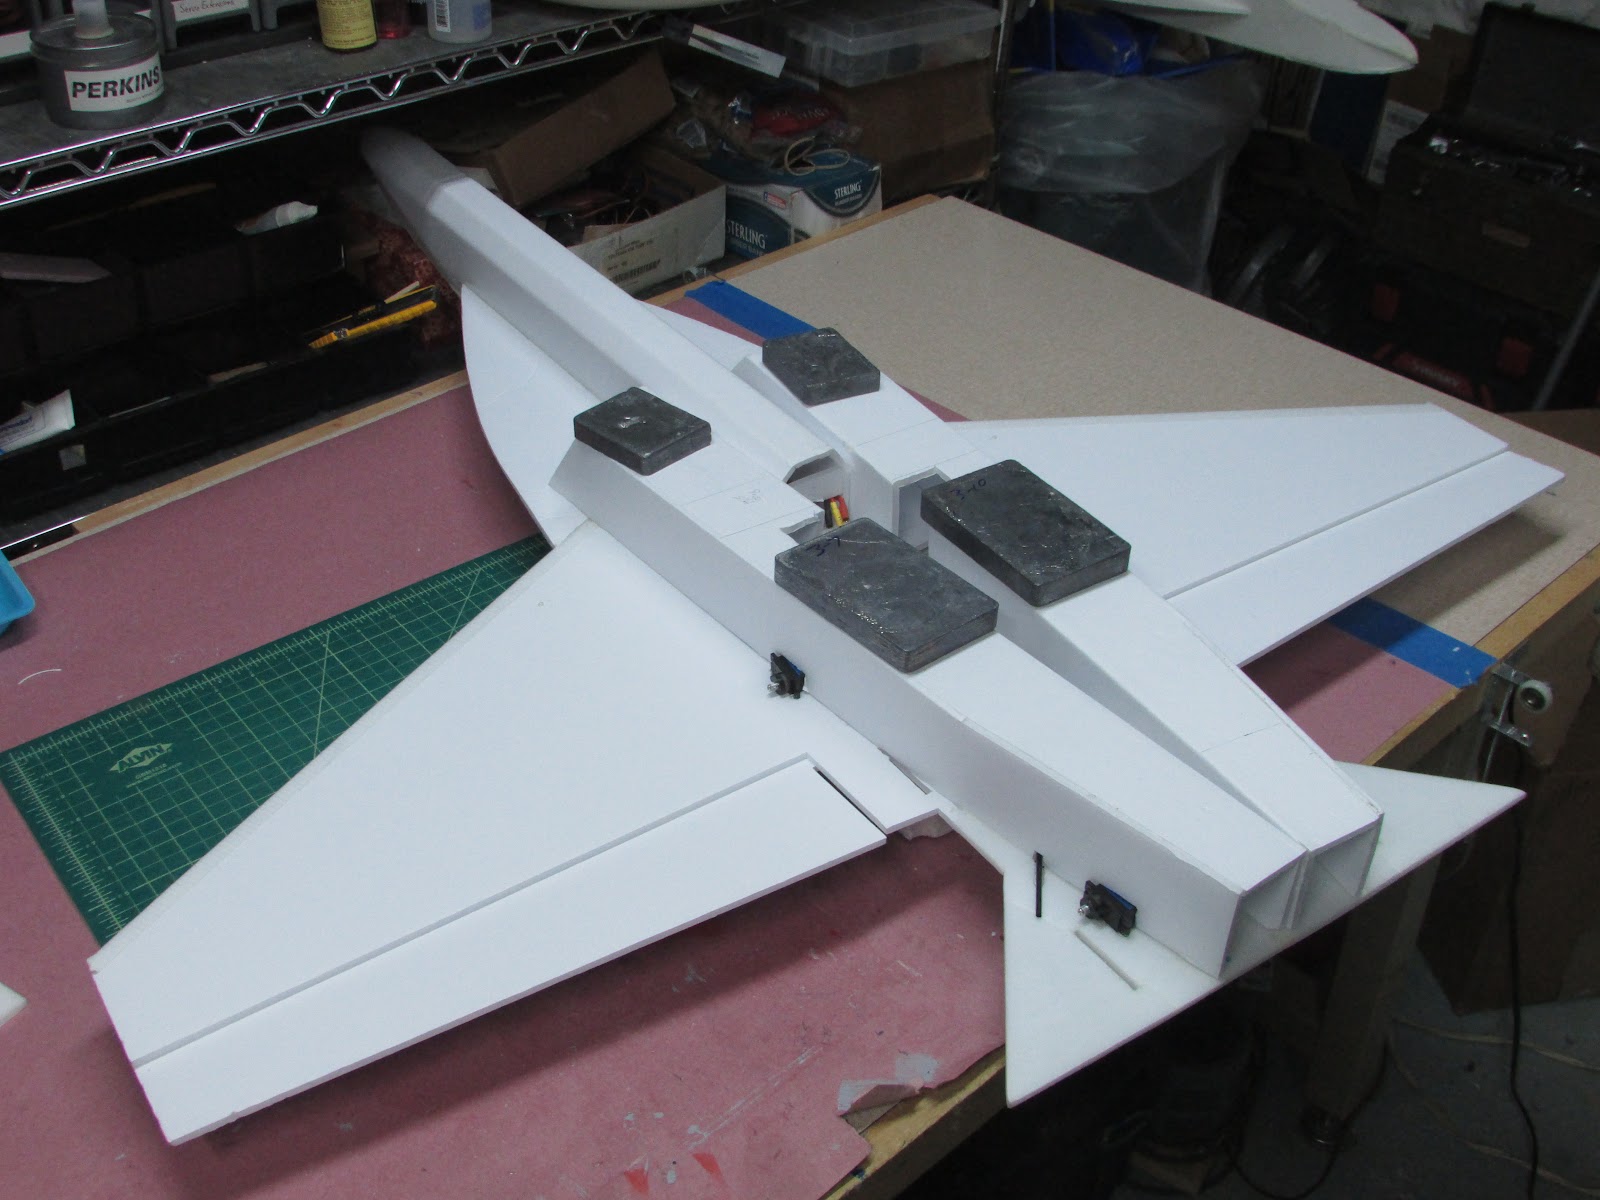
The CG from these three methods converged really well so I just left the CG mark from the smaller F-18 plans. I'd have to say that nailed it.
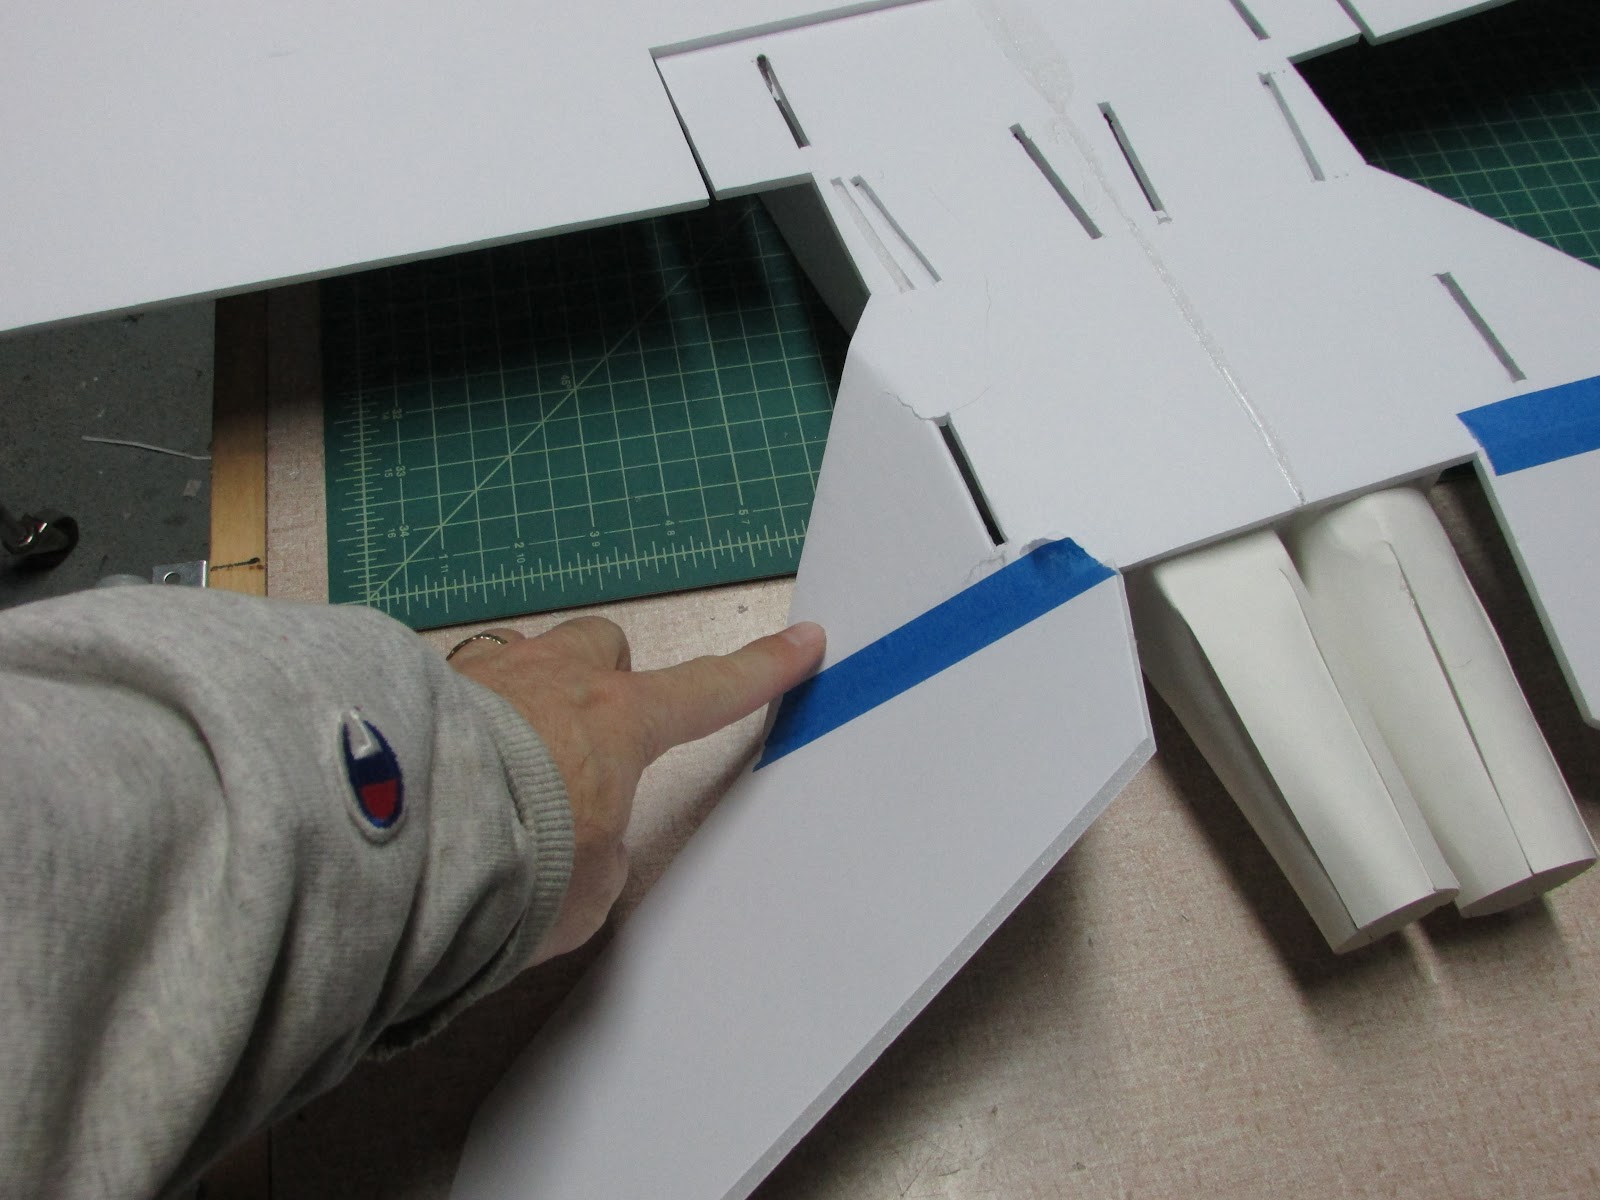
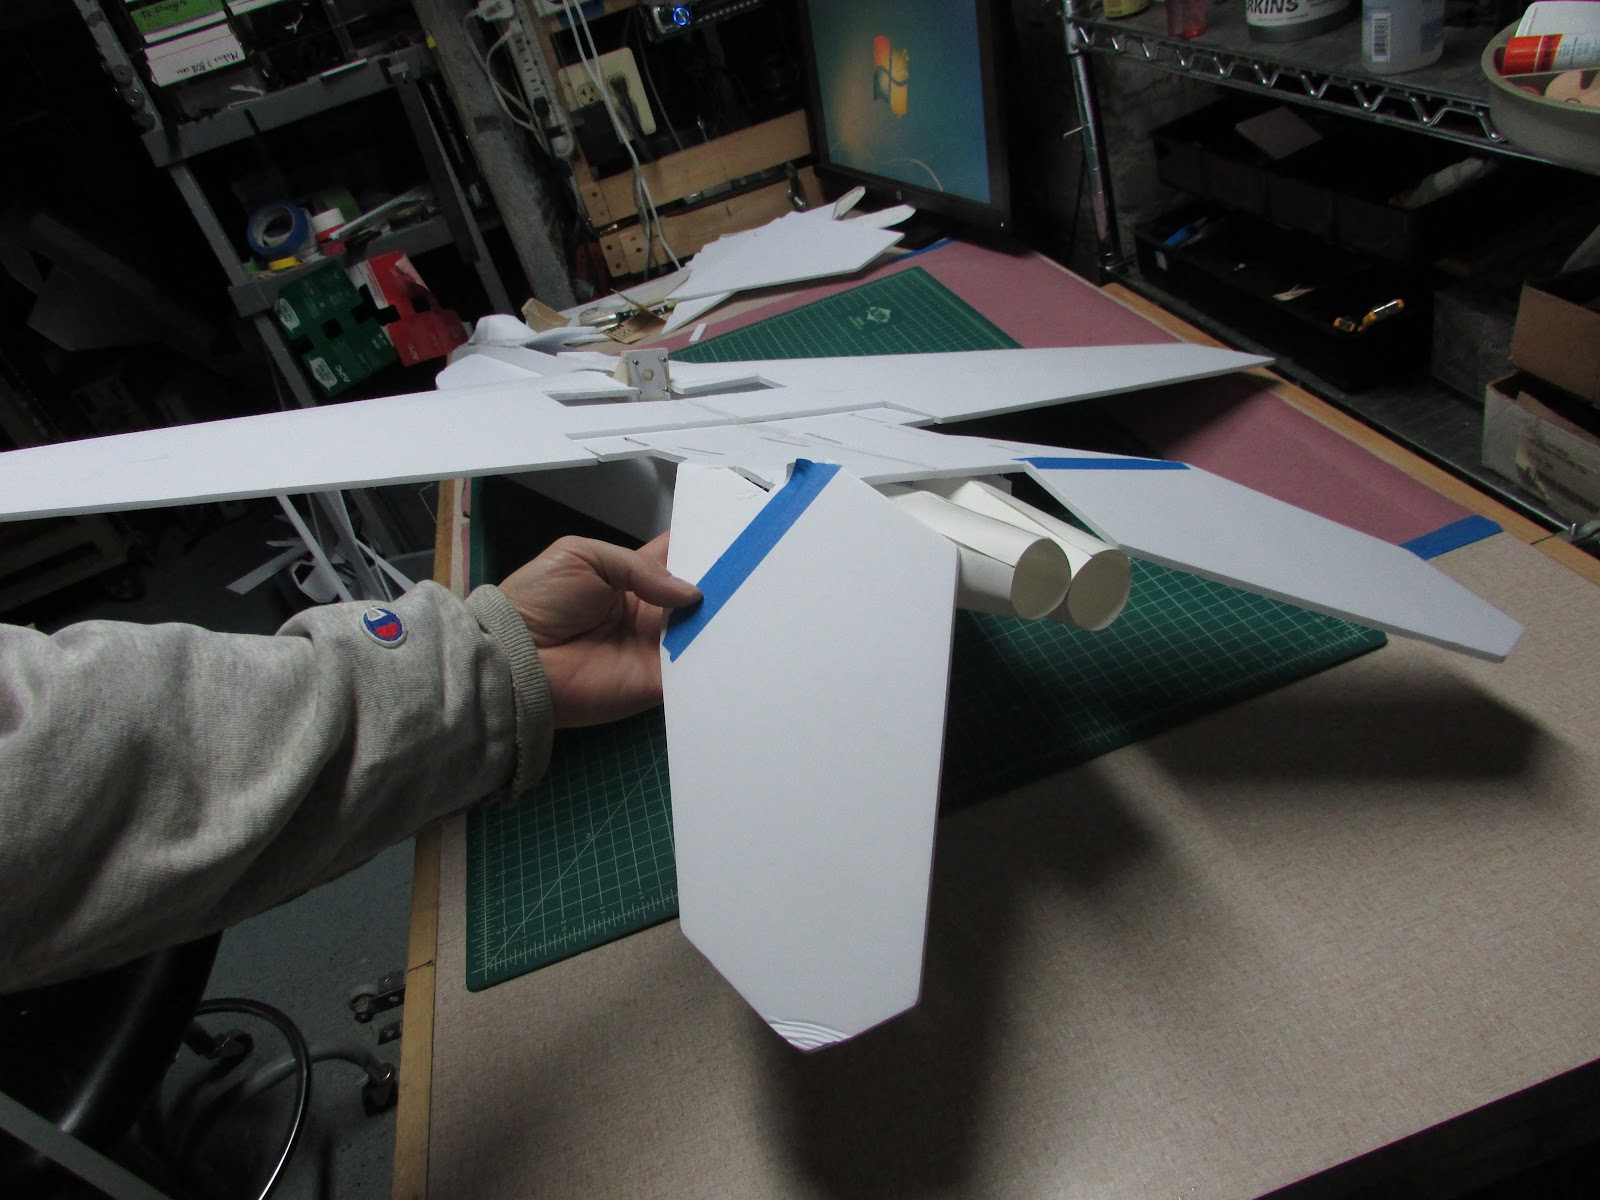
To get the plane to balance, I just moved the battery, ESC and motor around on a full-size prototype. The first picture of this thread shows the prototype with a battery installed and the ESC and Motor sitting on the top.
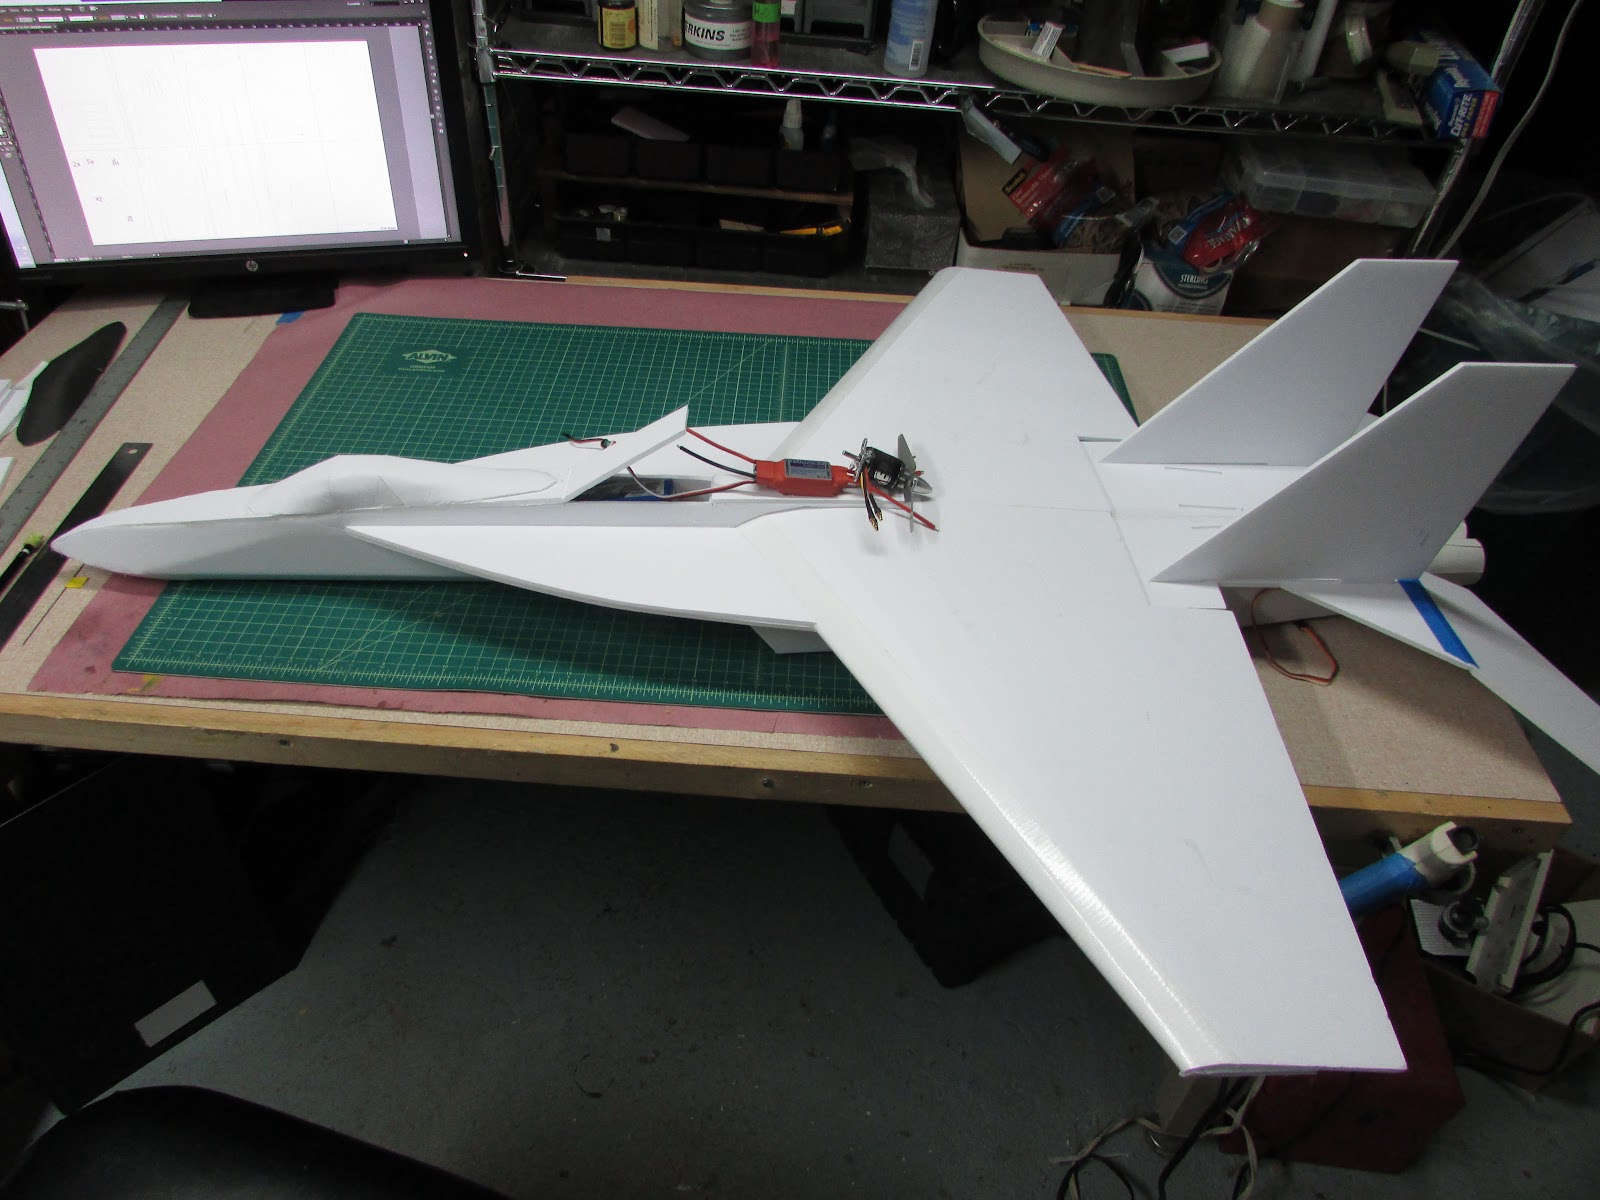
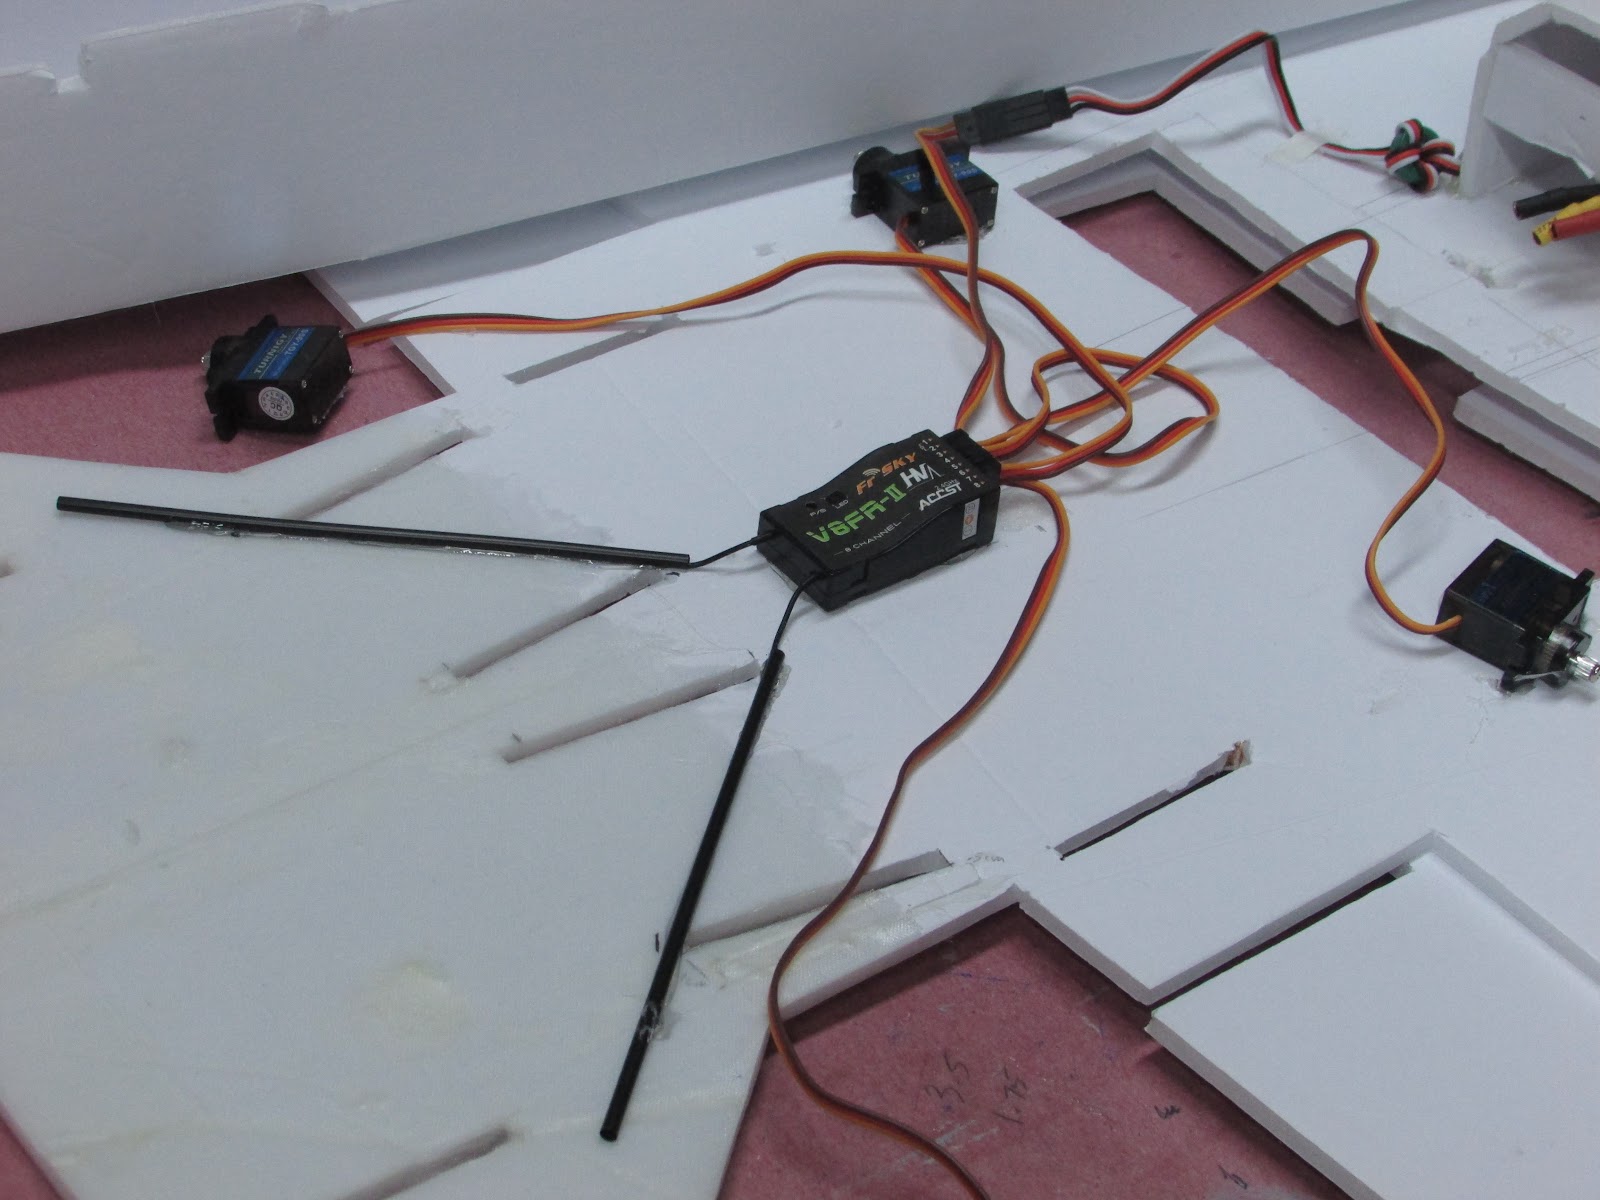
What you can't see is the servos and receiver are taped to the bottom. This gave me a rough idea of where things could go. To allow for adjustments, on new planes I make the battery compartment longer so the battery can be slid forward or rearward if needed. In this build I made a battery tray and platform. The platform was a long piece of foam secured to the fuselage and the tray was independent and only tacked in place until I got in the first flight. After the CG is confirmed, the battery try is secured.
Hope that made sense.
Congrats! That's amazing looking and flying. I've got a lot of projects on my list, but this ones going to have to be added I think.
Can you explain how you calculated the CG and what you needed to do internally to get the right balance?
Great question, and I'm glad to say the answer is NOT - "I Guessed!"
The CG was calculated a few different ways and then I used a my patented method of ballpark convergence to drop it on the plan. The basic concept is that each wing style will have its own center of lift.
1) There are several really good calculators on the web (like this one) that can help narrow down where CG should be on a wing. Regardless of the plane, the wing is key to CG. The CG calculators, however, do not consider things like leading edge extensions of the F-18E. I rationalized that the leading edge extensions would add a bit of "wing" to the forward, so I wasn't surprised the the calculated CG was a little to the rear.
2) I built a smaller version of the plane before hand, the FT-18E, and used it as a test subject. Since the Supersized version was a scaled up of the small one, I just assumed the CG would be pretty similar. I didn't know how the airfoil wing would affect it, if at all... so that was kind of a guess.
3) I took the CG from other peoples plans, like the RCSuper Powers F-18 which I built a few years earlier. The dimensions of the planes were different and the wing shape slightly different, so I just scaled the measurements as best I could, using % from the wing's leading and trailing edges.
The CG from these three methods converged really well so I just left the CG mark from the smaller F-18 plans. I'd have to say that nailed it.
To get the plane to balance, I just moved the battery, ESC and motor around on a full-size prototype. The first picture of this thread shows the prototype with a battery installed and the ESC and Motor sitting on the top.
What you can't see is the servos and receiver are taped to the bottom. This gave me a rough idea of where things could go. To allow for adjustments, on new planes I make the battery compartment longer so the battery can be slid forward or rearward if needed. In this build I made a battery tray and platform. The platform was a long piece of foam secured to the fuselage and the tray was independent and only tacked in place until I got in the first flight. After the CG is confirmed, the battery try is secured.
Hope that made sense.
Last edited:
HilldaFlyer
Well-known member
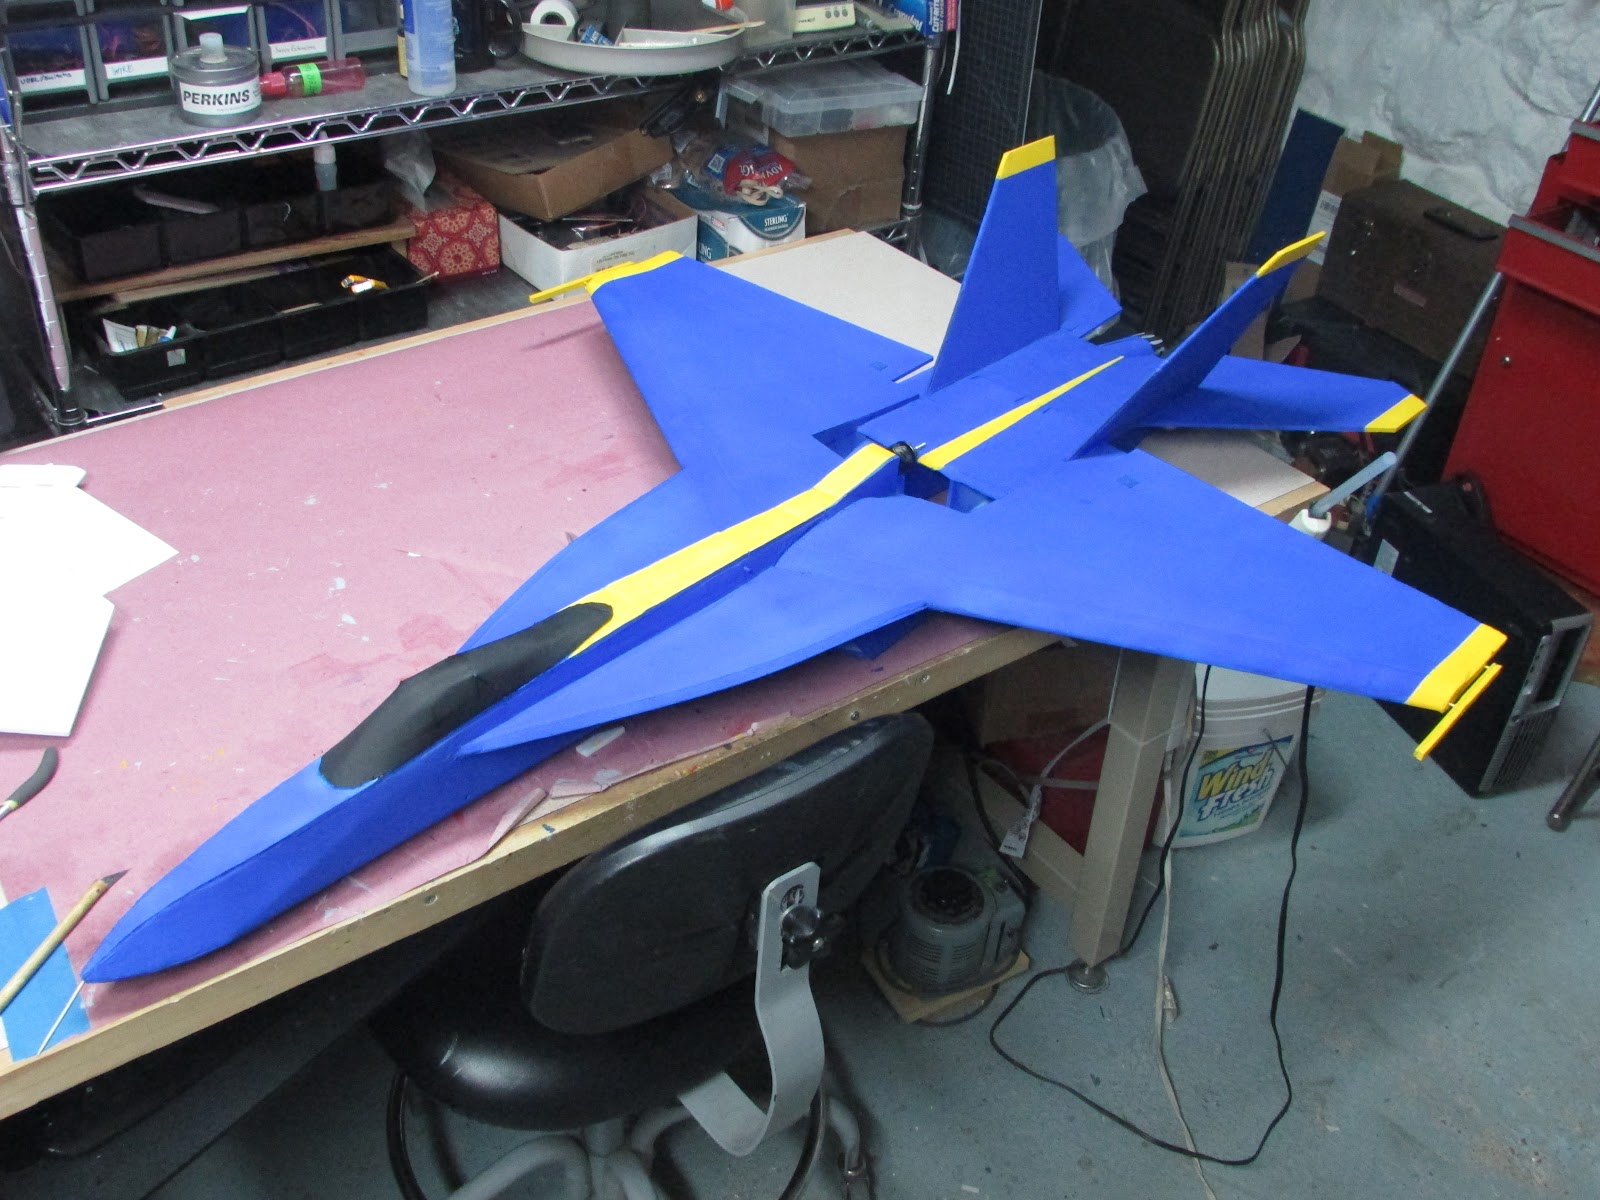
FA-18E Supersized v2 Build
The version 2 is pretty much identical to v1 except the color - This one will be a Blue Angels theme.
Don’t tell anyone but this, but this is the plane that I started first. However, it fell off the table and the tail broke so I set it aside and started over. You’ll find in the build of the v1 that it also fell off the table and broke its tail. Rather than start over, I just glued a stick to the tail. So, after completing the second one (which became v1 military grey with CAG colors) I turned back to this and not wanted to throw it away, made repairs.
Crushed tail.
The repair was poorly done with a fiberglass overlay. The nacelles were tacked on, so I had to rip them off. I also had to remove the servos, receiver antenna ducts (coffee stir straws). I should have take more time to get it straight, but as it turns out, the elevators turn slightly downward. Oh well, it is just a plane.
The nacelles were reattach, this time with Gorilla Glue.
HilldaFlyer
Well-known member
Added Wheels

V2 has an addition of wheels. This will be interesting, wheels without steering.
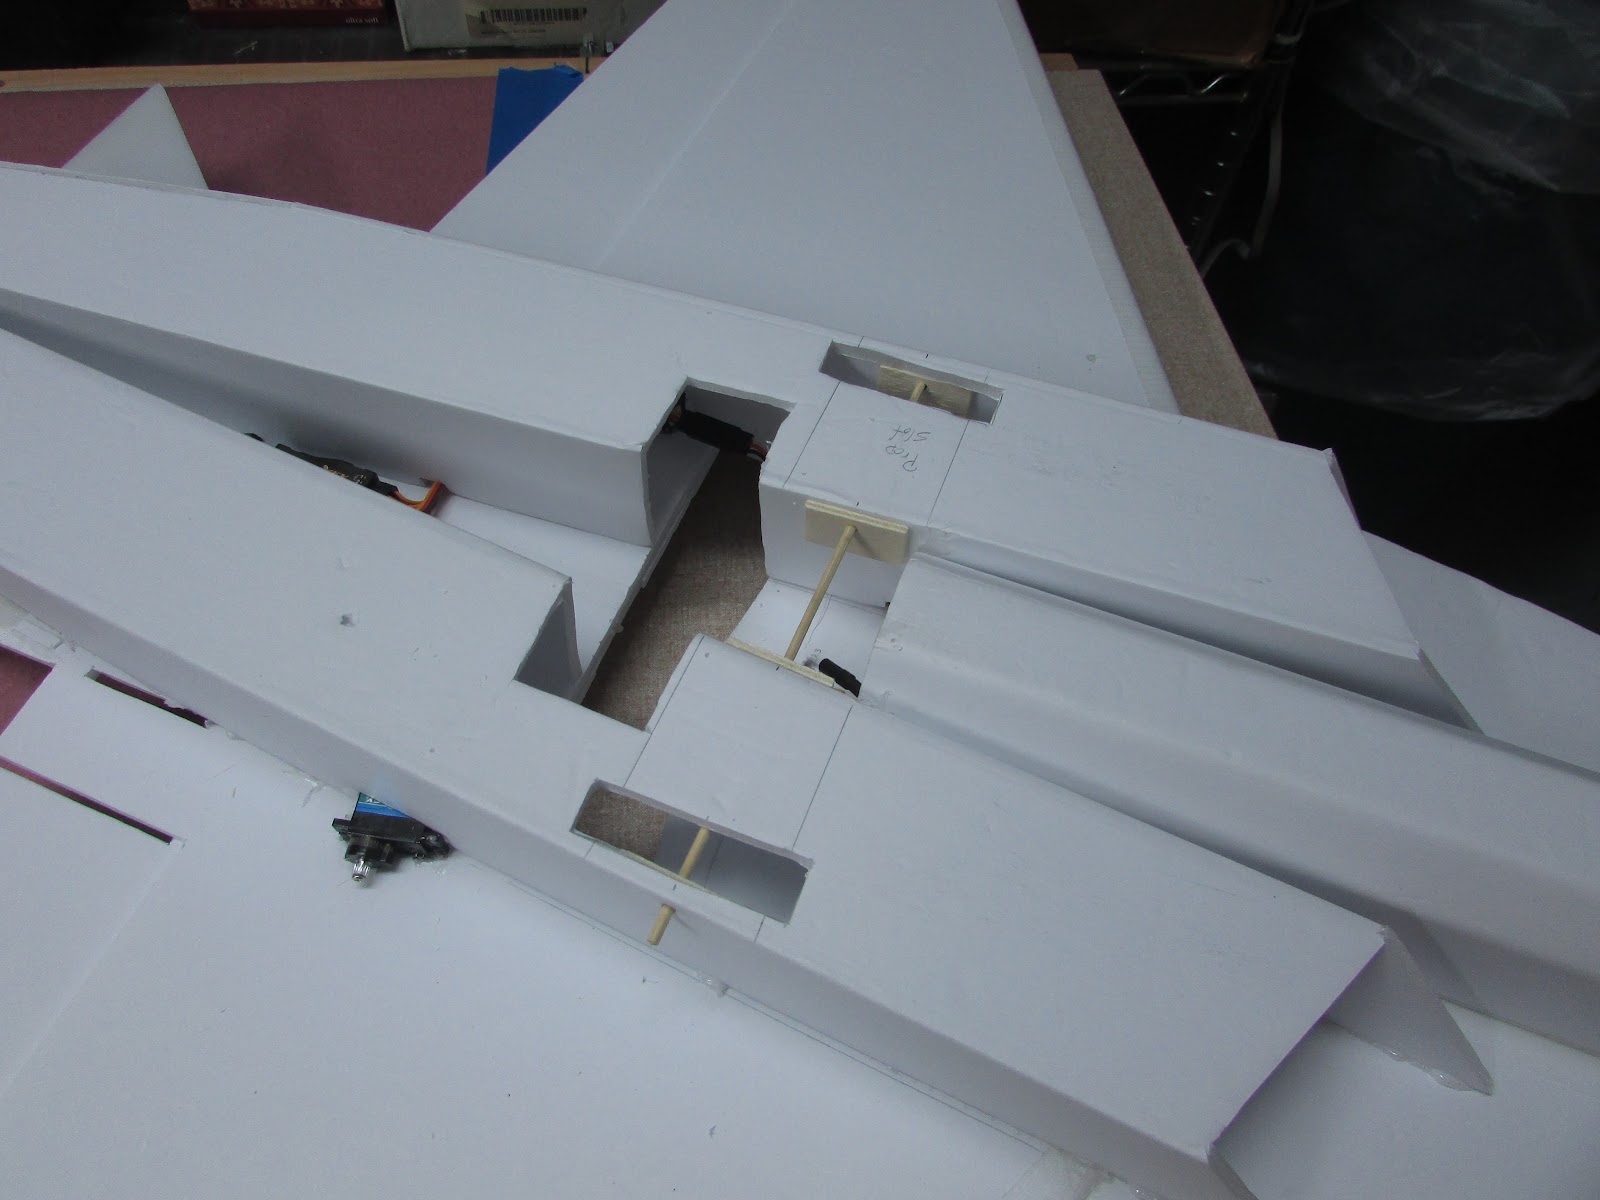
View of the rear wheel holes. The skewer will be replaced with two 3.5 mm carbon fiber tubes so it will not span the gap behind the fuselage. I reinforced the foam with plywood as shown.
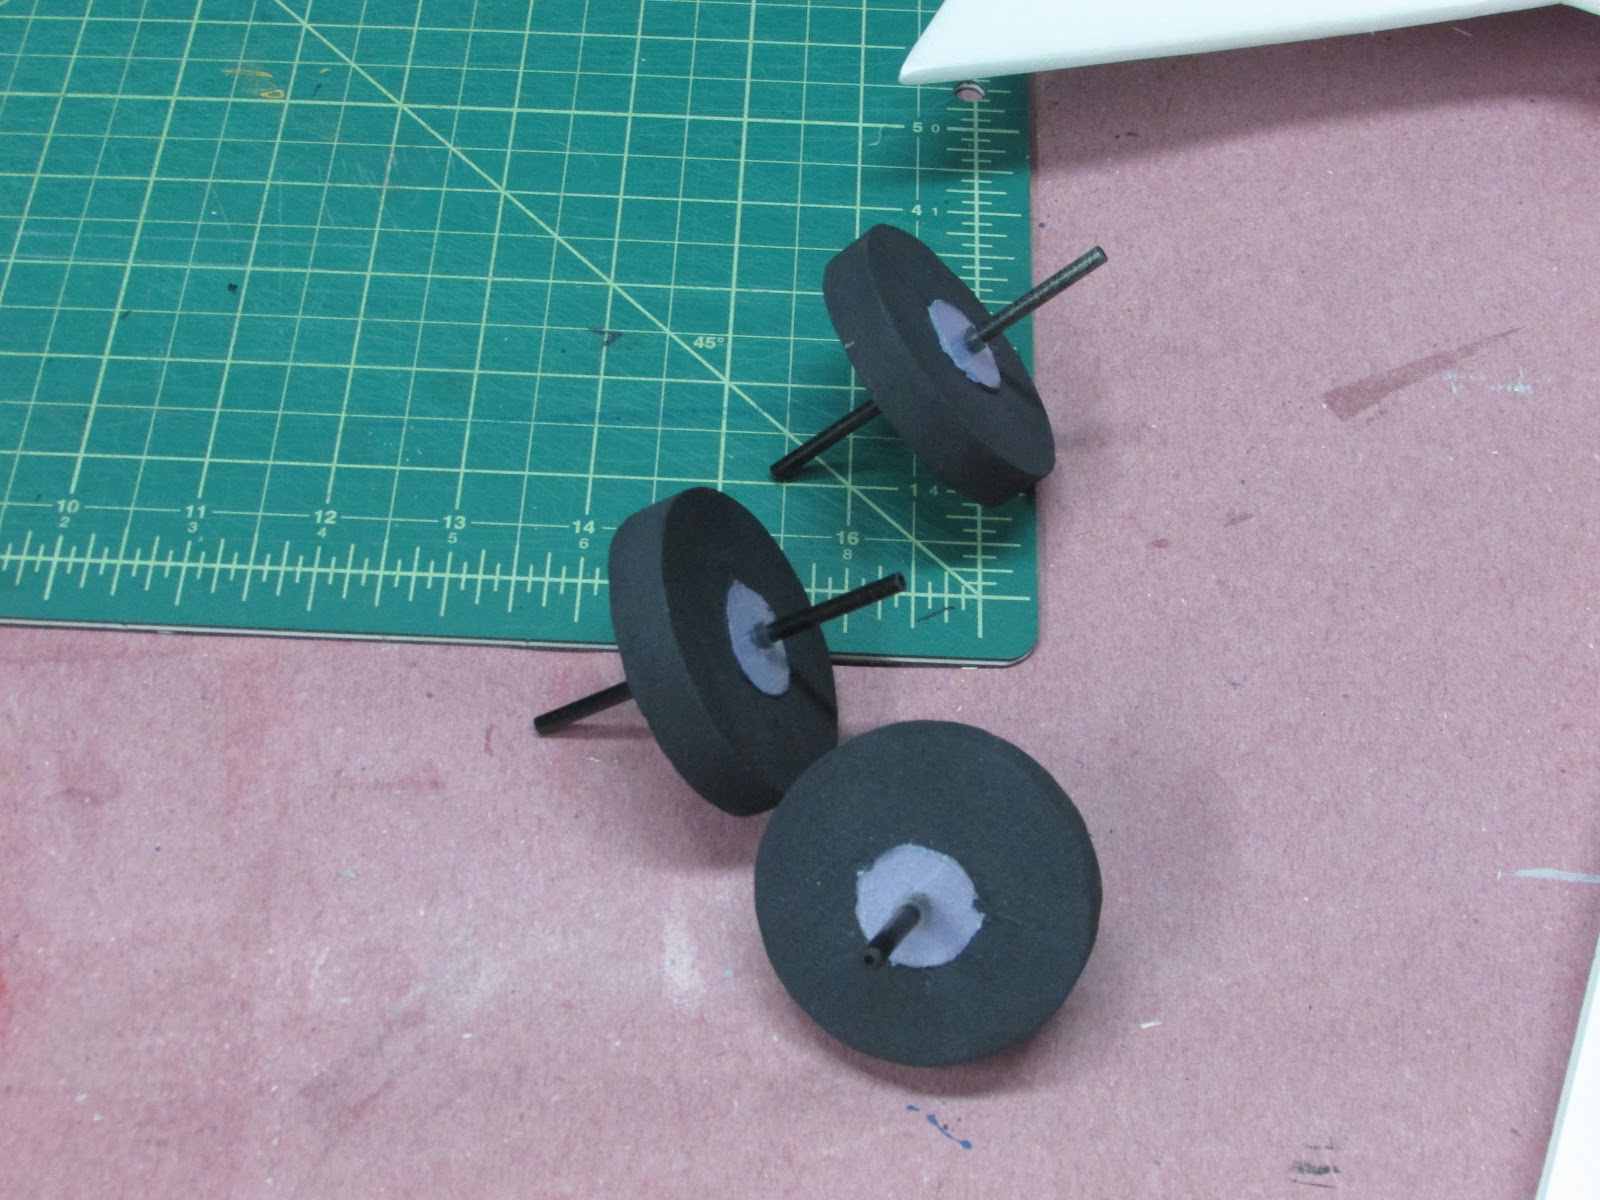
The wheels are a bit bigger, like 5 time scale, so I decided to just mount them internally so only half the wheel will show. This is mainly due to the fact that I have a grass landing field and anything less than 2” wheels just doesn’t roll. Don’t get me wrong, scale is great, and I love things that look nice and scale, however, I also like things to function.
V2 has an addition of wheels. This will be interesting, wheels without steering.
View of the rear wheel holes. The skewer will be replaced with two 3.5 mm carbon fiber tubes so it will not span the gap behind the fuselage. I reinforced the foam with plywood as shown.
The wheels are a bit bigger, like 5 time scale, so I decided to just mount them internally so only half the wheel will show. This is mainly due to the fact that I have a grass landing field and anything less than 2” wheels just doesn’t roll. Don’t get me wrong, scale is great, and I love things that look nice and scale, however, I also like things to function.
HilldaFlyer
Well-known member
Paint Paint Paint
Time for paint. I’m going to try airbrushing the paint rather than brushing… tape the yellow off.
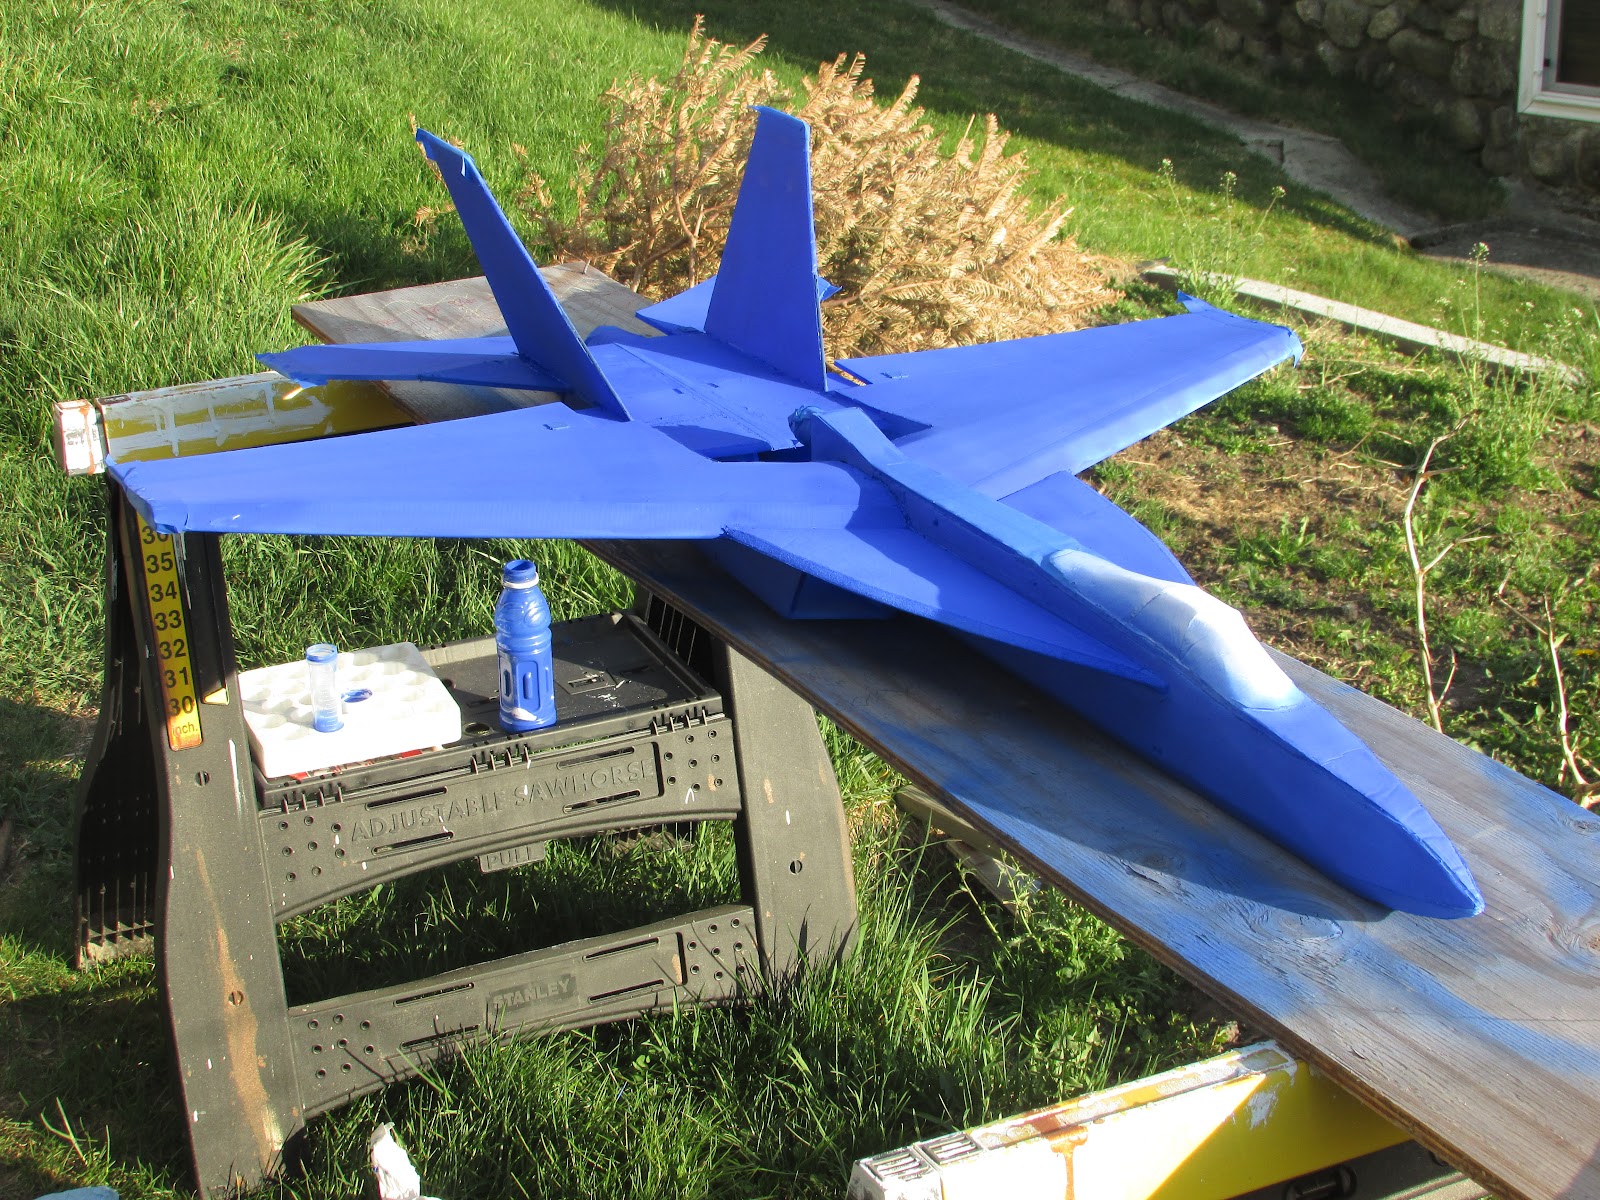
Waited for nice warm evening and then sprayed away!
Maybe next time I’ll take the time to reverse tape and spray again… but I just went with the good ol’ fashion brush to get the yellow on.
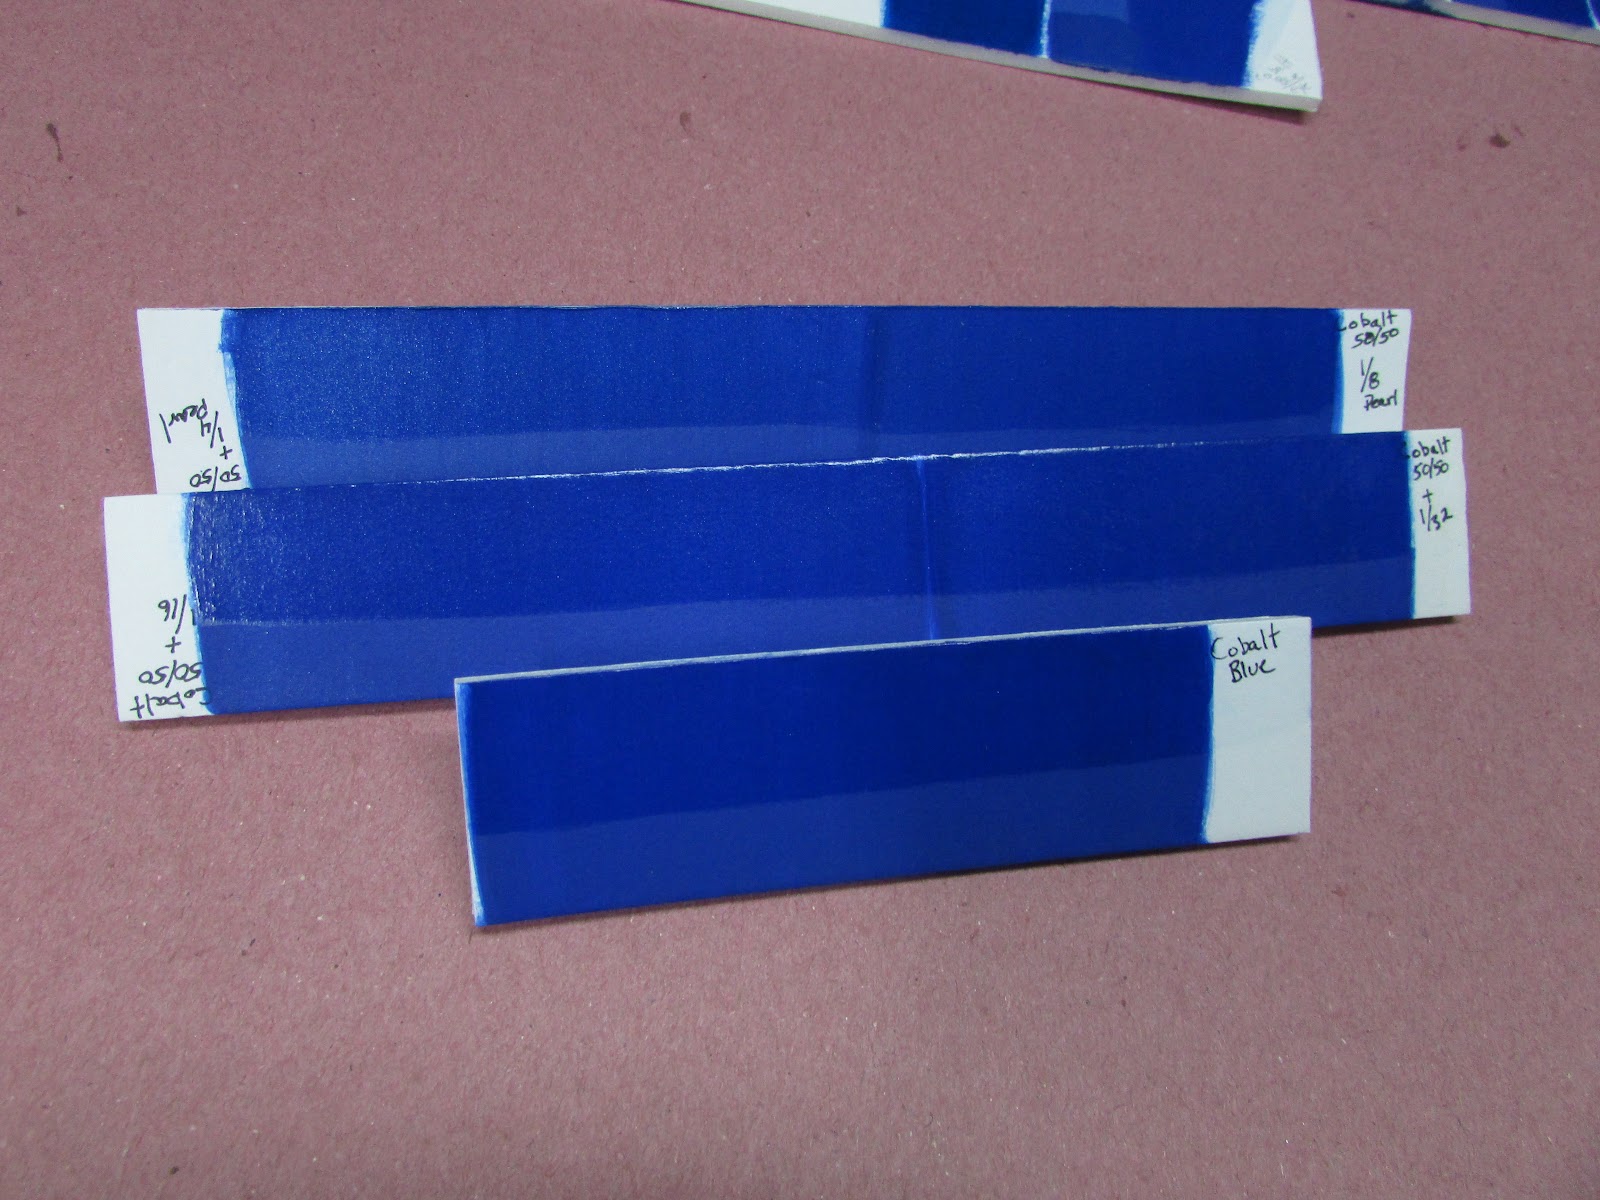
To get this in the air, I want to first overlay the entire plane in Americana DuraClear Gloss Varnish - it really makes the color POP! The top of each strip is overlayed with the DuraClear.
Time for paint. I’m going to try airbrushing the paint rather than brushing… tape the yellow off.
Waited for nice warm evening and then sprayed away!
Maybe next time I’ll take the time to reverse tape and spray again… but I just went with the good ol’ fashion brush to get the yellow on.
To get this in the air, I want to first overlay the entire plane in Americana DuraClear Gloss Varnish - it really makes the color POP! The top of each strip is overlayed with the DuraClear.
HilldaFlyer
Well-known member
V1 flies again
I posted this in a different thread - thought I'd put it here. I added missiles to the v1.

These were made by rolling paper around a knitting needle.

Attached they looked like this.

After the flight
I posted this in a different thread - thought I'd put it here. I added missiles to the v1.
These were made by rolling paper around a knitting needle.
Attached they looked like this.
After the flight
HilldaFlyer
Well-known member
Blue Angles Adornments
Vinyl Lettering
I picked up some yellow vinyl and thought I could use it to make the lettering. It is a pretty thick and filamented vinyl so cutting wasn’t easy.
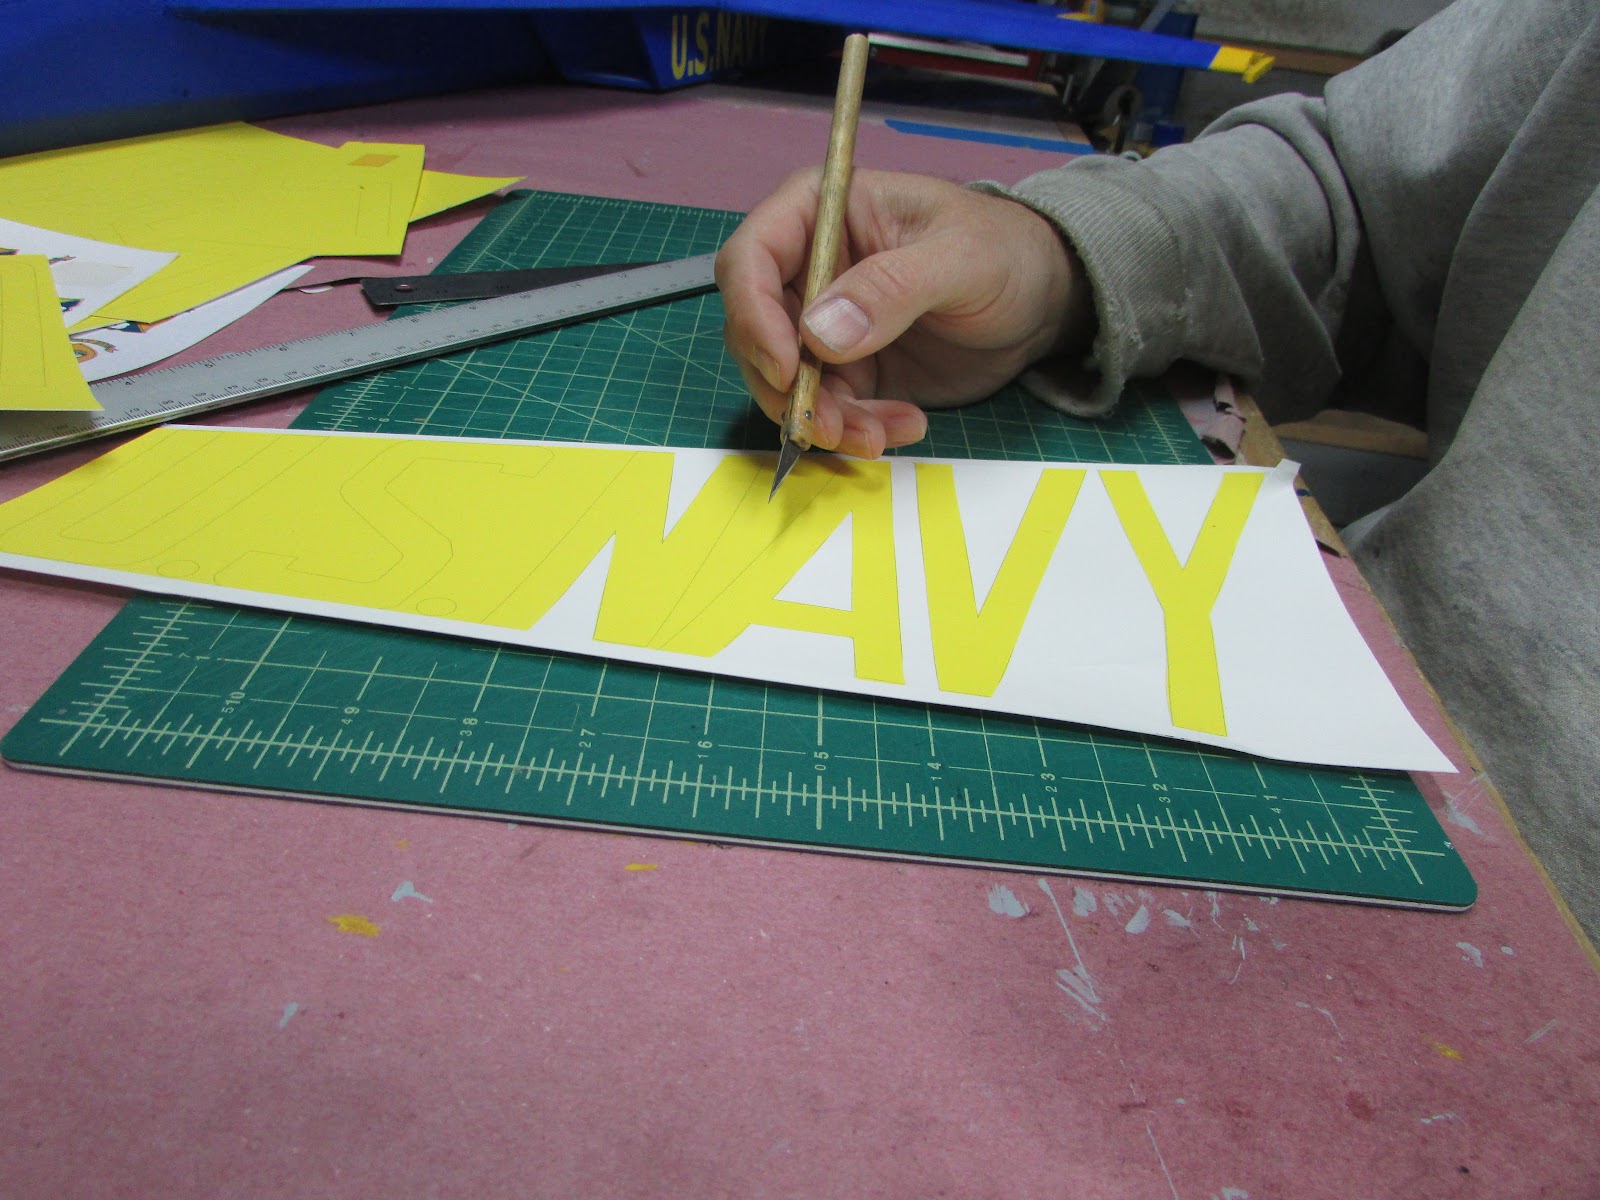
I ran it through my inkjet printer to get the outline of the lettering and cut it out.
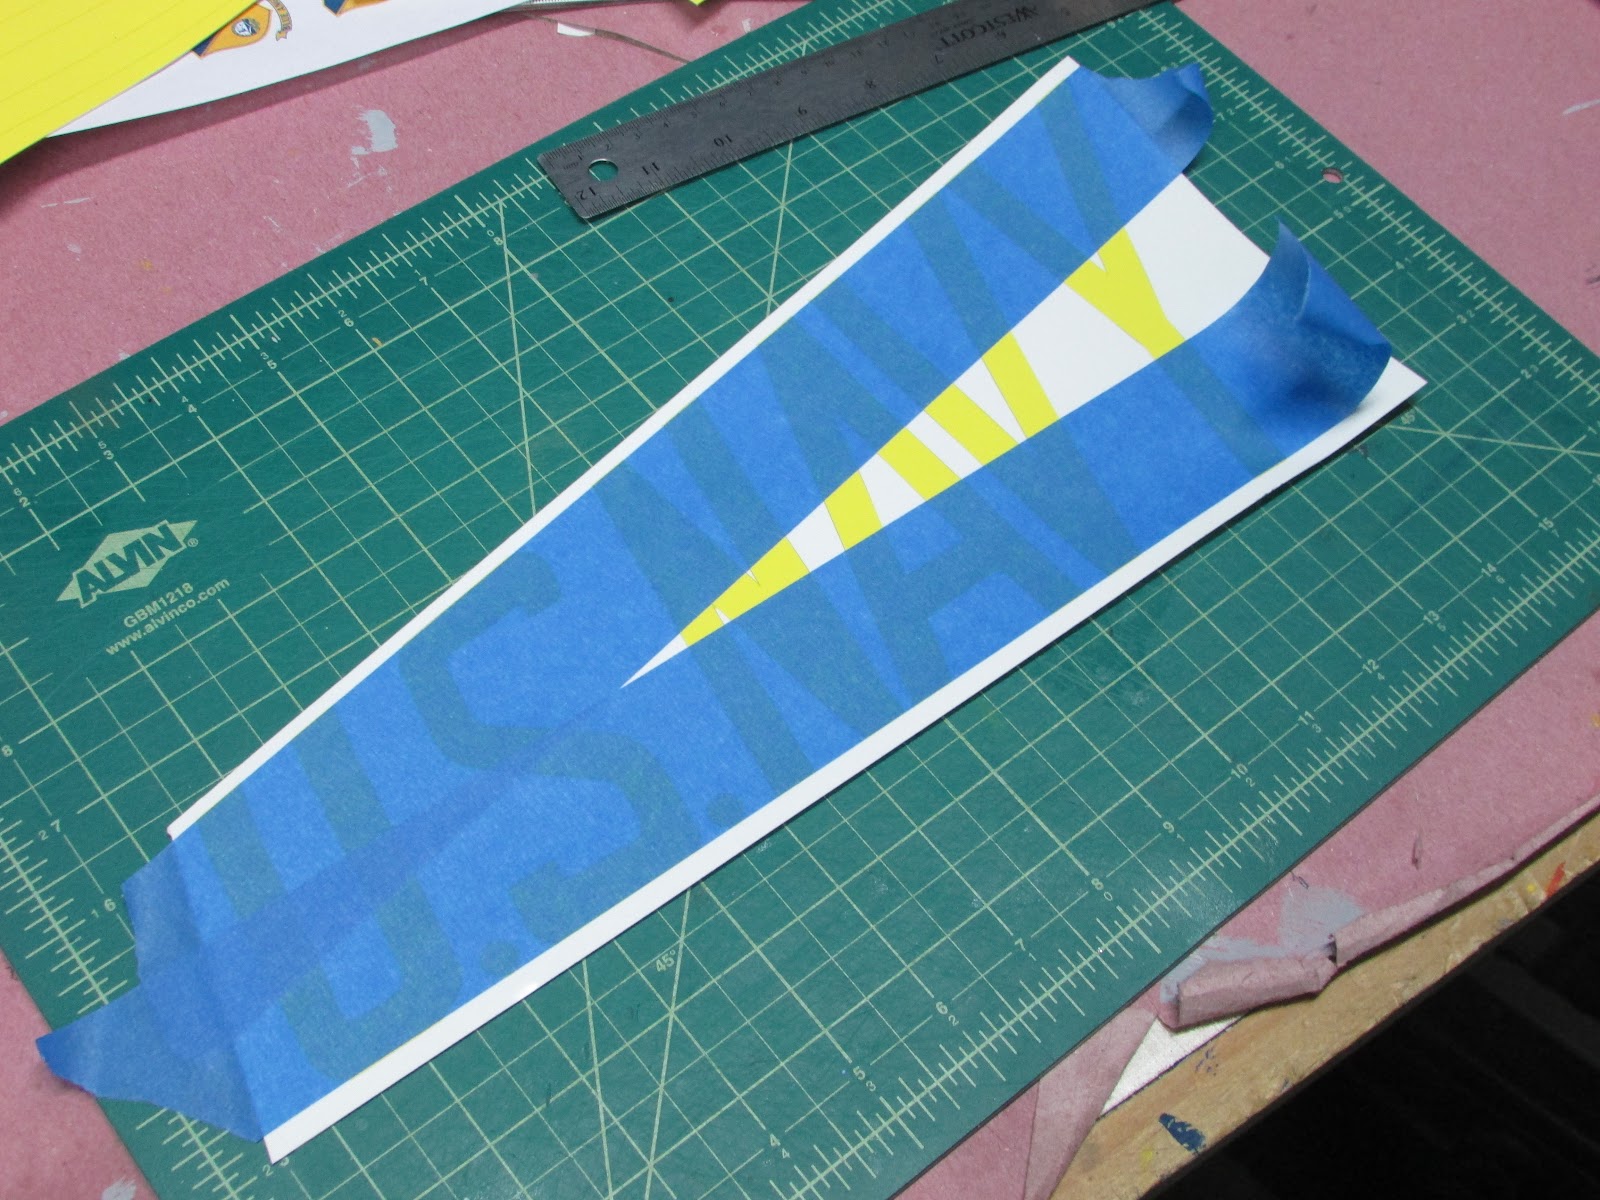
Overlaid it with masking tape and applied it to the plane.
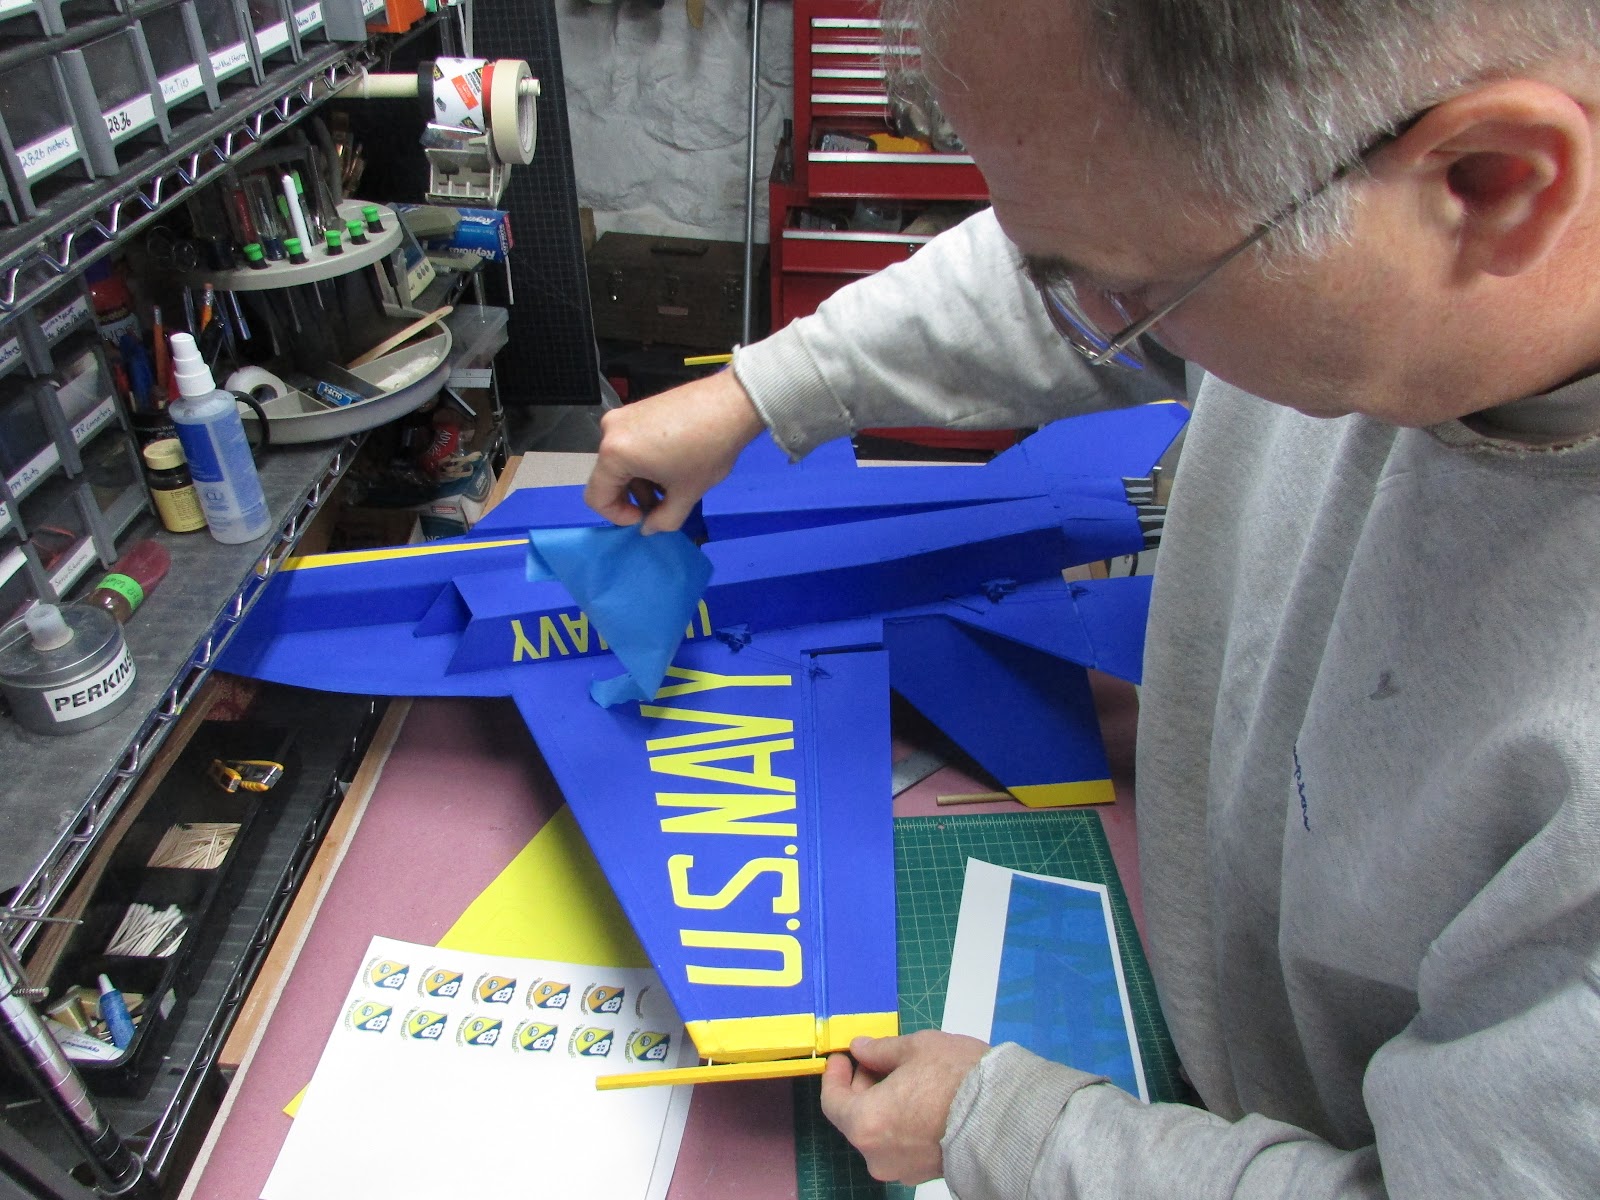
The masking tape peels off leaving the lettering. One thing I learned was even though the acrylic paint had completely dried, applying the DuraClear lifted the color. Since I applied the vinyl before the DuraClear, it seems advisable to spray on the DuraClear to avoid smearing blue over the decals. I think that brushing the DuraClear would work well if at least one coat were applied prior to decals. Then overlay all decals with the DuraClear.
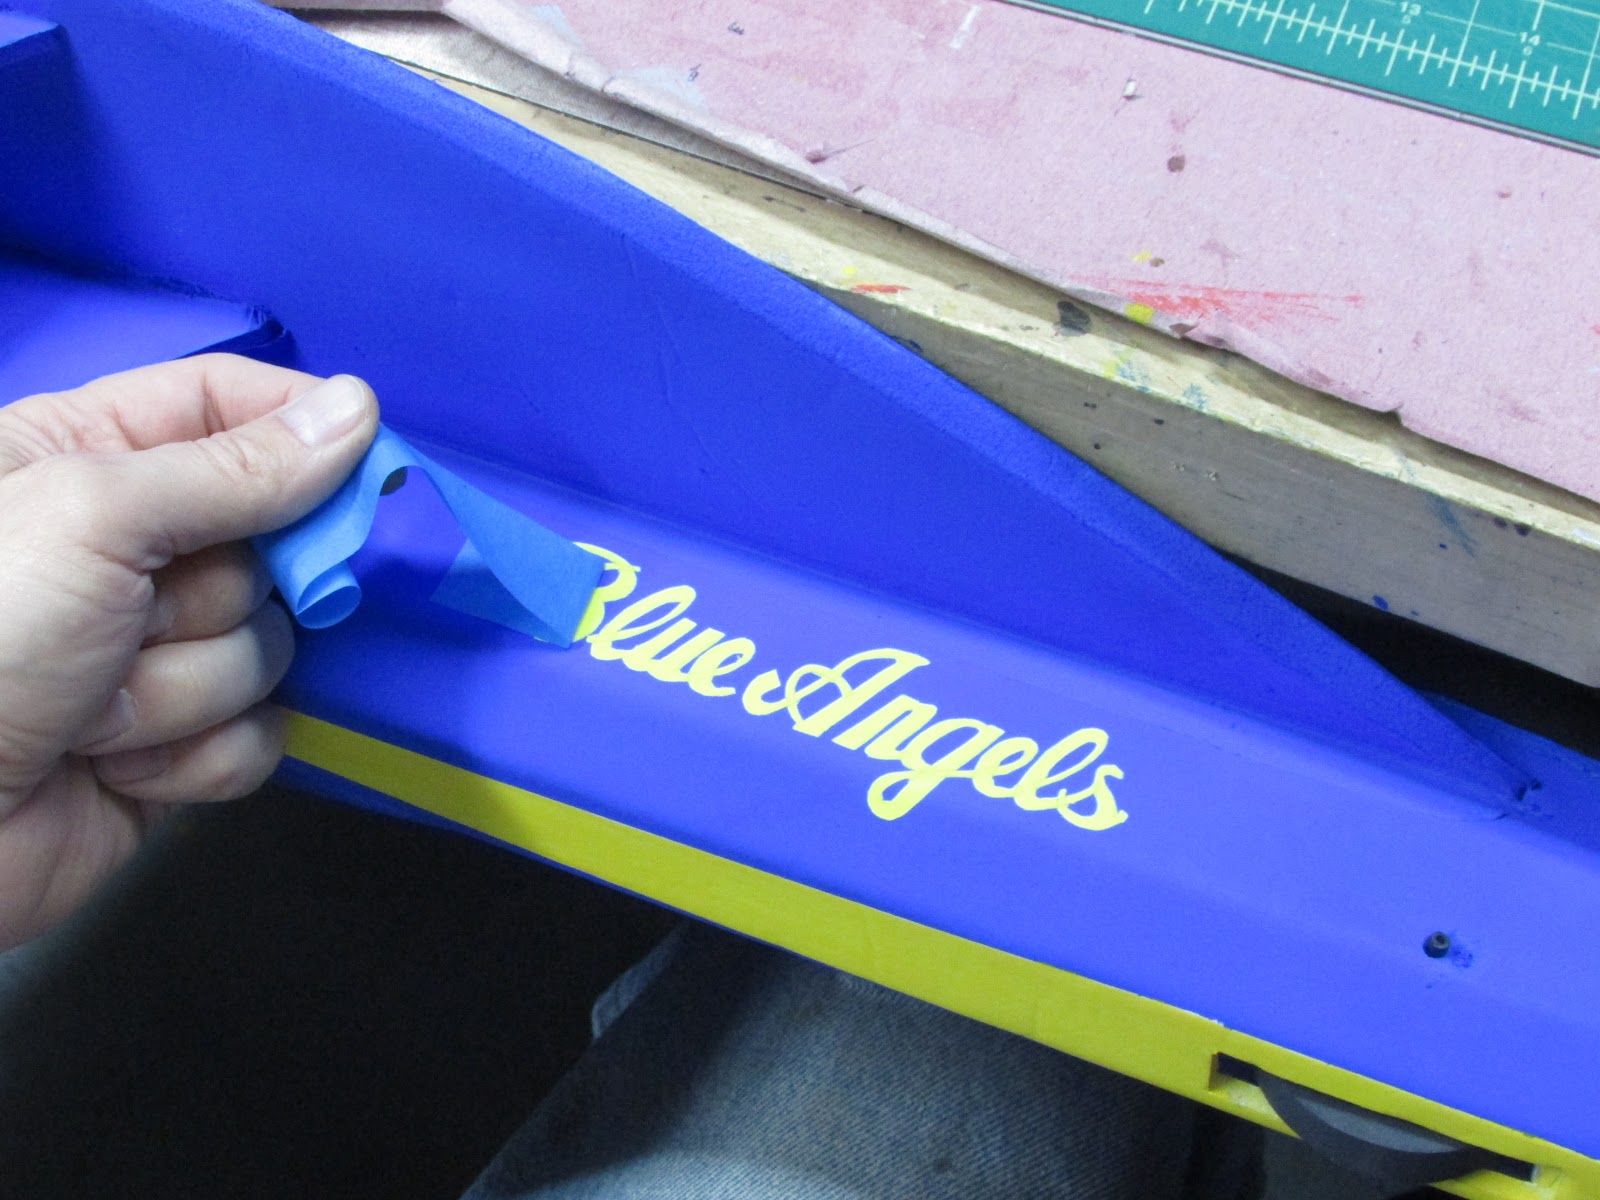
The “Blue Angels” script was the most difficult. First, there wasn’t a font that matched, so I ended up tracing it in Illustrator to make the lettering. Some of the letters were thin, so cutting the filamented vinyl was difficult. It came out OK, but could have been better.

I also wanted to add the pilot’s name below the canopy. Too small to just cut out so I decided to go with laser printing. The tangle was that the laser doesn’t print the same color gaumet and the blue could not be matched.
Vinyl Lettering
I picked up some yellow vinyl and thought I could use it to make the lettering. It is a pretty thick and filamented vinyl so cutting wasn’t easy.
I ran it through my inkjet printer to get the outline of the lettering and cut it out.
Overlaid it with masking tape and applied it to the plane.
The masking tape peels off leaving the lettering. One thing I learned was even though the acrylic paint had completely dried, applying the DuraClear lifted the color. Since I applied the vinyl before the DuraClear, it seems advisable to spray on the DuraClear to avoid smearing blue over the decals. I think that brushing the DuraClear would work well if at least one coat were applied prior to decals. Then overlay all decals with the DuraClear.
The “Blue Angels” script was the most difficult. First, there wasn’t a font that matched, so I ended up tracing it in Illustrator to make the lettering. Some of the letters were thin, so cutting the filamented vinyl was difficult. It came out OK, but could have been better.
I also wanted to add the pilot’s name below the canopy. Too small to just cut out so I decided to go with laser printing. The tangle was that the laser doesn’t print the same color gaumet and the blue could not be matched.
HilldaFlyer
Well-known member
Maiden of the FA-18E Super Hornet Blue Angel
Similar threads
- Replies
- 4
- Views
- 2K
- Replies
- 0
- Views
- 935
- Replies
- 110
- Views
- 29K
- Replies
- 53
- Views
- 18K