Scale Build-Off - Scratchbuilt 62" BF109 E-3

joker24458

Member
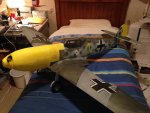
Here's my entry for the Scale Build-Off contest. It is a scratchbuilt BF109 E-3 with a 62" wingspan. First off, I have already started this build and covered the plane, but that was after the contest started (I started the build on Feb 7th 2015).

*** Big "thank you" to Marc Stermer. I've asked him for help about 100 times now and his advice is always awesome. Thanks Marc! :) ***

So, why did I build it? Ultimately, the plane was/is being built to fly at the NEF indoor event in Akron OH which was March 21-23; I wanted to either escort the huge B-17's or "attack" them (I chose the latter). Therefore, the main goal was to keep it light and slow, and for this, the obvious choice in materials would be depron and carbon fiber. I originally intended to use a Blue Wonder for power. However, I did not want to spend $50+ on the airframe (like Josh Bixler, I prefer to be frugal :D). Since I already had a stash of Dollar Tree Foam and sqaure wood dowels are so cheap, that is what I used/am using. The DTF is depapered to save some weight. The choice of DTF and wood over depron and carbon cost me an estimated 100g in weight, which also meant I had to use a larger motor (Emax CF2822), and a larger ESC and larger battery. If you do a similar project where weight is crucial and money is not an obstacle, I would recommend using lighter materials such as depron and carbon fiber.

Also, to keep it slow, I chose to use an undercambered airfoil since it produces a lot of lift at low speeds. Not wanting to add the extra weight and expense of two flap servos (I know, I know.....only $3 a servo :D), I cut the ribs and glued the flaps in place. The landing gear is also fixed (non-retractable) to save weight/time/money. The wheels are slightly smaller than scale size. They should have been 4" diameter (which is what the website said) but they ended up being only 3.5" in diameter. Not a huge deal, and I guess it saved me a tad bit of weight anyways.

The plane was built from a 3 view that I found on Google Images. It had the formers of the fuselage on the 3 view which made things a bit easier.


SPECS:

Wingspan - 62"
Length - 54"
AUW w/o battery: 544.6g
AUW w/ 1000mah 2s lipo: 595.4g
Controls - 4ch with fixed position flaps
Motor - Emax CF2822 1200kv
ESC - 18amp (I think it is a CC Thunderbird)
Servos - 4x HXT500
Battery - 2s 1000mah lipo
Prop - GWS 11x4.7 slow fly


Note: For build pictures, please refer to post #4.

Here's a few flight videos:

Maiden flight (not painted yet):

https://www.youtube.com/watch?v=YXcdHJWCS4M

First flight at NEF:

https://www.youtube.com/watch?v=2iwmdlb3GoE

Another flight at NEF:

https://www.youtube.com/watch?v=yL-oxJ9S7no

BF109_done_small (1).JPG

BF109_done_small (2).JPG

BF109_done_small (3).JPG

BF109_done_small (4).JPG

BF109_done_small (5).JPG

BF109_underside_small (1).JPG

BF109_underside_small (2).JPG
 
Last edited:

wilmracer

I build things that fly (sometimes)
Mentor
Really nice! I'm always impressed by guys who build stuff like this for indoors. Especially the people who get such great results like you've got here. The 109 looks AWESOME!
 

Jaxx

Posted a thousand or more times
I'm still trying to figure out how you built that from a 3-view. I looks awesome!
 

joker24458

Member
BF109 Build Pics

I will apologize ahead of time for the poor quality pictures; the majority of them were taken with my cheap cell phone. :rolleyes:

These are some pictures of the build process.

Laying out the plans:

BF109_Build (1).jpg

BF109_Build (2).jpg

Hmm, that doesn't look like a BF109!!!....?

BF109_Build (3).jpg

Yes, I know it's sideways.

BF109_Build (4).jpg

Adding a few stringers....

BF109_Build (5).jpg

Covering the aft fuselage (I used rolled up DTF)

BF109_Build (6).jpg

Laying on the workbench....which is in my bedroom. I have to admit it is pretty messy right now.

BF109_Build (7).jpg

Sheeted some more of the fuse.

BF109_Build (8).jpg

BF109_Build (9).jpg

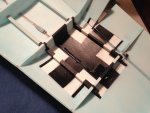
Planning out RX and servo hatches.

BF109_Build (10).jpg

Fuse is coming together nicely....

BF109_Build (11).jpg

Two wood spars (of different sizes) on each side, four total. Had to do this to incorporate scale dihedral.

BF109_Build (12).jpg

First time with wings on!

BF109_Build (13).jpg

Another shot of RX/servo bay.

BF109_Build (14).jpg

BF109_Build (15).jpg

Underside of wings

BF109_Build (16).jpg

Nose looks a bit funny in these pics :D

BF109_Build (17).jpg

BF109_Build (18).jpg

BF109_Build (19).jpg

Starting to cover the nose

BF109_Build (20).jpg

BF109_Build (21).jpg

BF109_Build (22).jpg

Nose covered. Just need a little sanding...

BF109_Build (23).jpg

Sitting in the hallway....

BF109_Build (24).jpg

BF109_Build (25).jpg

.....and now on the bed.

BF109_Build (26).jpg

BF109_Build (27).jpg

BF109_Build (28).jpg

BF109_Build (29).jpg

BF109_Build (30).jpg

BF109_Build (31).jpg

BF109_Build (32).jpg

Prototype canopy. Final canopy will be clear.

BF109_Build (33).jpg

Made a spinner for it.....out of DTF. :D Works surprisingly well, very little/no vibrations.

BF109_Build (34).jpg

View attachment 42813

View attachment 42814

View attachment 42815

View attachment 42816

View attachment 42817
 
Last edited:

joker24458

Member
Really nice! I'm always impressed by guys who build stuff like this for indoors. Especially the people who get such great results like you've got here. The 109 looks AWESOME!

Thanks for the kind words wilmracer and Jaxx. :)

Jaxx - I can provide more details about how to build from 3 view plans if you'd like.
 
Last edited:

joker24458

Member
I need some help from you guys. What color scheme should I do? I am airbrushing it this weekend so I need to come up with something soon. I'd prefer a color scheme of an aircraft that has a history behind it, but it also has to be the E-3 version (or similar...E-4 would be fine) of the aircraft.

I read a really cool article about an incident that happened during WW2. A B-17 was badly damaged after a bombing run, one crew member was killed and I think a few others were wounded. Many of the instruments on the instrument panel did not work so they had no idea what direction they were going (compass broke). They were trying to fly home, but instead were flying deeper into Germany. One single German fighter pilot flying a BF109 was sent up to shoot it down. When the German pilot saw the badly damaged state of the aircraft and crew and realized they were heading the wrong direction, he guided them to turn around and escorted them to the coast. The B-17 landed safely and all but one of the crew survived. The BF109 pilot landed and lied that he shot the B-17 down over the ocean. The two pilots met each other well after the war (late 1900s I think) and became friends.

I would do the scheme of that 109, but the only problem is - it was a different version than what I am building (I believe it was a G-6). If you want to read the full story just Google "Charlie Brown and Franz Stigler incident". It is an amazing story that makes me wish I built a G-6 instead. :rolleyes::D
 

rcspaceflight

creator of virtual planes
I did a quick Google Image search and a lot of yellow noses came up. I love the look of the yellow nosed Bf-109 (E3).

Except for the side view this paint job looks easy.
bf109e_profile01.jpg
 

joker24458

Member
I did a quick Google Image search and a lot of yellow noses came up. I love the look of the yellow nosed Bf-109 (E3).

Except for the side view this paint job looks easy.

Thanks for the suggestion. I like the looks of the yellow nose on the 109, too. That color scheme comes from the JG-51 fighter wing, but I would really like a scheme from JG-52. Guess I will continue to search but if I can't find anything I will go with the one you suggested. And yeah, the sides of the fuse might be a little tricky.

-Andres
 

rcspaceflight

creator of virtual planes
I forgot to mention. Epic build. I know it will look amazing no matter what paint scheme you pick. For the sides you could always just fade together the top and bottom colors. A few blotches of the top color after painting the bottom color would get it really close.
 

joker24458

Member
I forgot to mention. Epic build. I know it will look amazing no matter what paint scheme you pick. For the sides you could always just fade together the top and bottom colors. A few blotches of the top color after painting the bottom color would get it really close.

Haha, thanks. :) I think that will work out. Now I just have to mix up the right colors and start painting.....won't have time until Saturday though. I will update the thread with pics of the airbrushing process when I get there.

On a completely different topic, I outfitted my stock Nano QX (not FPV version) with a DIY FPV setup I made. Working pretty well so far and I'm having a lot of fun with it. (I am one of those people who like to have multiple projects going on at once.....:D)

-Andres
 

Jaxx

Posted a thousand or more times
Thanks for the kind words wilmracer and Jaxx. :)

Jaxx - I can provide more details about how to build from 3 view plans if you'd like.

Joker that would be great. I would love to know more about building from 3 view plans. This is impressive work!
 

joker24458

Member
Joker that would be great. I would love to know more about building from 3 view plans. This is impressive work!

I will try to work on something for that over the weekend. :)

Preparing to paint the 109 tomorrow. Let's hope this goes well. :eek::D

-Andres
 

joker24458

Member
I have decided to do the scheme of Joseph Priller that rcspaceflight suggested. A little research shows that Priller scored 101 kills, pretty impressive. I don't know what I will do for the details yet (maybe print on tissue....? we will see). I will start painting in about an hour. I'm mixing paint right now to get the right colors. :)

-Andres
 

joker24458

Member
Finished a base coat of light blue.....I think it looks more like baby blue than sky blue. :rolleyes: Oh well, we will see how it turns out.....

-Andres
 

joker24458

Member
I'm pretty tired after a day of painting. I've put the pics of the painted plane in the first post. It's not even done yet, though; I still have to paint on the details and markings tomorrow, so look forward to those pictures as well.

I forgot to take pictures of the bottom of the aircraft, but it's disassembled now and I'm too lazy/tired to put it back together and take a pic, so I will just do that tomorrow. :)
 

joker24458

Member
I got less than half the markings done today because I ran out of paint, and Hobby Lobby is closed on Sundays. :( I guess I will just continue tomorrow. Looking forward to it though....painting is tedious but relaxing (same thing with building). The FT podcast really makes the time pass so quickly. :D

-Andres
 

joker24458

Member
Just about done airbrushing, I'm cleaning up now. I'll post pics in a bit. :D

EDIT: Sorry guys, I'm getting pretty tired, I will post pics tomorrow afternoon. Sorry for the delay but it is all done (finally!) and ready for the NEF event. :)
 
Last edited:

joker24458

Member
I'm pretty much done with the build at this point. Updated pics are in the first post with the markings of Joseph Priller. If any of you guys are coming to NEF, you should see it there. :)
 

AkimboGlueGuns

Biplane Guy
Mentor
Really nice paint, this will be tough competition. Is there a reason you chose undercambered wings instead of a full airfoil? It will be really cool to see that thing slowed down.
 

willsonman

Builder Extraordinare
Mentor
I suspect two reasons... Its a rather large indoor plane so the drag (1) will slow it down while producing a lot of lift and reduce a lot of weight (2) to make it really float.