Top Flite F8F Bearcat 0.60 size (Red Box Rescue)

willsonman

Builder Extraordinare
Mentor
First things first for this update: Safety first!
IMG_9586.jpg

Since I knew what structure was underneath the removal of the other side went much better and less destructive than the first side. The wheel hole was cut out and trimmed with the dremel sanding drum.
IMG_9588.jpg IMG_9589.jpg

I removed additional balsa skin to facilitate installation of the ply plates and did dry fitting and fine shaping of the plates to help them fit better.
IMG_9591.jpg

From here we proceed to mix up epoxy. This is my 60-minute epoxy as it cures out harder than 5 or 15 minute epoxies. Previously I had cut additional hard wood that fit very snug against both ply plates. You can see my strategy more clearly in the first image below. The procedure was to apply epoxy to the plates and install them, then install the newly cut hardwood as a means to apply pressure to the plates against the ribs, then install the original hardwood beams on top to tie it all together. To clap the top beams in their place, I cut off a piece of paint stick to wedge in to apply clamping pressure to the beams in the side direction. These are temporary until the epoxy cures.
IMG_9592.jpg IMG_9593.jpg IMG_9594.jpg

The epoxy should be cured out enough by this afternoon/evening for me to proceed on to replacing the skin and cutouts for the retract unit mounting. Additional shaping of the wing tips and spackle filler will be on the list next. Then rinse and repeat the glassing process.
 

Chuppster

Well-known member
First things first for this update: Safety first!
View attachment 161116

Since I knew what structure was underneath the removal of the other side went much better and less destructive than the first side. The wheel hole was cut out and trimmed with the dremel sanding drum.
View attachment 161122 View attachment 161121

I removed additional balsa skin to facilitate installation of the ply plates and did dry fitting and fine shaping of the plates to help them fit better.
View attachment 161120

From here we proceed to mix up epoxy. This is my 60-minute epoxy as it cures out harder than 5 or 15 minute epoxies. Previously I had cut additional hard wood that fit very snug against both ply plates. You can see my strategy more clearly in the first image below. The procedure was to apply epoxy to the plates and install them, then install the newly cut hardwood as a means to apply pressure to the plates against the ribs, then install the original hardwood beams on top to tie it all together. To clap the top beams in their place, I cut off a piece of paint stick to wedge in to apply clamping pressure to the beams in the side direction. These are temporary until the epoxy cures.
View attachment 161119 View attachment 161118 View attachment 161117

The epoxy should be cured out enough by this afternoon/evening for me to proceed on to replacing the skin and cutouts for the retract unit mounting. Additional shaping of the wing tips and spackle filler will be on the list next. Then rinse and repeat the glassing process.

Wow. It's great that you could make room for the wheels without cutting the spar.
 

willsonman

Builder Extraordinare
Mentor
Yes, and making rotating retracts that retract aft are much more problematic. For that, review my F4U build. There are mounts that key into the spar and there is a notch for the strut but BOTH sides of the spar are reinforced with ply. This is particularly critical for the Corsair as this notch is on the underside of the lower bend for the gull shape. So, in reference to your P-40 mentioned previously, this would have been my approach. I would create ply mounting rails that would key into the spar but I'd apply the ply plates to the spar first to maintain strength for the wing. Screws for the retract mount should always screw into wood at a cross-grain, never end grain, for ply. So a ply plate would be best there over top of mounting rails.
 

willsonman

Builder Extraordinare
Mentor
Amid the complications of COVID-19 I'm continuing my self-quarantine ... in my shop. All jokes aside, I'm not sick, wash your hands whenever you can, don't touch your face. My job entails extensive virus testing so I'm well-versed in viral propagation. Viruses grow logarithmically so any prevention to dampen this is far better that you may first think. The vast majority of the population have difficulty thinking in logs as we are generally taught in linear math formatting. MD schools have been shut down for two weeks and my workplace it taking extreme measures to limit contact. My OPINION is that while the media is going a tad overboard with hype, there very much should be a serious approach to this pandemic.

Moving along...

The epoxy was cured so I removed the shims and started to replace the skin. I used scrap pieces left over from removing skin to have support for the replaced sections of skin.
IMG_9603.jpg

From there it's a matter of measuring cutting (slightly oversize), and final sanding for fitment. Once the skin pieces are installed with medium CA, I trimmed the pieces where needed.
IMG_9604.jpg

While there are slight differences on each side due to the overall less-than-perfect original construction, they are fairly close. The other side was more involved as it had more destruction but it's a very clean result.
IMG_9605.jpg

I want to emphasize that the wheel wells are NOT in the correct location because I made the decision to not incorporate the wheel doors. These doors are an odd shape as wells on the real airplane go into the fuselage belly and I just wanted to avoid all complications with that feature. I will, however, do strut covers to maintain a better look with the gear down. These will just be simple flat ply and not be recessed into the wing to maintain the simplistic approach.
 

willsonman

Builder Extraordinare
Mentor
While I did not get much done over the weekend due to something I'll post on in a minute, I did get the landing gear installed and took some motivation shots. First time on her legs and she does not look too bad. You can see that the gear are angled out just a bit but short of getting retracts that move 85-degrees, there is really no way around this given the geometry I'm working with. I'm content and moving on. I also got the strut covers cut from ply.
IMG_9607.jpg IMG_9609.jpg IMG_9610.jpg IMG_9608.jpg IMG_9611.jpg
 

willsonman

Builder Extraordinare
Mentor
I did take the risk amid the COVID-19 shenanigans to make my annual trek to the Lebanon PA swap meet. I did pick up a few shop items that I had been on the lookout for but also scored some seriously awesome airplanes.

First is a first for me. A civilian airplane and a restoration project at that. This is a 1/4 scale Piper Tripacer. It needs a complete re-cover and inspection. The nose gear mount is a bit wobbly so I'll need to investigate that and do some rebuilding there. Overall it is in pretty great shape and I'm looking forward to this distraction. The wingspan is about 86" and the image below is taken in front of a double door out of my basement. She is a big girl. I'll also need to replace the cowl which is not a big deal to build or source. Not sure which kit this is but clearly it was originally powered by a glow engine that hung out the side of the cowl. It is in very rough shape. Price? $50:cool:
IMG_9646.jpg

Next up is something that I have been COVETING for years. Those who know me well also know that I am a sucker for the odd and unusual, and frankly, misbehaved models. I was NOT intending to make such a purchase but you just DO NOT find this model anymore. Long out of production and notoriously difficult to land is the Great Planes Gee Bee R2... NEW in box and un-assembled. Everything was in it's original packaging and nearly perfect... a few ply pieces had cracked but that is minor. I've seen this model fly and those who have flown it are just scared to land it. All of the landings I've seen have been just too fast. My thought of approach is to have the ailerons on separate channels and utilize programming to give flaperons for landings to help with landings. I've flown some pretty sketchy models in the past but this was too good to pass up. Plus, my wife loves the cartoonish look of the Gee Bee lineup so she was good with it too. Price? $250. Worth. Every. Penny.
IMG_9636.jpg IMG_9635.jpg
 

Chuppster

Well-known member
While I did not get much done over the weekend due to something I'll post on in a minute, I did get the landing gear installed and took some motivation shots. First time on her legs and she does not look too bad. You can see that the gear are angled out just a bit but short of getting retracts that move 85-degrees, there is really no way around this given the geometry I'm working with. I'm content and moving on. I also got the strut covers cut from ply.
View attachment 161741 View attachment 161740 View attachment 161739 View attachment 161738 View attachment 161737
Besides them no being scale, I actually think the gear looks better canted out a bit.
 

Chuppster

Well-known member
I did take the risk amid the COVID-19 shenanigans to make my annual trek to the Lebanon PA swap meet. I did pick up a few shop items that I had been on the lookout for but also scored some seriously awesome airplanes.

First is a first for me. A civilian airplane and a restoration project at that. This is a 1/4 scale Piper Tripacer. It needs a complete re-cover and inspection. The nose gear mount is a bit wobbly so I'll need to investigate that and do some rebuilding there. Overall it is in pretty great shape and I'm looking forward to this distraction. The wingspan is about 86" and the image below is taken in front of a double door out of my basement. She is a big girl. I'll also need to replace the cowl which is not a big deal to build or source. Not sure which kit this is but clearly it was originally powered by a glow engine that hung out the side of the cowl. It is in very rough shape. Price? $50:cool:
View attachment 161742

Next up is something that I have been COVETING for years. Those who know me well also know that I am a sucker for the odd and unusual, and frankly, misbehaved models. I was NOT intending to make such a purchase but you just DO NOT find this model anymore. Long out of production and notoriously difficult to land is the Great Planes Gee Bee R2... NEW in box and un-assembled. Everything was in it's original packaging and nearly perfect... a few ply pieces had cracked but that is minor. I've seen this model fly and those who have flown it are just scared to land it. All of the landings I've seen have been just too fast. My thought of approach is to have the ailerons on separate channels and utilize programming to give flaperons for landings to help with landings. I've flown some pretty sketchy models in the past but this was too good to pass up. Plus, my wife loves the cartoonish look of the Gee Bee lineup so she was good with it too. Price? $250. Worth. Every. Penny.
View attachment 161743 View attachment 161744

The R2 is going to be sweet. I'm usually not a big gyro guy, but wouldn't this be a good platform to put a gyro in?
 

willsonman

Builder Extraordinare
Mentor
I'm usually not a big gyro guy, but wouldn't this be a good platform to put a gyro in?

It's not a bad idea. I'm not one for stabilization either however the new Aura5 from FT is appealing as an evaluation for this. Generally, These aircraft fly just fine, but the landings seem to be the problematic area that requires skill.

I'll quote the manual directly. I've flown several Great Planes models over the years and none of them have the extensive guidance on how to fly and airplane like this one. I've quoted the intimidating bits for your review.

"Remember to take off into the wind. In fact, we do not recommend that you try to take off or land in a crosswind. The large fuselage and short coupling of the Gee Bee is not well suited to crosswind conditions. We have flown our prototypes in crosswind conditions and found that a wide, long runway is needed for success. If you have a crosswind for your first few flights you may want to consider waiting for better conditions before flying. "

"Landing the Gee Bee is probably a bit more difficult than the take-off or the flying. Concentration on the landings for the first few flights will help you learn the best way for you to land the Gee Bee.To initiate a landing approach, lower the throttle Landing Engine Out Situation Aerobatics Flight Takeoff CAUTION: (THIS APPLIES TO ALL R/C AIRPLANES): If, while flying, you notice any unusual sounds, such as a low-pitched “buzz,” this may indicate control surface flutter. Because flutter can quickly destroy components of your airplane, any time you detect flutter you must immediately cut the throttle and land the airplane! Check all servo grommets for deterioration (this may indicate which surface fluttered) and make sure all pushrod linkages are secure and free of play. If the control surface fluttered once, it probably will flutter again under similar circumstances unless you can eliminate the free-play or flexing in the linkages. Here are some things which can cause flutter: Excessive hinge gap; Not mounting control horns solidly; Poor fit of clevis pin in horn; Side-play of pushrod in guide tube caused by tight bends; Poor fit of Zbend in servo arm; Insufficient glue used when gluing in the elevator joiner wire; Excessive play or backlash in servo gears; and insecure servo mounting. 33 34 while on the downwind leg. Allow the nose of the model to pitch downward to gradually bleed off altitude. Continue to lose altitude, but maintain airspeed by keeping the nose down as you turn onto the crosswind leg. Make your final turn toward the runway (into the wind, just like you did for your takeoff) keeping the nose down to maintain airspeed and control. Level the attitude when the model reaches the runway threshold, modulating the throttle as necessary to maintain your glide path and airspeed. If you are going to overshoot, smoothly advance the throttle (always ready on the right rudder to counteract torque) and climb out to make another attempt. When you're ready to make your landing, flare when the model is a foot or so off the deck; smoothly increase up elevator until it gently touches down. Once the model is on the runway and has lost flying speed, hold up elevator to place the tail on the ground, regaining tailwheel control. You can also land the Gee Bee on the main wheels and execute a slightly longer roll out with the tail off of the ground. From our experience we have found it takes a bit more practice to achieve a nicely flared, three-point landing than it does to land the Gee Bee on its wheels. "
 

Chuppster

Well-known member
It's not a bad idea. I'm not one for stabilization either however the new Aura5 from FT is appealing as an evaluation for this. Generally, These aircraft fly just fine, but the landings seem to be the problematic area that requires skill.

I'll quote the manual directly. I've flown several Great Planes models over the years and none of them have the extensive guidance on how to fly and airplane like this one. I've quoted the intimidating bits for your review.

"Remember to take off into the wind. In fact, we do not recommend that you try to take off or land in a crosswind. The large fuselage and short coupling of the Gee Bee is not well suited to crosswind conditions. We have flown our prototypes in crosswind conditions and found that a wide, long runway is needed for success. If you have a crosswind for your first few flights you may want to consider waiting for better conditions before flying. "

"Landing the Gee Bee is probably a bit more difficult than the take-off or the flying. Concentration on the landings for the first few flights will help you learn the best way for you to land the Gee Bee.To initiate a landing approach, lower the throttle Landing Engine Out Situation Aerobatics Flight Takeoff CAUTION: (THIS APPLIES TO ALL R/C AIRPLANES): If, while flying, you notice any unusual sounds, such as a low-pitched “buzz,” this may indicate control surface flutter. Because flutter can quickly destroy components of your airplane, any time you detect flutter you must immediately cut the throttle and land the airplane! Check all servo grommets for deterioration (this may indicate which surface fluttered) and make sure all pushrod linkages are secure and free of play. If the control surface fluttered once, it probably will flutter again under similar circumstances unless you can eliminate the free-play or flexing in the linkages. Here are some things which can cause flutter: Excessive hinge gap; Not mounting control horns solidly; Poor fit of clevis pin in horn; Side-play of pushrod in guide tube caused by tight bends; Poor fit of Zbend in servo arm; Insufficient glue used when gluing in the elevator joiner wire; Excessive play or backlash in servo gears; and insecure servo mounting. 33 34 while on the downwind leg. Allow the nose of the model to pitch downward to gradually bleed off altitude. Continue to lose altitude, but maintain airspeed by keeping the nose down as you turn onto the crosswind leg. Make your final turn toward the runway (into the wind, just like you did for your takeoff) keeping the nose down to maintain airspeed and control. Level the attitude when the model reaches the runway threshold, modulating the throttle as necessary to maintain your glide path and airspeed. If you are going to overshoot, smoothly advance the throttle (always ready on the right rudder to counteract torque) and climb out to make another attempt. When you're ready to make your landing, flare when the model is a foot or so off the deck; smoothly increase up elevator until it gently touches down. Once the model is on the runway and has lost flying speed, hold up elevator to place the tail on the ground, regaining tailwheel control. You can also land the Gee Bee on the main wheels and execute a slightly longer roll out with the tail off of the ground. From our experience we have found it takes a bit more practice to achieve a nicely flared, three-point landing than it does to land the Gee Bee on its wheels. "

I have several GP models as well and you're right, I haven't seen anything like this in the manuals.

I vote you put an Aura in it and do a video on it. I'd definitely watch it. Have you come up with a power solution for it?
 

willsonman

Builder Extraordinare
Mentor
I have several GP models as well and you're right, I haven't seen anything like this in the manuals.

I vote you put an Aura in it and do a video on it. I'd definitely watch it. Have you come up with a power solution for it?
I have a power solution that involves some shuffling of the fleet. My tried and true giant P-6E Hawk has the motor I want in the Bee. For a while now I've wanted a proper (pun intended) 3-blade prop on the hawk and that will come from my Dauntless. So, I will swap the power system from the dauntless to the Hawk and use the Hawk system in the Bee. I'll likely also gut a few servos from the Dauntless for the Bee. I'll think on the Aura 5 for the time being but I'll create a separate thread for that one.

In the meantime, things are also progressing for the Tripacer restoration as well. More on that when things start happening.
 

willsonman

Builder Extraordinare
Mentor
It was hard to resist the new toys but I got work done on the Bearcat.

Shop got a bit of tidying. It was getting a bit out of control. I cut small holes and routed the wires for the gear and installed a y-connector for them.

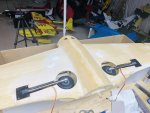
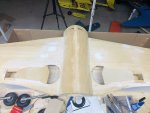
I then figured out the placement for the flap servos. I decided that the inner ribs would be a sufficient location given that I really did not want to try to run extensive wires through a wing I had no idea if there were holes available to do so. I measured and outlined a hole 5x5.5cm and made it symmetrical on each side. Using my razor saw, I cut out the balsa to reveal a hole and installed ply squares at each corner for the servo plate to mount to.
IMG_9648.jpg

Servo plates were cut from ply to maintain rigidity and slots were cut with a drill, dremel, and finished off with the rasping bit on the dremel. Hard points installed on the plate for servo mounting and servos and horns installed. I put the plates in position and drilled holes for screws. I enlarged the holes in the servo plate so I could snug down the screws into the tabs. Y-harness installed on the servos showed even movement and full movement within the slots with no binding.
IMG_9649.jpg IMG_9650.jpg

I have to also say, the right tools go a long way to speed up work. Among the airplanes I picked up at the swap meet, I also picked up this little gem. A tiny circular saw and the blade was still sharp. $15. This sped up the cutting of the ply immensely and made clean cuts that I did not have to sand flat.
IMG_9651.jpg

Next up is to shape the wings and fill damaged spots from hangar rash over the years. The tips need some work but the razor planar should make that fairly quick work. Small blocks of wood also need to be installed at the root of the wing along the trailing edge that butts up to the flaps. That should not be an issue with some scrap I have laying around. Sand it all smooth and we are ready to glass and primer.
 

Chuppster

Well-known member
It was hard to resist the new toys but I got work done on the Bearcat.

Shop got a bit of tidying. It was getting a bit out of control. I cut small holes and routed the wires for the gear and installed a y-connector for them.

I then figured out the placement for the flap servos. I decided that the inner ribs would be a sufficient location given that I really did not want to try to run extensive wires through a wing I had no idea if there were holes available to do so. I measured and outlined a hole 5x5.5cm and made it symmetrical on each side. Using my razor saw, I cut out the balsa to reveal a hole and installed ply squares at each corner for the servo plate to mount to.
View attachment 161915

Servo plates were cut from ply to maintain rigidity and slots were cut with a drill, dremel, and finished off with the rasping bit on the dremel. Hard points installed on the plate for servo mounting and servos and horns installed. I put the plates in position and drilled holes for screws. I enlarged the holes in the servo plate so I could snug down the screws into the tabs. Y-harness installed on the servos showed even movement and full movement within the slots with no binding.
View attachment 161918 View attachment 161917

I have to also say, the right tools go a long way to speed up work. Among the airplanes I picked up at the swap meet, I also picked up this little gem. A tiny circular saw and the blade was still sharp. $15. This sped up the cutting of the ply immensely and made clean cuts that I did not have to sand flat.
View attachment 161916

Next up is to shape the wings and fill damaged spots from hangar rash over the years. The tips need some work but the razor planar should make that fairly quick work. Small blocks of wood also need to be installed at the root of the wing along the trailing edge that butts up to the flaps. That should not be an issue with some scrap I have laying around. Sand it all smooth and we are ready to glass and primer.

Not gonna lie, I'm a little jelly of your table saw. I use my scroll saw for just about everything but having that little beaut on my bench would be sweet.
 

willsonman

Builder Extraordinare
Mentor
Not gonna lie, I'm a little jelly of your table saw. I use my scroll saw for just about everything but having that little beaut on my bench would be sweet.

Yeah, I've thought about a scroll or band saw in the shop before but the size was my main issue. I'd much rather have this and try to find a nice small drill press. When the time comes, it may be difficult to find a replacement blade but I'm hopeful I can source one.
 

Chuppster

Well-known member
Yeah, I've thought about a scroll or band saw in the shop before but the size was my main issue. I'd much rather have this and try to find a nice small drill press. When the time comes, it may be difficult to find a replacement blade but I'm hopeful I can source one.

I found your saw for sale ($60) so hopefully parts will still be available in the future.
 

Joker 53150

Mmmmmmm, balsa.
Mentor
Yeah, I've thought about a scroll or band saw in the shop before but the size was my main issue. I'd much rather have this and try to find a nice small drill press. When the time comes, it may be difficult to find a replacement blade but I'm hopeful I can source one.

For me, the bandsaw gets far more use than my scroll saw. I keep forgetting I have a micro table saw like that as well, but it does work well. A small disc sander is also super useful.

You can find a lot of tools at swap meets as people get out of the hobby or pass on. I picked up a Dremel drill press last year. It needs a little work, but takes up about 1/4 the space of my current massive drill press.
 

willsonman

Builder Extraordinare
Mentor
Amazon: 3 blades for $10. Shipped.

Moving along we have some hefty progress. I used my dremel to carve out the leading edge intake.
IMG_E9654.JPG

Next up was to prep the underside for the hinges I have planned for the flaps. They required some small holes in the skin. Oddly, I remembered something very wrong because I did NOT need balsa filler at the root of the wing. I checked the flap and aileron placement and quickly found I had no room. So that became a non-issue.
IMG_E9655.JPG

Next up was the wing tips. Lots of carving to get here. I used the tip of my aileron to get the rough shape and then used my sanding block with 100-grit paper to blend and refine.
IMG_E9656.JPG

From here I sanded the wing entirely and filled dents and crack with spackle. No picture because no point. You've already seen it in this build. Worth mentioning is that the original builder was not exactly... proficient? The leading edge seams are not seams. The skins were not tucked and butted up against the leading edge balsa block so a big gap was made on the outside (and inside) that was filled with some sort of filler putty. The leading edges were not initially shaped with a block or bar as they are very wavy. A portion of skin looks like it was planed. It was very rough and gouged. Given some of the gaps I observed on the inside between the skin and the ribs, I was not surprised to find a lot of uneven skin. Some of it feeling like it was purposefully corrugated. These are just some of the issues but I knocked back a lot of them with the sanding block and applied spackle and left it.

I moved on to sanding down the fuselage... finally. First with 100-grit to knock it back and make the weave pattern go away, then with 220-grit to smooth things out. Like the wing, there are imperfections but that's not what this build is about. It's "good enough" and that is fine.
IMG_E9657.JPG

And Callie came in with a fresh delivery of livery. See what I did there? LOL Anyway, this is a fairly plain scheme that will look decent on the ground and only requires me to shoot one color. ONE.
IMG_E9653.JPG