Introduction and Custom Jet Engine Project

AeroEngineer20

New member
Hello all! My name is Andrew, and I am a university student majoring in Mechanical Engineering. I've been watching FliteTest for quite a while now and have been inspired by their designs and their attitude toward the hobby. I think it's safe to assume that I am not the only one here who has found my way into the hobby through them, and for that I'm very grateful.

I have a few projects I've been working on, but I'll introduce my biggest one first. In May of 2017 I decided I wanted to build a hobby-sized turbojet engine from scratch, with every part being made by me. I was confident in my modelling abilities through my experience with Blender and Autodesk products, but I had relatively little experience in CNC machining other than 2D plasma cutting. For a project like this I would have to learn, so I made friends with my university's shop manager. He got me up to speed on physically operating the machines, and gave me guidance on methods and rules of CNC machining, spring boarding from my manual machining experience in high school. I also joined the local EAA chapter, who lets me use their TIG welder as a member.

Since May, I've been working on it every chance I get. My ultimate goal is to have a test run before April 17th, my 20th birthday. While it is still a work-in-progress, I am now comfortable with sharing it outside my local friend group. Even if it doesn't work, the process of designing and machining is invaluable experience gained.

I have glossed over the majority of the process and details in the interest of maintaining some kind of brevity, so If you have any questions, feel free to reply!

Section View:
3-5-18.PNG

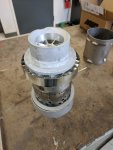
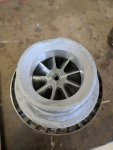
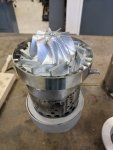
Progress so far:
IMG_20180302_162016.jpg
IMG_20180302_162020.jpg
IMG_20180302_162321.jpg

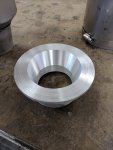
Cast and partially machined intake:
IMG_20180302_162318.jpg

Diffuser and stator vanes:
20170510_174547.jpg

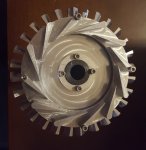
Compressor machining (roughing stage):
20170630_143552.jpg

Turbine (right) and turbine nozzle (left):
20170601_213036.jpg

Turbine nozzle machining:
20170531_112220.jpg
 
This is incredible! And thanks for all the high resolution pictures that are in focus - a rarity, it seems, among jet engine projects... :)

I have a lot of questions for you, so feel free to answer any/all/none - I imagine you're pretty busy.

1. It looks like your fuel line comes up in the empty space between the compressor and the combustor.
(a) Are you worried about it being unsupported?
(b) How are you planning to seal the hole where it leaves the body of the engine?

2. Are you worried about the solder (I think that's solder...) on your fuel line melting?

3. How did you choose the pattern of holes on your combustor?

4. What kind of math went into the design?

5. What is the difference between the turbine and the turbine nozzle?

6. About how much does the whole engine weigh?

7. It seems the only airflow into the combustor is through the holes in the sides. From what I've seen, most engines also have a primary airflow coming in at the front of the combustor, around where the fuel nozzle sits. Is there a purpose behind this difference?

8. How did you suspend the combustor? Is it screwed in?


The reason I'm asking is because I've been off-and-on trying to develop something similar over the past few years (usually more off than on...) and I would love to learn everything I can from your design.

Thanks for posting! I think this is one of the most complete and promising 'DIY jet engine' builds I've seen on the internet. Can't wait to see how it works!
 

AeroEngineer20

New member
Thank you for your kind words! I tried my best to get photos at every step of the process; the ones posted on the article are only a few out of 175 that I've taken. I'll do my best to answer your questions as I understand them.

1) That's correct; the fuel line, which is just 3/32 brass tubing from Ace Hardware, goes through the main case to the front of the combustor.
a) I'm not worried at all about the lack of support. Though there may be some pressures that the tube sees, the distance between supports is no more than 5/8". Given the small frontal area, I'm not worried about it being blown about from the compressor outlet air.
b) I drilled a hole (I'm not sure how visible) a bit larger than the tube that the fuel ring is made of to accommodate another tube that fits over it. I'm finding it a bit difficult to be clear, so here are a couple pictures of it:
IMG_20180409_000751.jpg
IMG_20180409_000800.jpg

Once the fuel line is installed, I'll be sealing it and the hole for the igniter with high-temperature silicone. Though it is part of the fuel system, it shouldn't get much hotter than ~300 degrees F due to the high flow rate of compressor outlet air.

2) The only place I'm using solder on the engine is to seal the end of the ring that wasn't completely sealed by crimping it. I have done a test with just the ring and combustor and the ring will not see too much heat. I also used tin-silver solder to give myself a slightly better chance. I may just melt the brass itself together if I get a chance.

3) I did my best to consider J79, T58, Orenda 14 and 10, and existing RC engines, as well as my limited knowledge of aerodynamics of fluid flow at this point to design my combustor. The principle I was following was to allow just enough air near the fuel to allow for combustion, then mix more air as the hot gasses continue to move toward the turbine. On full-scale engines, I believe only around 15% of the air coming through the engine is directly used for combustion; the rest is used to cool the hot exhaust gasses before encountering the turbine to only around 900 degrees F or lower. I believe this reduces the stress on the turbine and increases life of the engine. In my case, I'm using propane, which should burn cooler than kerosene, and is easier to deliver. I did some basic CFD analysis and it seemed to be fine with the flow.
Here's a combustor I kinda used for reference.
xModel-turbine-combustor-stator-500pics.jpg

4) Unfortunately, at this point in my college career, not as much math went into this as I would like. I did do some basic stress estimations for the turbine, though, and the mild steel turbine I am using initially should survive an idle test. Before I increase power past idle, though, I'll be making the turbine out of 304 stainless steel. At 1200 degrees F, which is hotter than it should ever get, I would still be good up to 80,000 RPM, and at around 800 degrees F, it should reach around 100,000 RPM before it begins to deform. As with any turbine engine, the hottest temperature the turbine reaches is during startup, when the airflow is not as fast as during usual operation. Once I get past this point, I can still have a failure, but it is slightly less likely to be from the heat.

5) In turbine engines, as far as I know, there are a couple kinds of nozzles. The most often though-of one is the exhaust nozzle, which is where the gasses from the engine exit. However, there is also a part of the engine which comes right after the combustor that directs the gasses from a "straight" path to a "swirling" path. The turbine nozzle is fixed and the turbine is attached to the rotor. The redirected gas from the turbine nozzle hits the turbine at a more optimum angle for increasing horsepower and efficiency by reducing fluid turbulence. I have a photo of the two just after machining (don't mind the burrs).
20170601_213021.jpg
The part on the right is the fixed turbine nozzle, and the part on the left is the turbine. The turbine is more cup-shaped, which makes it act similar to a pinwheel or water wheel. All this turbine is, really, is a high-temperature pinwheel. I'm not sure if its too visible, but the geometry of the turbine nozzle and turbine resembles a slight convergent-divergent nozzle, like on a rocket engine. The convergent-divergent shape is where the turbine nozzle gets the "nozzle" name, I believe. Just like in a rocket engine, the shape accelerates the gasses slightly, also increasing power for the turbine.

6) I don't have a scale, but it seems to be somewhere around the 12 lb the Fusion 360 file predicts. I did not design the engine with the intent of attaching it to an aircraft, so I was okay with using steels.

7) I will be drilling a few more holes (12) on the outer angled piece of the combustor, as well as drilling the holes near the fuel ring larger to introduce a bit of air from the start. When I get around to that, all surfaces of the combustor will have holes in them for air. For now, that outer angled portion is the only part without air holes. So no, there is no design purpose; I just hadn't gotten around to drilling them yet!

8) The combustor is screwed in at the back of the main frame tube. You can also see the inner air holes on the combustor in these views.
IMG_20180409_010522.jpg
IMG_20180409_010545.jpg

Hope that helps! If you have any more questions, feel free to ask. And good luck on your project! It's been a lot of fun, and I hope it goes well for you.
I'm sure you're aware, but I wouldn't take this stuff for granted. The blades will be going around 300 mph at idle, and I sure don't want to leave me getting hit with one or not up to chance. I have quite a bit of steel in between the turbine and the outside of the engine, but I'll still be standing out-of-plane with any of the rotating components, as well as a fair distance back. Unlike the professionally-made engines, it's not a given that this won't explode, so when you get yours running, I'd figure out some kind of remote starting system. I'm not trying to tell you what to do, but I also wouldn't want you to get hurt from it. I'm taking all the precautions I can, and I'm even having a friend of mine who has experience with some real high-performance turbine engines guide me for testing procedures.

Speaking of starter systems, I'm working on something and I'll post when I get it working. It involves an Emax 2205 and some 3d printed parts. :D
 
Wow, thanks for all the detailed information! Especially the bit about the turbine nozzle - I never knew that.

Thanks for the safety tips too - I will definitely have to come up with a remote control system! Turbine shrapnel isn't really something I ever want to see... :)

Can't wait to see your test!
 

Bricks

Master member
Might be kind of a silly question but how are you balancing the rotating parts, at the types of rpms turbines turn has to be super critical.
 

AeroEngineer20

New member
That's not a silly question at all! Unfortunately, I do not have a dynamic balancing system, so I'm going to try my best to rotate the positions of components on the rotor to minimize imbalance.
 

AeroEngineer20

New member
I've just completed two systems tests in preparation for the full test: one was a starter spin test, and the other was a flame test. I'm using a 3d printed starter system with an Emax 2205 red bottom motor to spin up the rotor. It gets a bit warm after the first time I spin it up for on cold, and hot the second time. I'm surprised the 2205 can even spin it up to high rpm at all.

Starter test: https://youtu.be/iHk6mFQTst0
Flame test: https://youtu.be/b-CHVKGqRCQ

The flame test was to verify combustion could be sustained with airflow through the engine.
 

DamoRC

Elite member
Mentor
I've just completed two systems tests in preparation for the full test: one was a starter spin test, and the other was a flame test. I'm using a 3d printed starter system with an Emax 2205 red bottom motor to spin up the rotor. It gets a bit warm after the first time I spin it up for on cold, and hot the second time. I'm surprised the 2205 can even spin it up to high rpm at all.

Starter test: https://youtu.be/iHk6mFQTst0
Flame test: https://youtu.be/b-CHVKGqRCQ

The flame test was to verify combustion could be sustained with airflow through the engine.

Is there anything a hobbyist can't do these days (with access to the right equipment). I love that you are taking this on. Inspired by this I am going to try to mine lithium from my back yard and make my on Lipos.

This is brilliant - looking forward to seeing it create some thrust!

DamoRC
 

AeroEngineer20

New member
Update!
My friend and I attempted the first run on April 15 and it did not self-sustain. However, we did learn a lot that I'll be able to put toward getting this thing running. The main points are:

1.) More fuel is needed to increase exhaust gas expansion and increase power (The very low fuel flow rate could be completely due to the low temperatures. During my flame test, which was in warmer weather, the flow rate seemed to be fine)

2.) The igniter system needs updating in order to actually ignite fuel inside the combustor with air and fuel flow

3.) The starter needs to be modified to increase stability and strength

4.) I need to Loctite the starter motor onto the mount (this was the cause to the end of the test for the day)

5.) Test in better weather conditions than ~35 to 40 F light rain and some wind


However, we did learn a few things that went right:

6.) The oil system worked perfectly to deliver fresh oil to the bearings

7.) The combustion sustains during high rotor RPMs at startup

8.) The turbine is apparently unchanged after relatively high temperature is applied (though not as high as during operation)

9.) The bearings are in as good of condition as they were before the test


Before the test, I had to connect the fuel line, oil line, and igniter to the engine. The oil orifices will be visible in post-test photos.

IMG_20180415_025953.jpg

IMG_20180415_025959.jpg

IMG_20180415_104141.jpg


Once we got to the location, we started to set up the test stand and all the peripherals.

IMG_20180415_123401.jpg

IMG_20180415_123406.jpg

IMG_20180415_134436.jpg


Here's the video of the attempt. I should explain our proximity to the engine; after a few tests before this clip, we deemed it safe enough to be near the engine during startup, given the low speeds and low fuel flow. Had the engine begun to spool up on its own, we would have retreated to a safer distance.
I'm the one in the red sweatshirt (did I mention it was almost freezing out?) and the other one is my friend who has given me some tips on safety and procedure, as well as helped me eliminate some guesswork in the design, since he has full scale turbine engine experience.


These are photos of the condition of the engine after the test. In order of removal:

The turbine and rear bearing. There was a small coating of soot on the turbine blades, most likely as a result of the lost oil to the bearings burning off. No damage is visible to the turbine. The bearing looks and feels like it's in great shape, and has a nice coating of oil. The oil on the bearing and throughout the engine confirms oil flow was good.

IMG_20180415_164723.jpg


The forward bearing. Like the rear bearing, it seems to be in as perfect a condition as it was at the beginning of the test.

IMG_20180415_164749.jpg


The forward frame/compressor stator vanes. As with most parts of the engine, there is a thin coating of oil on it. I believe the darker splotches are due to oil burning in the combustor area, since it wiped off just fine.

IMG_20180415_165308.jpg

IMG_20180415_165314.jpg


The combustor. Everything seems to be fine in the combustor region of the engine. I figured there would be a good chance of the solder joints just falling apart, but they seemed to hold up for this particular test.
The rear oil orifice can be seen in the first image as a small tube at the inner circumference of the frame. This tube is ~1/32" I.D. brass tubing from my local Ace Hardware.

IMG_20180415_165437.jpg

IMG_20180415_165447.jpg


The turbine nozzle and turbine shroud. There is a definite line on the shroud where the oil has sprayed out from the bearing. This was part of the plan, since I have no real way to recover oil at this small of a scale. There is a small amount of soot that can be seen on the shroud, most likely from oil burning.

IMG_20180415_165513.jpg

IMG_20180415_165519.jpg


That's all for now. I think I'll take about a week or so off from this project to think about the next steps and how to execute them correctly. As always, if there are any questions, feel free to ask, and I'll do my best to answer them.
 
Looks (and sounds) great!

Did you measure the RPM of the turbine?
It could be that the motor is just to slow to start the turbine.
You may use an aircompressor for the start.

Good luck!
Jetcrafter2000