Manic Micros

localfiend

I like 3D printers...
Mentor
Yeah, I thought about wire. Then figured, it'll be fine for this one test until I can get the motor angle set. Dumb mistake.

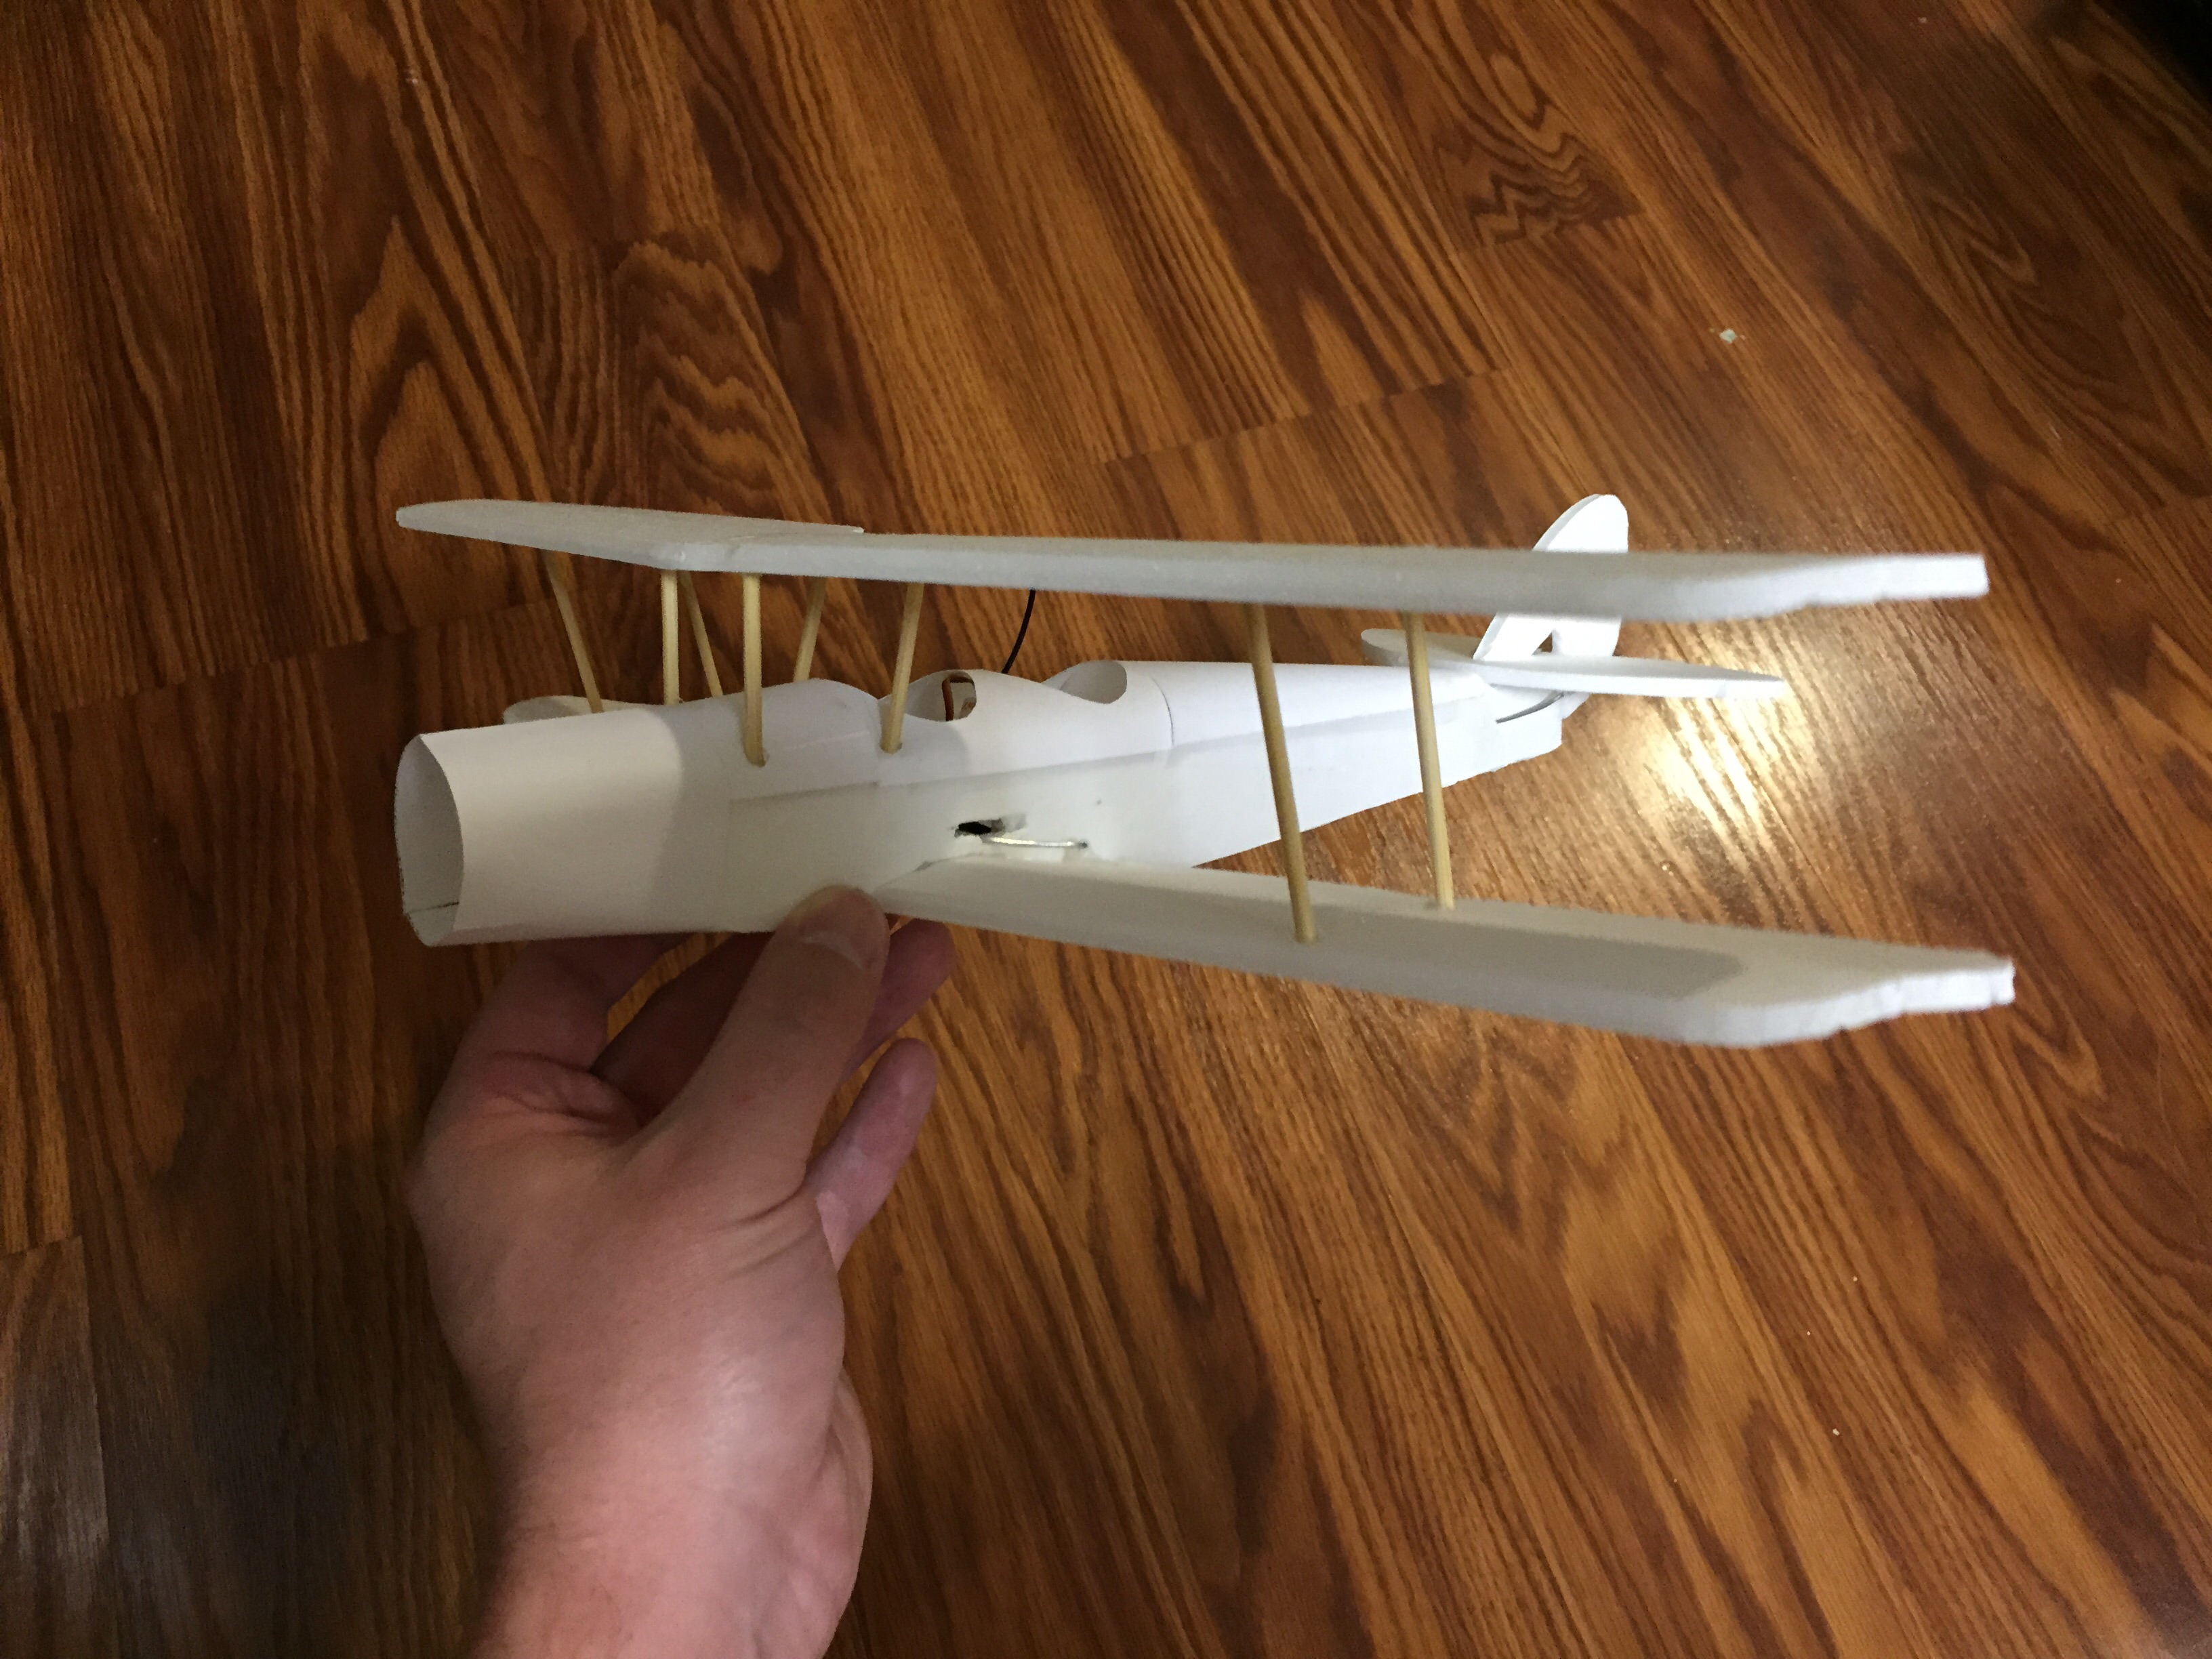
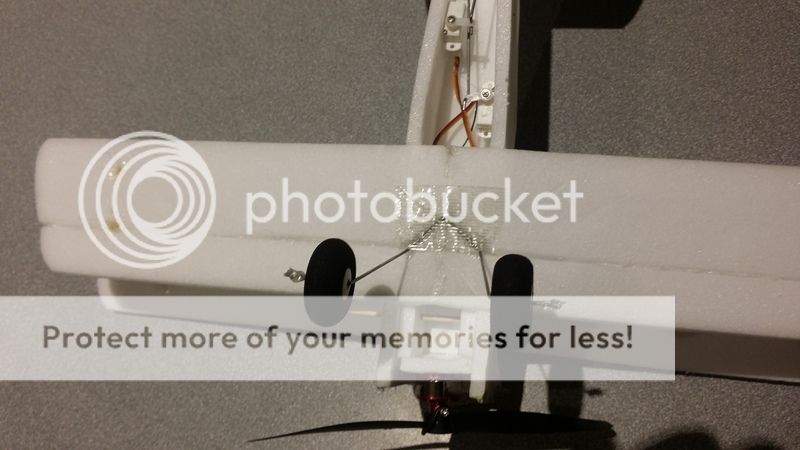
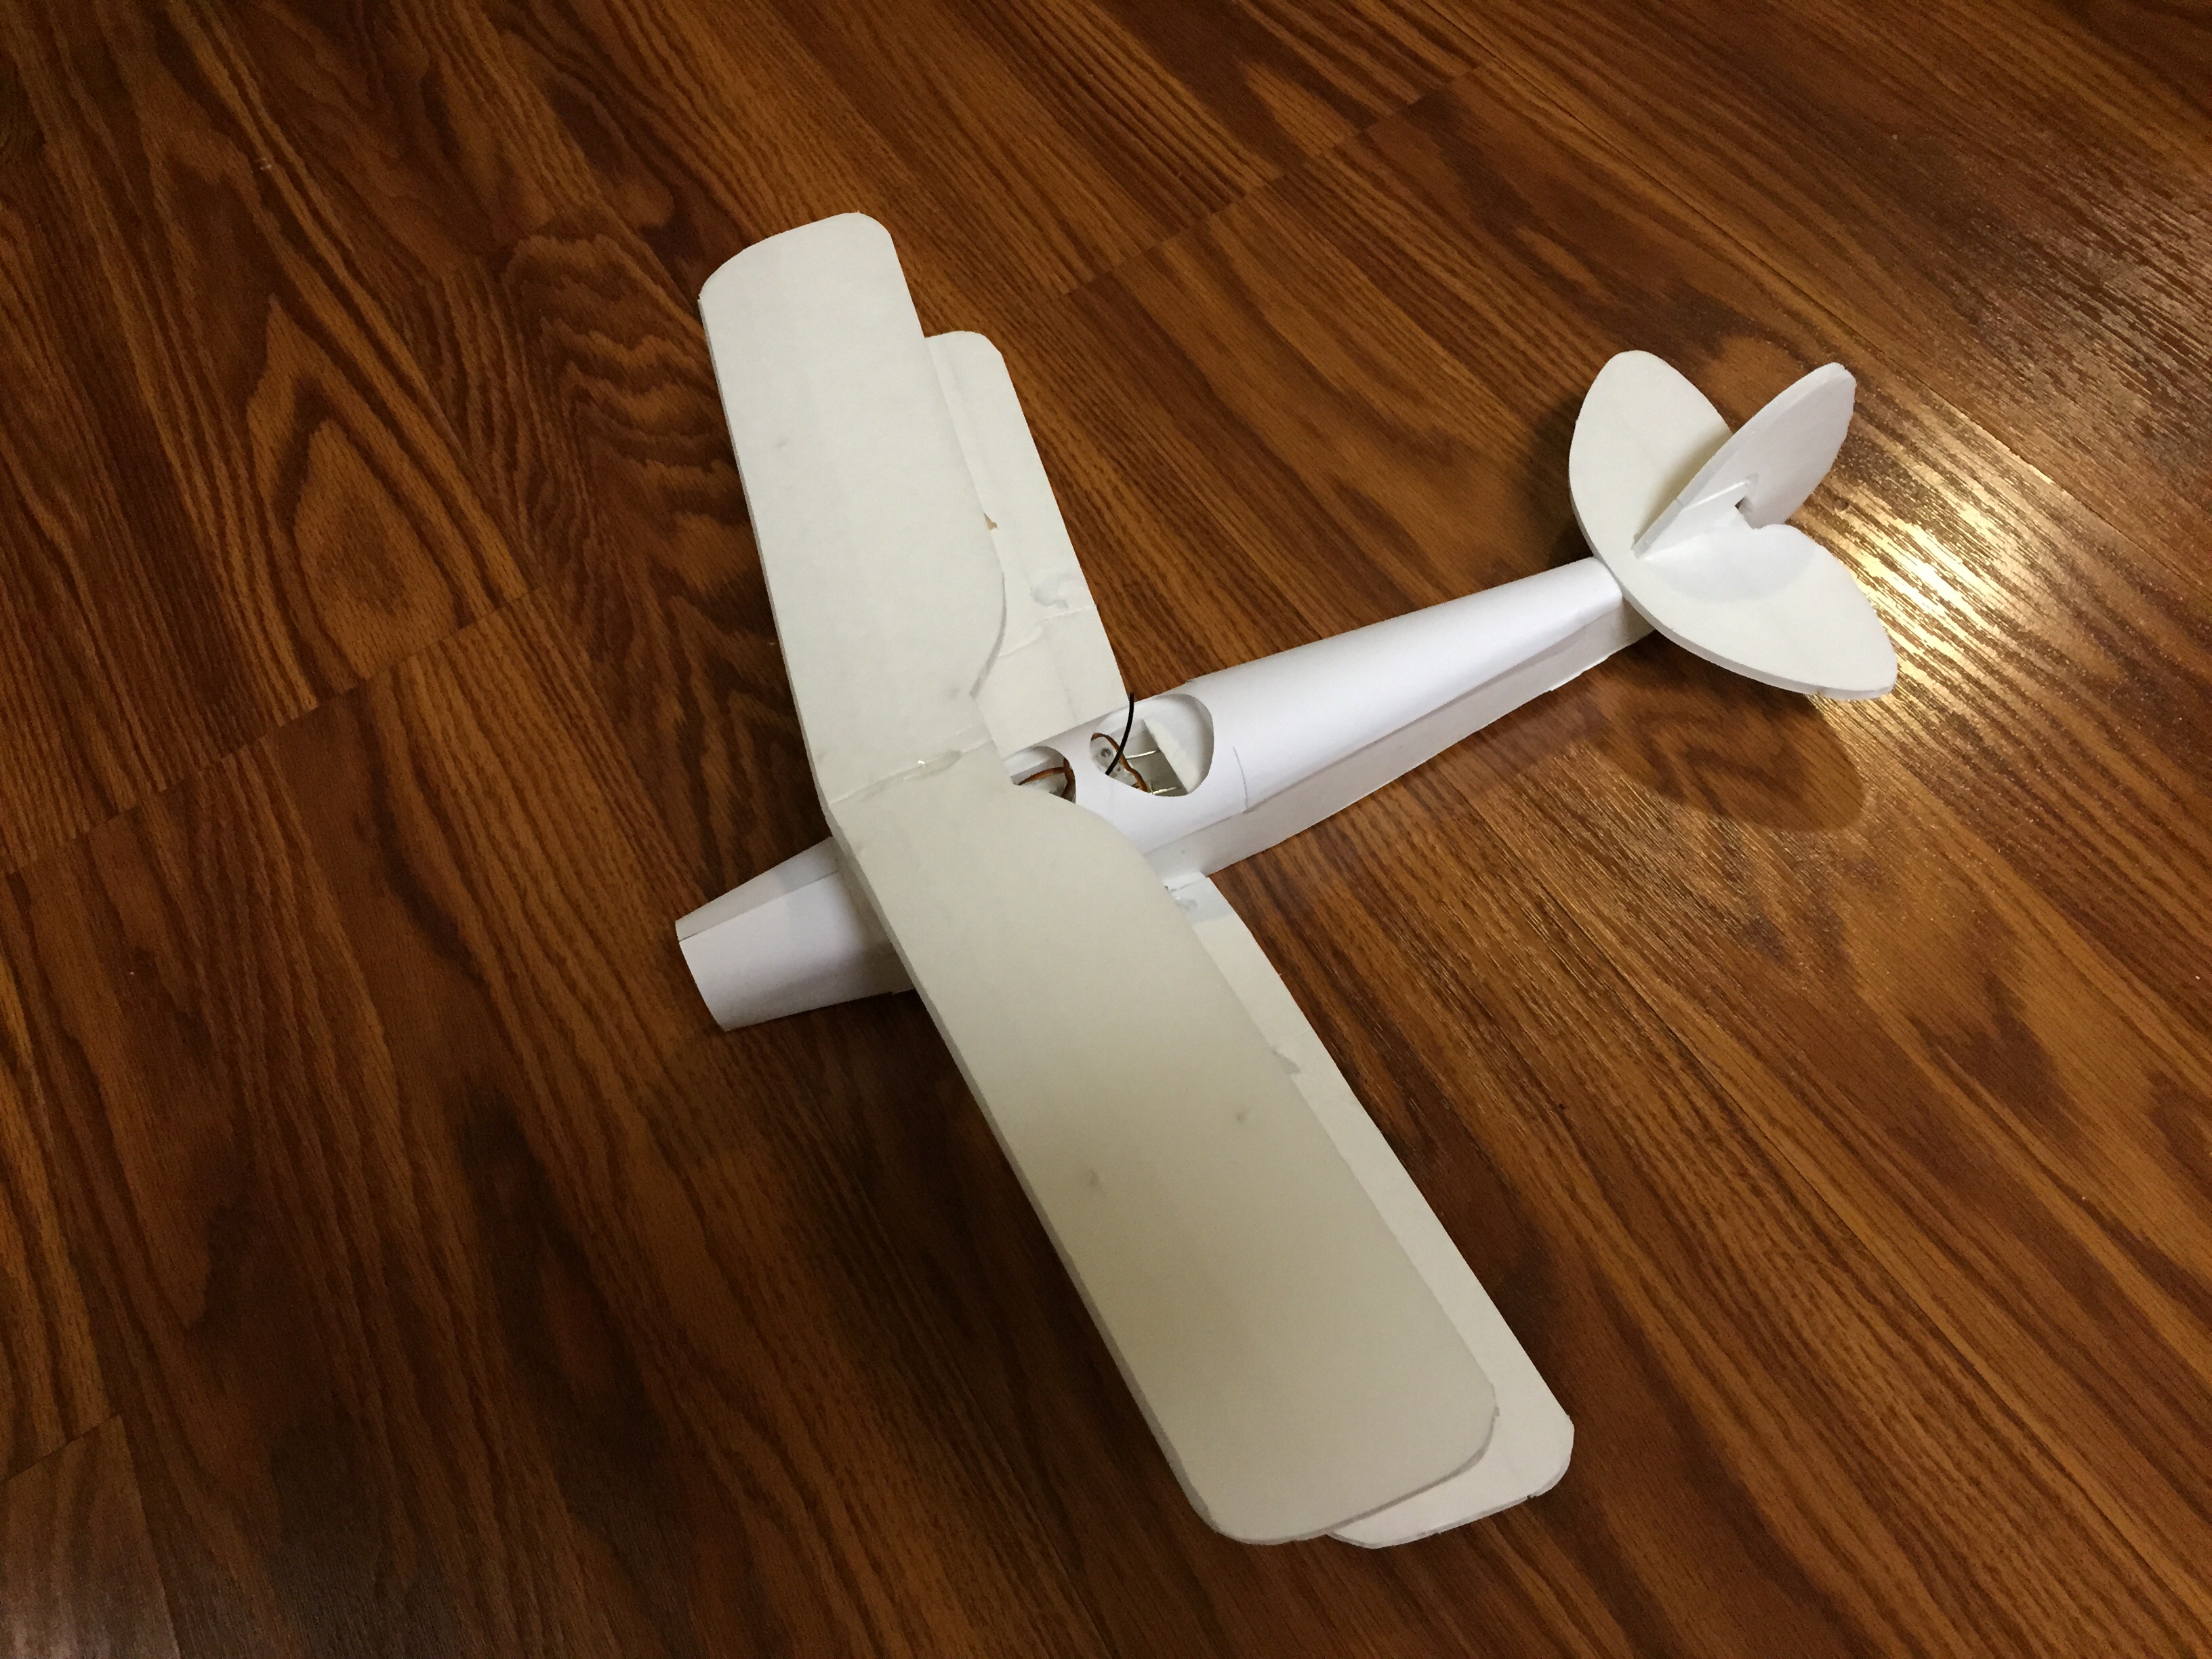
Got several new motors coming, and some other odds and ends. Copied the baby blender landing gear, just way scaled down. Used a piece of push rod wire.


A bit of hot glue, and then a piece of extreme packing tape to hold it all down. Didn't want to go adding any more weight from zip ties. We'll see what happens.


localfiend

I like 3D printers...
Mentor
Made some fuselage changes to be a little more accurate to the actual plane, as well as a tiny scale bump. Wingspan is now 13.5 instead of 13. Also changed the rudder and elevator setup a bit to try and make getting everything together easier.

Then I decided to download a free CAD program this evening to see if I could get some actual plans started.


Got most everything worked out now. Now I just need my electronics, so I can figure out if all the drawing effort was for nothing.

BTW, nerdnic, my power pod is exactly 1" wide and 1" high when assembled. I plan on scaling the whole plane up or down based on whatever you come up with so that things match.
 
Last edited:

mesolost

Junior Member
I as well have a micro flyer in the works. Not an original design, just took the RCPowers Extra300 and scaled it to 50%.(3D flyer) The bare airframe, not even control horns yet, is 27.7g and the currently planned power plant will have 38g max thrust so I think I'm gonna need to re-evaluate my electronics selection. Guess I'll peek at those tiny brushless motors and see about an upgrade.

what i HAD planned on using combined with an Rx that has 2 linear servos and the speed controler built in.
http://www.hobbyking.com/hobbyking/store/__10001__Micro_Power_system_w_Gearbox_GPS_7.html

The Rx comes in brushed and brushless configurations so a power plant re-think would have no major effect on the overall plan. Will also be adding on a 1.7g servo for the ailerons though. I hope I can get this thing built with an AUW of <60g although <50g would be nicer.

I had also planned on using a round LiPo cell from the HK site to power it. Stop this thought now if you think I should be using the standard 1S long LiPo.

I, too, need a small slow flyer for gymnasium flights during the winter so I hope we get more micro flyers being designed. ^_^
 

localfiend

I like 3D printers...
Mentor
Cool. I think we'll be getting a bunch of designs being made for this size. The time and money investment is so small it's not so intimidating. That's what pushed me into doing it. I've even got some large scale stuff off the back burner now that I'm set up for drawing up plans.
 

localfiend

I like 3D printers...
Mentor
Thought this video of repeated failures would be entertaining.

It's really windy outside, but I decided to try and fly anyway behind our tree line windbreak. This called for a lot of power, and a lot of maneuvering. I quickly discovered that this plane just isn't going to fly well with only a rudder. Hard maneuvering caused the plane to rotate too far to recover without ailerons. Once you're inverted, things get weird.

After coming to this conclusion, I decided I'd rather build a new model with my fuselage changes, as it will work better with ailerons. This meant the old one had to go, and there's only one good way to do that.


As you can see, the plane is also way overpowered. These tiny motors have a lot of punch. With ailerons and a lot less wind, it will probably do some pretty crazy aerobatics. Hovering with only a rudder, elevator, and a lot of power was kind of fun though, for 10 seconds at a time. :cool:

So, for the next build. New lighter fuselage, no paper at all, ailerons, carbon fiber control rods, and maybe some lighter 1s batteries. The 2s power and weight is just wasted on this plane.
 

Hell2Go

Member
localfriend, you could try using Styrofoam plates cut into squares and edge glued together with epoxy to make suitable material instead of dtfb for these really small planes. use clear packing tape or HK wingtape for the skin to give it rigidity and durability. put a little stretch in the tape as you apply it ( equal stretch on each side to prevent warping) as the tension will add even more rigidity. Its also a lot thinner for better airflow around wing and rudder edges.

If you really want to stick with the dtfb then I'd remove the paper on both sides, cut out your parts, lightly sand the edges down for a slightly sharper edge, then tape the foam parts while they are still flat. Then switch up from the hot glue to weldbond white glue. It gets lighter as it dries and retains some flexibility.
412HRU0xBmL.jpg

for rudder elevator only, I'd put a little more dihedral in the wings to improve the stability in flight.

just my $.02
 
Last edited:

localfiend

I like 3D printers...
Mentor
localfriend, you could try using Styrofoam plates cut into squares and edge glued together with epoxy to make suitable material instead of dtfb for these really small planes. use clear packing tape or HK wingtape for the skin to give it rigidity and durability. put a little stretch in the tape as you apply it ( equal stretch on each side to prevent warping) as the tension will add even more rigidity. Its also a lot thinner for better airflow around wing and rudder edges.

If you really want to stick with the dtfb then I'd remove the paper on both sides, cut out your parts, lightly sand the edges down for a slightly sharper edge, then tape the foam parts while they are still flat. Then switch up from the hot glue to weldbond white glue. It gets lighter as it dries and retains some flexibility.
View attachment 53440

for rudder elevator only, I'd put a little more dihedral in the wings to improve the stability in flight.

just my $.02

Thanks for the tips, I'll look into thin Styrofoam and that other glue. I'm open to other options so long as they retain flitetest's primary characteristics.

Here's what I'm after :

1.) Easy & Fast to build with minimal fuss
2.) Easy to repair
3.) Materials are common and cheap.

I know that dollor tree foamboard is not the best option for micros, but it's fast and some of the challenges are being overcome.

See this thread:

http://forum.flitetest.com/showthread.php?21299-Micro-Indoor-Flyers-Re-Purposed-Designs

I will eventually get back to the Camel. Right now I'm still messing with things and learning. I want to do it right, so it'l be after I have the Micro Spitfire up and running.

It sounds like you have experience with micros. Any opinions on firewall setups? I have been sewing the motors to gift card firewalls and sealing with CA. This works well but is very slow. Any ideas on faster build designs? A tiny bit more weight wouldn't be a deal killer.
 

mesolost

Junior Member
personally for mini firewalls I glue 2 or 3 pieces of gift card together (laminate) then use the leftover wood screws that come with the servos to attach the motor. The other thing I do is use a piece of a paint stir stick but if you do that you MUST drill pilot holes or the screws will just split a piece off the side. Just dont hot glue coat some foam and screw the motor to that. It don't work. Well it does but not very long. LOL
 

localfiend

I like 3D printers...
Mentor
personally for mini firewalls I glue 2 or 3 pieces of gift card together (laminate) then use the leftover wood screws that come with the servos to attach the motor. The other thing I do is use a piece of a paint stir stick but if you do that you MUST drill pilot holes or the screws will just split a piece off the side. Just dont hot glue coat some foam and screw the motor to that. It don't work. Well it does but not very long. LOL

That works great for the mini size motors, but these tiny micro ones all seem to have holes too small for screws. Even the extra screws that come in the package for 1.7 gram servos are all 2 sizes too big.
 

mesolost

Junior Member
only other thing i could think of then would be to trace the mount onto the paint stick piece and carve a slight recess into it then CA glue the mount into it but with a recess holding on to the mount you may be able to get away with hot glue so it can be more easily replaced. Since the motor is THAT small I don't see why hot glue wouldn't hold onto it somewhat decently
 

rockyboy

Skill Collector
Mentor
I've had good luck on one build using a piece of counter top laminate sample from the local hardware store as a firewall. Very stiff, pretty light weight, and free!
 

localfiend

I like 3D printers...
Mentor
only other thing i could think of then would be to trace the mount onto the paint stick piece and carve a slight recess into it then CA glue the mount into it but with a recess holding on to the mount you may be able to get away with hot glue so it can be more easily replaced. Since the motor is THAT small I don't see why hot glue wouldn't hold onto it somewhat decently

Recessing stuff gives me an idea. Perhaps a two layer firewall, one with a hole big enough in the middle to fit over the bell but not the feet. Then I can just sandwich the base and hold it together with CA and maybe a piece of tape for extra security. That will speed things up 10 fold.


I've had good luck on one build using a piece of counter top laminate sample from the local hardware store as a firewall. Very stiff, pretty light weight, and free!

Hah. Free stuff is awesome.
 

nerdnic

nerdnic.com
Mentor
Okay guys, have much delay I have decided on a new design for my first Manic Micro. Based on my testing of the Bucker and localfiend's findings, a bi is really the way to go with these little guys.

XylT4vM.png
 

localfiend

I like 3D printers...
Mentor
Cool.

How did the bucker behave? I'm curious how the performance on the flat wings were, and if they should be completely avoided or not.
 

nerdnic

nerdnic.com
Mentor
It actually had under camber. The wing loading was very high so in my glide tests I had to give it full power throws to get anything other than a stall out of it. I did some non powered flight and the surfaces were so small I couldn't really control the plane. It would just veer one direction and stall.
 

nerdnic

nerdnic.com
Mentor
The prototype is a little rough but I think we've got a winner. AUW is 65g with a 300mah 1s, so this thing will fly forever. Glide test went really well, these wings produce a lot of lift! It should be a very slow flyer!

Servos are serviceable and hidden from outside view.
Lx7OOSi.jpg


6Yx4xJ7.jpg


Didn't get my fuse supports deep enough so I lost some top wing dihedral.
cNXLDEb.jpg


Still need to add the windshields and the raised section over the mid top wing.
dof15MR.jpg


A little camera perception distortion here but you're looking at a beautiful 16" wingspan. Scale offset on the top wing too.
yrOa6n1.jpg
 

localfiend

I like 3D printers...
Mentor
Looking good. Are you going to be using a power pod of some sort? Any idea on pod size yet?
 

nerdnic

nerdnic.com
Mentor
Thanks! And yep, I'll share the dimensions once everything checks out. The Tiger Moth started as a 42% scale version of my nnMoth Minor. I then redesigned the tail feathers and wing(s) to match the scale Tiger Moth. If all goes well then I'll try other designs around 42% to see if that size works well. I will likely scale the other designs to fit this pod so that everything is interchangeable.