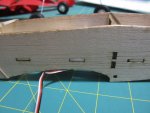
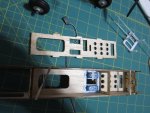
Willy Nillies "Eaglet 250" Beta Kit Build and Flight

Turbojoe

Elite member
Your method of servo movement makes the most sense but I prefer to complicate things as much as humanly possible so I spent a bunch of time 3D printing and trying different versions until I was finally happy (and mentally exhausted). I didn't cut up the original plate. I just cut new pieces to fit from a sheet of 3/32" balsa. Everything fits together well. I even added a tab to my plate to lock everything in place. It's all just held together with rubber bands in the pictures for now. I still need to add the steerable nose gear and then I can start gluing things together. I already tucked a print into the bag for my 2nd Eaglet. For now it's just going in the Skylark.

Joe
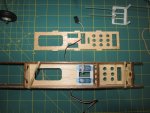

IMG_0009.JPG IMG_0006.JPG IMG_0004.JPG
 

TooJung2Die

Master member
I didn't cut up the original plate. I just cut new pieces to fit from a sheet of 3/32" balsa.
Very clean modification. It looks OEM :) That's the Skylark in the photos, right? The servos look snug. Is there enough length to the servo hole so the servo cable fits through? After gluing my wood servo mounts in I couldn't get the servos to come out because of the cable. I had to file a notch for the cable to fit through.
 

Turbojoe

Elite member
Very clean modification. It looks OEM :) That's the Skylark in the photos, right? The servos look snug. Is there enough length to the servo hole so the servo cable fits through? After gluing my wood servo mounts in I couldn't get the servos to come out because of the cable. I had to file a notch for the cable to fit through.

You're right. It is the Skylark I'm working on. When I use rails I do just like you did. A little notch in the middle and then slide 'em into position. I got lucky on the 3D servo plate. The servos fit really well and it's not a problem for the leads to go through. I could probably make the holes even tighter if i had too but they'll be fine. I can't seem to get any time to work on it anymore right now. I did get all 6 new Li-Po's from Willy Nilles charged up and Velcro added. Things are going to get in the way but I'm going to try hard to fly the Eaglet again tomorrow with some GOOD batteries this time. She balances much better now too and I was able to remove 1/4 ounce of lead.

Joe
 

Willy Nillies

Elite member
Just for what it is worth, if anything... The Eaglet 250 we just finished from a production kit and flew in the videos came out spot on cg with no extra weight needed to balance.

Sincerely,
Doug and Becky
WillyNillies.com
 

TooJung2Die

Master member
When you have a kit that goes together this easy you have time to make it more complicated than it has to be. :) I used wood filler on the tab slots to smooth out the sides of the fuselage. Here is the battery hatch. I'll make a latch from a servo arm to hold it closed.

IMG_1773.JPG


A good view of the battery hatch and the replacement piece I made for the front landing gear bottom sheet.

IMG_1775.JPG


You're supposed to glue the windshield permanently in place. I decided to make another hatch. This hatch is held tightly closed by magnets.

IMG_1776.JPG


The hatch was getting cracked just from handling it so I added longitudinal stringers to the top and bottom hatches.

IMG_1777.JPG


The fuselage and tail are getting sanded and almost ready to cover.

IMG_1778.JPG


All you have to do to make the tail feathers is pop them out and sand them. This is so easy half the time I feel like it's cheating.

IMG_1779.JPG


The fuselage and tail are lighter than I expected, just a little over one ounce as pictured above. (y)

Jon
 
Last edited:

Willy Nillies

Elite member
Looks great Jon! Glad you are having fun.

For what it's worth, we intentionally make bulkhead tabs slightly less than fuselage side thickness. We don't use any filler and lay covering over and shrink. It's looks just fine this way in our opinion.

In regards to the dorsal fin.... we do not add any balsa to the fuselage to glue it to, we simply glue it to the fuselage covering. It works well on such a lightly loaded airframe. Also the rudder pushrod we just poke a hole in the covering were it exits the fuselage. Both of these work well and have proven airworthy over many many flights.

All in an effort to keep things as simple and easy as possible.

Sincerely,
Doug and Becky
WillyNillies.com
 

Turbojoe

Elite member
When you have a kit that goes together this easy you have time to make it more complicated than it has to be. :) I used wood filler on the tab slots to smooth out the sides of the fuselage. Here is the battery hatch. I'll make a latch from a servo arm to hold it closed.

View attachment 156117

A good view of the replacement piece I made for the front landing gear bottom sheet.

View attachment 156118

You're supposed to glue the windshield permanently in place. I decided to make another hatch. This hatch is held tightly closed by magnets.

View attachment 156119

The hatch was getting cracked just from handling it so I added longitudinal stringers to the top and bottom hatches.

View attachment 156120

The fuselage and tail are sanded and ready to cover.

View attachment 156121

All you have to do to make the tail feathers is pop them out and sand them. This is so easy half the time I feel like it's cheating.

View attachment 156122

The fuselage and tail are lighter than I expected, just a little over one ounce as pictured above. (y)

Jon

You're almost done. Looking good! I used magnets on the windshield and bottom hatches on my Eaglet 250 but like you are planning for your bottom hatch I may forgo any magnets and use servo arm type hatch latches on my Jr.Skylark 250. As usual I'll 3D print and over complicate them though......

Joe
 

rockyboy

Skill Collector
Mentor
I love finding another awesome build to follow here! :D

It'll be a couple weeks (at least) till I can start my Eaglet, but with all these pictures to follow I'm sure it's going to snap together without any problems. :D
 

TooJung2Die

Master member
All in an effort to keep things as simple and easy as possible.
We like easy. Easy is Good. I won't add any unnecessary balsa to the tail. I'll probably sand it to make it thinner. In my opinion most balsa airplanes are over-engineered and overweight anyway. Maybe because they're designed to survive the rigors and vibrations of internal combustion engines. Even most rubber powered free flight designs will benefit from going on a balsa diet when converting them to electric RC.
 
Looks great Jon! Glad you are having fun.

For what it's worth, we intentionally make bulkhead tabs slightly less than fuselage side thickness. We don't use any filler and lay covering over and shrink. It's looks just fine this way in our opinion.

In regards to the dorsal fin.... we do not add any balsa to the fuselage to glue it to, we simply glue it to the fuselage covering. It works well on such a lightly loaded airframe. Also the rudder pushrod we just poke a hole in the covering were it exits the fuselage. Both of these work well and have proven airworthy over many many flights.

All in an effort to keep things as simple and easy as possible.

Sincerely,
Doug and Becky
WillyNillies.com
I showed in my build thread that I had some left over pushrod guide tubing from another project. I used that to guide the rudder pushrod from the top of the fuselage to the guide hole in the forward former. This way, I have a small hole that is cut flush with the fuse and I can install the pushrod after covering. I think it works out really well, it even lines up the pushrod perfectly, and only needed one simple part. If I was willing to z-bend the pushrod and cutaway into the rear former, the exit could be pushed further back. I think something like that could be included in future kits. The only other wish I have is the steerable nose gear.

20200126_123634.jpg
 

Willy Nillies

Elite member
Looks good! Just be very mindfull of adding anything extra aft of cg.

Steerable nose gear is in the works. Joe's design works very well if you are in a hurry.

Sincerely,
Doug and Becky
WillyNillies.com
 

Turbojoe

Elite member
I showed in my build thread that I had some left over pushrod guide tubing from another project. I used that to guide the rudder pushrod from the top of the fuselage to the guide hole in the forward former. This way, I have a small hole that is cut flush with the fuse and I can install the pushrod after covering. I think it works out really well, it even lines up the pushrod perfectly, and only needed one simple part. If I was willing to z-bend the pushrod and cutaway into the rear former, the exit could be pushed further back. I think something like that could be included in future kits. The only other wish I have is the steerable nose gear.

View attachment 156134

As minimal as it may seem the Gold -N-Rod is pretty heavy to be used in the tail section of this bird. I used the super light thin clear tube from the Dubro Micro push rod system LINK and just that little bit extra could have been part of my CG issues. Just be prepared to compensate with weight in the nose.

Joe
 

TooJung2Die

Master member
I like to use thin tubing and thin push rod wire for tail control surfaces too. This time I'm sticking to the plan and using the wire that came with the Eaglet kit. This is how the push rods are run at the tail. I'll cut a small thin slot in the covering with a hot blade for the rudder wire. It won't be noticeable.

IMG_1782.JPG


Thumbs up (y) for the position of the push rod holes in the bulkheads. First time I didn't have to make them myself and they're positioned perfectly.

Jon
 

Willy Nillies

Elite member
Looks great! We notice you've done a nice sanding job also with rounded corners and all. Alot of people don't realize what a difference it makes when putting the covering on. PLUS you reduce the weight of the airframe with every stroke.

Sincerely,
Doug and Becky
WillyNillies.com
 

TooJung2Die

Master member
I spend more time on sanding than any other stage of construction except maybe covering. It'll be rounder than that when I'm done. The tail surfaces will be thinner and tapered. The more time you spend preparing the surface the better the covering goes on.
 
Last edited:

TooJung2Die

Master member
The wing! My favorite part to build. :cool: I'm holding one side of the wing. All the parts are dry fit, no glue. I've never been able to do that with a wing before. It's remarkable how well these parts have been cut.

IMG_1784.JPG


This could be a gotcha for someone. The trailing edge does not lay flat. It is angled to match the top of the ribs.

IMG_1785.JPG


Maybe you don't have to do this but I pinned down the wing before gluing with CA to ensure it is perfectly flat. The center ribs don't get installed until you join the two wing halves and set the dihedral.

IMG_1786.JPG


Joining the wing halves is the only step up to this point where there is a bit of fiddly sanding and fitting. Take your time if you don't want any gaps. I'm using the medium angle plywood dihedral braces and setting the dihedral to the angle of the brace by eye.

IMG_1788.JPG


One wing propped up 5/8" looked like a good angle for the medium dihedral brace.

IMG_1787.JPG


I have never framed out a wing this fast! This kit is amazing. Still have shear webs, center sheeting, and tips.

IMG_1789.JPG


This wing is going to be strong and light.

IMG_1790.JPG


I need to slow down. This is coming together too fast. My next balsa airplane will have to be hand-cut parts. :)

Jon
 
Last edited:

TooJung2Die

Master member
Question: Is there shear webbing under the center sheeting? I had to stop to scratch my head because one shear web piece is shorter than all the rest.

IMG_1791.JPG


I have two shear webs left. One is short like in the photo above and the second is the same as all the rest. Is the short one a mistake? Maybe I don't need the last two webs?

IMG_1792.JPG


Jon
 
Last edited:
As minimal as it may seem the Gold -N-Rod is pretty heavy to be used in the tail section of this bird. I used the super light thin clear tube from the Dubro Micro push rod system LINK and just that little bit extra could have been part of my CG issues. Just be prepared to compensate with weight in the nose.

Joe
Oh, it's not a Gold-N-Rod, it's just a hollow sheath. I weighed it, it's 0.1 grams an inch so that section there is probably 0.5 grams. But looking at your zbend, that's a better job as it moves the exit hole farther back.

Question: Is there shear webbing under the center sheeting? I had to stop because one shear web piece is shorter than all the rest.

View attachment 156298

I have two shear webs left. One is short like in the photo and the second is the same as all the rest. Is the short one a mistake? Maybe I don't need the last two webs?

Jon

I had the same problem. I think that there should be two short ones so that you can run the top sheeting up to the spar. I didn't notice when I glued them in so I have the normal sized ones in the center and this made me shift the top sheets a little forward and fill the gap. Its obvious from how much I had to sand back the top sheets that they were meant to go flush with the spar.

I forgot to pin down the wing when I glued mine up and I ended up with a slight warp in one half. It doesn't jig up as solidly as the fuselage.
 
Last edited:

Willy Nillies

Elite member
Center webs are not needed. But we include them for those that insist on it. They must be sanded/cut down to fit between the spars so that they do not interfere with the center sheeting. The center sheeting is where the wing gets it's strength in the middle from.

Not sure why you got one shorter one? They should have all been the same. I just checked the cut file and some sheets that are cut and ready to be put in kits and none of them are short.... hmmmm....????

Sincerely,
Doug and Becky
WillyNillies.com